Watching for a Better Notification System

Notifications

One of the things on my iOS 12 wish list last year (that is also on my iOS 13 wish list) was opt-in Apple Watch notifications instead of opt-out. I’m an Apple Watch wearer who only wants taps on my wrist from things I need to act on immediately or soon (for example when I’m on the bus: a notification that my stop is coming up and I need to get off), so only a select few apps are allowed to send notifications. Too many things tapping my wrist gets annoying quickly.

The current system of allowing Apple Watch notifications, though, is not geared toward making this easy. I allow plenty of apps to send notifications on iPhone, and currently that means I also automatically get notifications on my Apple Watch. Nine times out of ten (maybe even 9.5), I don’t also want those notifications on my Apple Watch, so I have to go back to my home screen, find the Apple Watch app, scroll to and select Notifications, scroll scroll scroll to find that app, and toggle the switch off.

For users like me, Apple Watch notifications being opt-out is cumbersome and requires more management than it should.

But what if Apple Watch notifications were instead opt-in? Meaning: by default, apps would not also send notifications on Apple Watch, but if users wanted them to (in my case those one-out-of-ten times), we could allow them to.

How might opt-in Apple Watch notifications work?

One way to accomplish this is in Apple Watch app > Notifications having a switch to set whether or not Apple Watch automatically shows notifications for new apps. To maintain current functionality, it could even be toggled on by default.

Notifications Settings

I could toggle this off, and new apps I downloaded (or redownloaded) and allowed to send notifications would no longer automatically send them on Apple Watch in addition to iPhone—they would only be sending notifications on iPhone. For any apps I wanted to also send Apple Watch notifications, I could manually turn on notifications in the settings below the switch.

But I think a better way to handle this is in the modal when an app is requesting permission to send notifications. Currently, this modal has two options: Don’t Allow and Allow.

NotificationsModal_Current

What if it had a third option if there’s an Apple Watch paired to the iPhone?

NotificationsModal_Update

The phrasing could be improved of course since the label is rather long (or the button made taller to fit two lines of text), but the idea holds: this gives better, more immediate control over if and where I want to see notifications for this app. If I only want notifications on iPhone, there’s an option for that. If I want notifications on iPhone and Apple Watch, there’s an option for that too.

Compared to the current workflow, when I don’t want notifications on my Apple Watch too, this doesn’t require the extra several steps of navigating to and in the Apple Watch app to manually turn off notifications for the app (or manually turning them on if there were an auto switch like in the first example and I did want notifications). I can set where I want to see notifications right then and there.

As someone who only likes a few apps tapping my wrist with Apple Watch notifications and thus must more actively manage what apps can send them, the current opt-out notifications system feels more geared toward users who like all the apps sending all the notifications. An opt-in system, though, could work for both those users and users like me.

iOS 12 didn’t change the notifications workflow, so I’ll be watching to see if a change is on tap for iOS 13.

Not Mailing It In

Mail

A few months ago, I switched back to the default iOS Mail app (as seen on my home screen) after using third-party email apps for a while. I’m not an email power user (I don’t snooze my emails for example), so Mail is good enough for me.

There are a few things, though, that would make Mail more useful for email users of all levels and would help Mail better fit in the modern iOS ecosystem. Here are four easy things and one more advanced thing.

1.) Safari View Controller

When I tap a web link in an email, instead of Mail kicking over to Safari, the link should open right inside Mail using Safari View Controller. Perhaps this could be an option in Settings that is turned off by default so less tech-savvy users don’t have to know about it, don’t have to use it, and don’t have to be confused how to get back to their mail when they open a link in Safari View Controller.

Safari View Controller

2.) Returning to the inbox after acting on a message

Currently, when I’m viewing an email and I delete it or file it away to an archival folder, I’m shown the next or previous email from my inbox. I don’t necessarily want to act on it or mark it read (and then have to immediately mark it unread), so I would like an option to go back to my inbox after acting on a message. Perhaps this could be an option in Settings too.

Actions

3.) Account avatars

To help in quickly browsing an inbox, Mail should show avatars for each email in the list like each contact has in Messages. The avatar would be useful to visually process who the email is from.

Avatars

Currently when viewing an email, an avatar appears in the header information along with the from and to details. This avatar should be in the list view as well.

Message avatar

Additionally, while senders who are saved in Contacts use the image I have set for them, senders not in Contacts should use the domain’s favicon (if the email is from a company) or even the sender’s Gravatar instead of the sender’s initials as it works now (unless neither are available).

4.) Share sheet

For whatever reason, email messages can’t be acted on with the share sheet. I can share websites from Safari, notes from Notes, and locations from Maps, but why not emails from Mail?

Share

Not that I want to send my email to someone through the share sheet, but I might want to share it to another app. For example, if someone sends me a link to an article or video, I may want to send it to Pocket to view later. Currently, I have to tap the link, get kicked over to Safari, save the thing to Pocket with the share sheet, close the Safari page or tab, and go back to Mail. A Safari View Controller would save a few steps here, but being able to use the share sheet right in the email would save even more.

5.) Rules / smart inbox?

This one I realize could be considered more of a power-user feature, but I feel even casual email users could benefit from this too. While avatars for each email in the inbox list would be a small change to aid in triaging email, a smart inbox would be a big change. This could be something as simple as having the ability to set up rules which would work like they do in desktop email clients: if an incoming email matches a rule or set of rules (for example if it’s from a particular sender), it gets filtered to a particular folder.

But perhaps this could also be something more advanced like what Spark does: emails are grouped into predefined categories so more important emails are together at the top, and less important ones are together at the bottom.

SmartInbox

Mail already allows setting up VIPs, so perhaps one of the categories is VIP emails, another is other non-newsletter emails, and another is newsletter emails. There’s already some newsletter detection happening since Mail offers a link to unsubscribe, so at the very least why not group all the newsletter emails together so they don’t have the same weight as emails from friends and family. And if friends and family have their own MailChimp newsletters they’re sending me (or the automatic grouping missed something), there should be a way to mark the email as a particular type so it gets grouped correctly in the future.

A full modernization of Mail should also include the ability to snooze emails, create and save smart searches, and set email to send at a later date, but these five things would be a good start to making Mail more useful for both casual and more advanced users.

Mail feels like it’s good enough for many iOS users—me included—but that doesn’t mean it can’t be better. I hope a new version of iOS brings some updates to Mail so parts of the app don’t feel so, well, mailed in.

Gesturing for User-Friendliness

With my iPhone X in my hand, I’m checking the weather for my current location in Partly Sunny, and I want to see my full locations list. What do I do? I swipe from the left edge of the screen to go back. I’m done checking the weather, and I want to go to my home screen. What do I do? I swipe up from the bottom.

I open Photos, swipe through my Camera Roll, favorite some photos, and now I want to go to the Favorites album. What do I do? I swipe down on the current photo to get back to the Camera Roll, I swipe from the left edge to go back, and now I can tap on the Favorites album. With all that navigating, I didn’t press any buttons. I only used gestures.

Gestures are an increasingly important part of iOS. Whether they’re a simple tap to dismiss, a swipe to go back, or a pinch to close, gestures not only offer shortcuts, they offer increased usability.

There is one particular place in iOS that hasn’t been given some gesture love but dearly needs some: modal form sheets. No doubt you’ve seen and interacted with form sheets in iOS before. On iPhone, they slide up from the bottom of the screen and fully cover the other view you were interacting with. On iPad, they slide up from the bottom and occupy a portion of the width and height of the screen. The area of the other view not covered by the form sheet is dimmed underneath.

App Store Apple ID

By default, when modal form sheets are displayed, there is one way to dismiss them: the Done button in the top-left or top-right corner. This can make dismissing form sheets user-unfriendly. On iPads, this button occupies a tiny portion of the screen—meaning there’s just a tiny portion of the screen that can dismiss the modal. And on taller iPhones, reaching for the Done button can be challenging. How can dismissing form sheets be made easier? Gestures!

Before we get to that, let’s define a few things. First, what’s a modal? In its basic definition, a modal is a view that covers up another view and prevents interaction with that other view (the parent view) until an action occurs on the modal view. What are some examples of modal views?

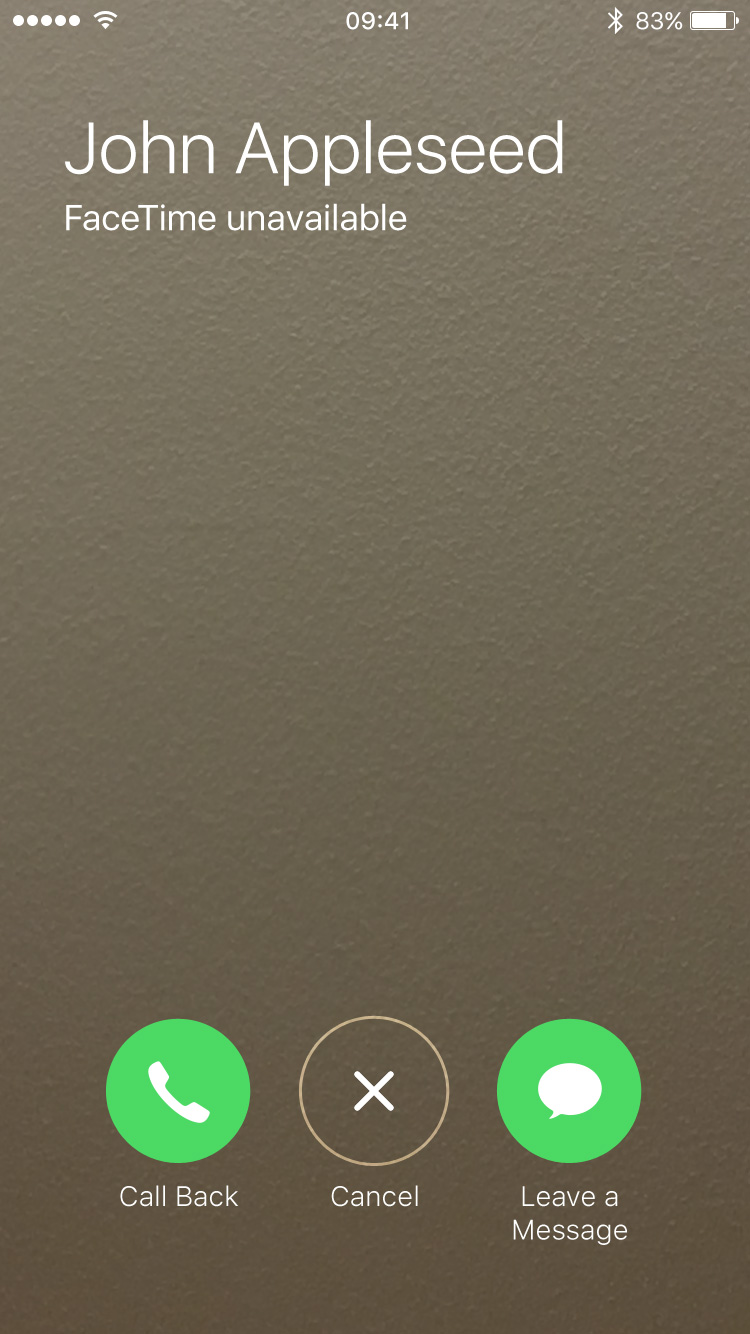
In iOS, there are a variety of modal views. There are alerts (centered on the screen with usually a message and one more more buttons), action sheets (anchored to the bottom of the screen and usually show two or more choices to act on something), and activity sheets (commonly know as “share sheets” to copy, send, or share content).

Modals

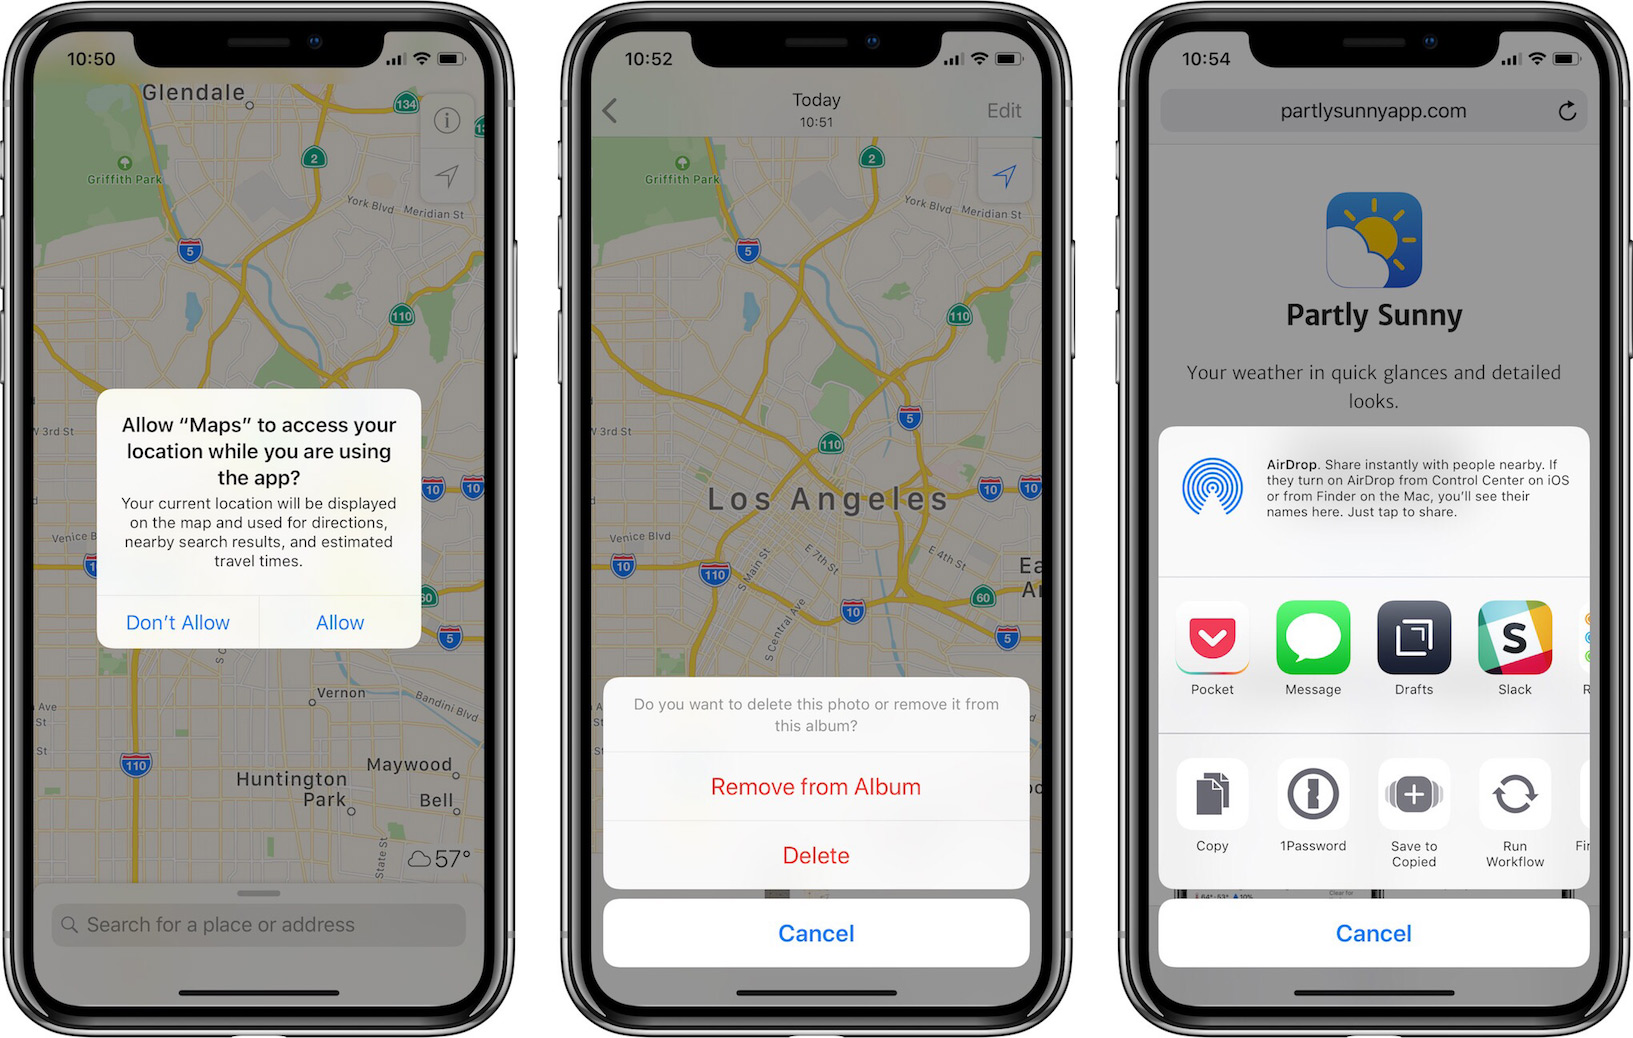
These types of modal views are defined by iOS. One more type of modal view is defined by developers. When showing (called “presenting” in iOS parlance) a custom view—say a settings view with options and submenus—developers can choose to present the view modally. By default, the view will slide up from the bottom of the screen and cover the view the user was interacting with.

When presenting a view modally, developers can choose a few styles for the modal view. From the iOS Human Interface Guidelines, the styles are “full screen”, “page sheet”, and “form sheet”. On smaller screens, page sheets and form sheets cover the whole screen, but on larger screens, they cover a portion of the screen. The portion of the parent view not covered is dimmed underneath.

ModalPresentations

I’m going to focus specifically on form sheets though the improvements I discuss would also apply to page sheets and mostly to full screen modal views too.

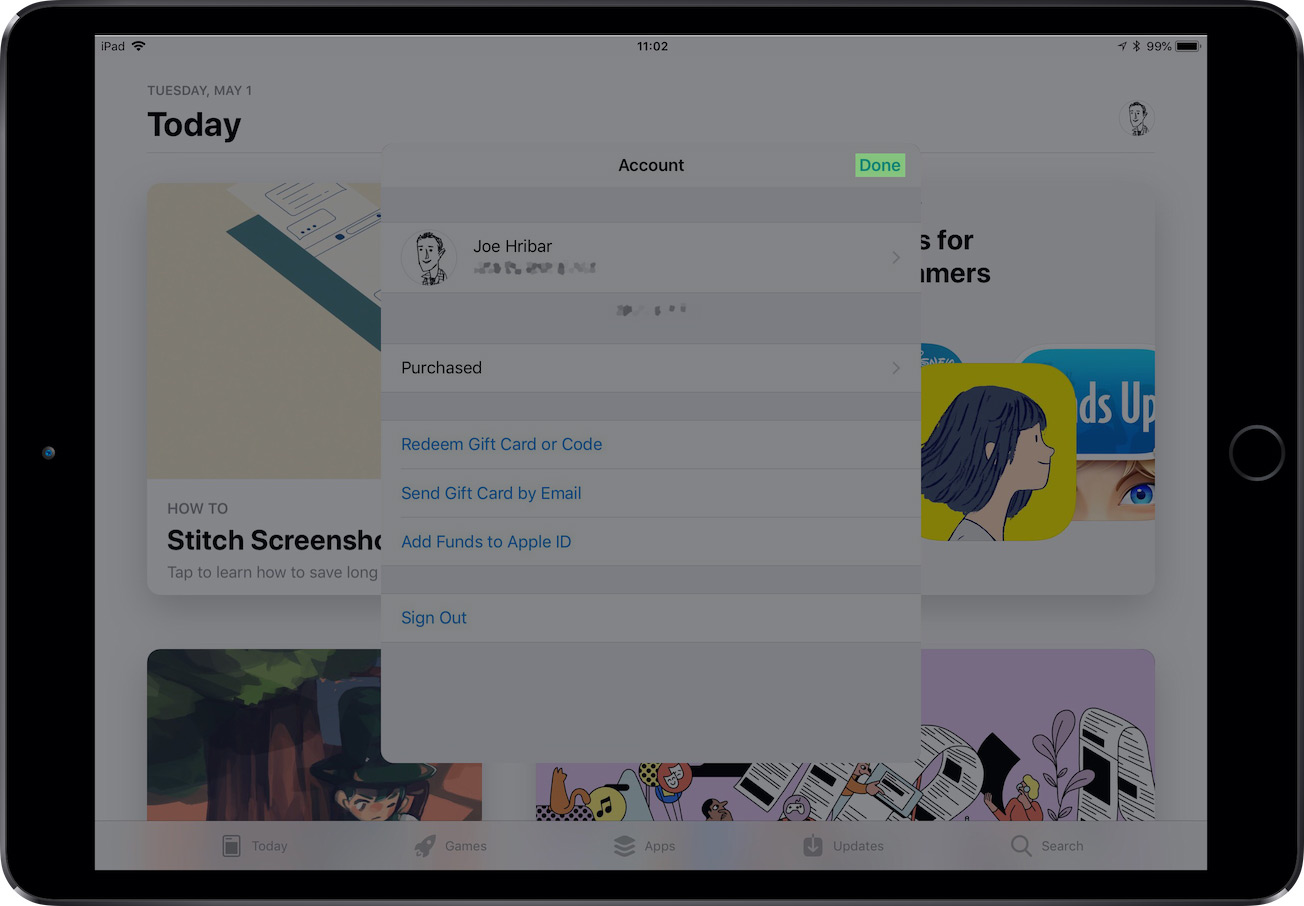
What are some examples of form sheets? In App Store, viewing your Apple ID account presents a form sheet.

App Store Apple ID

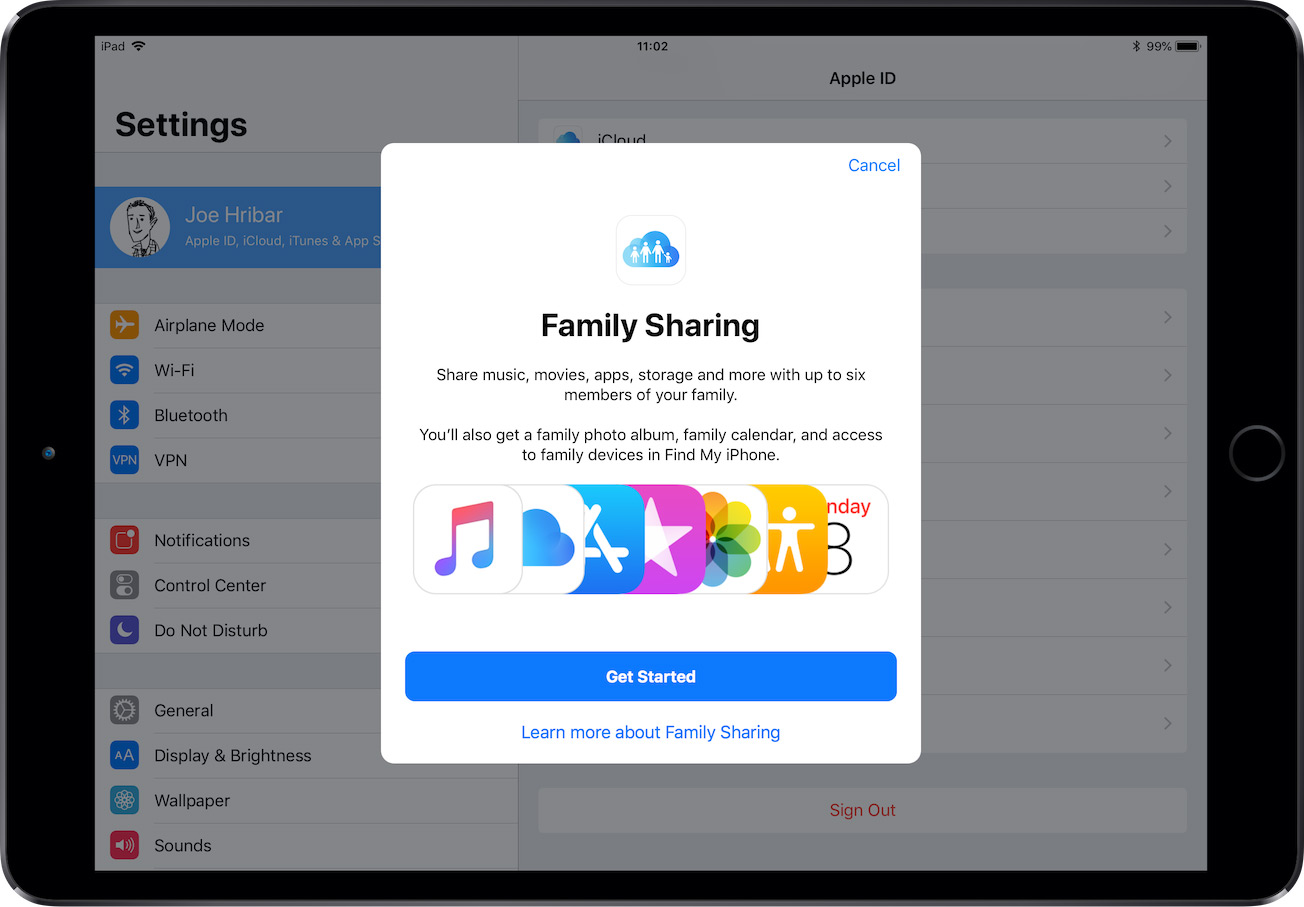
In Settings > Apple ID, tapping “Set Up Family Sharing” presents a form sheet.

Family Sharing

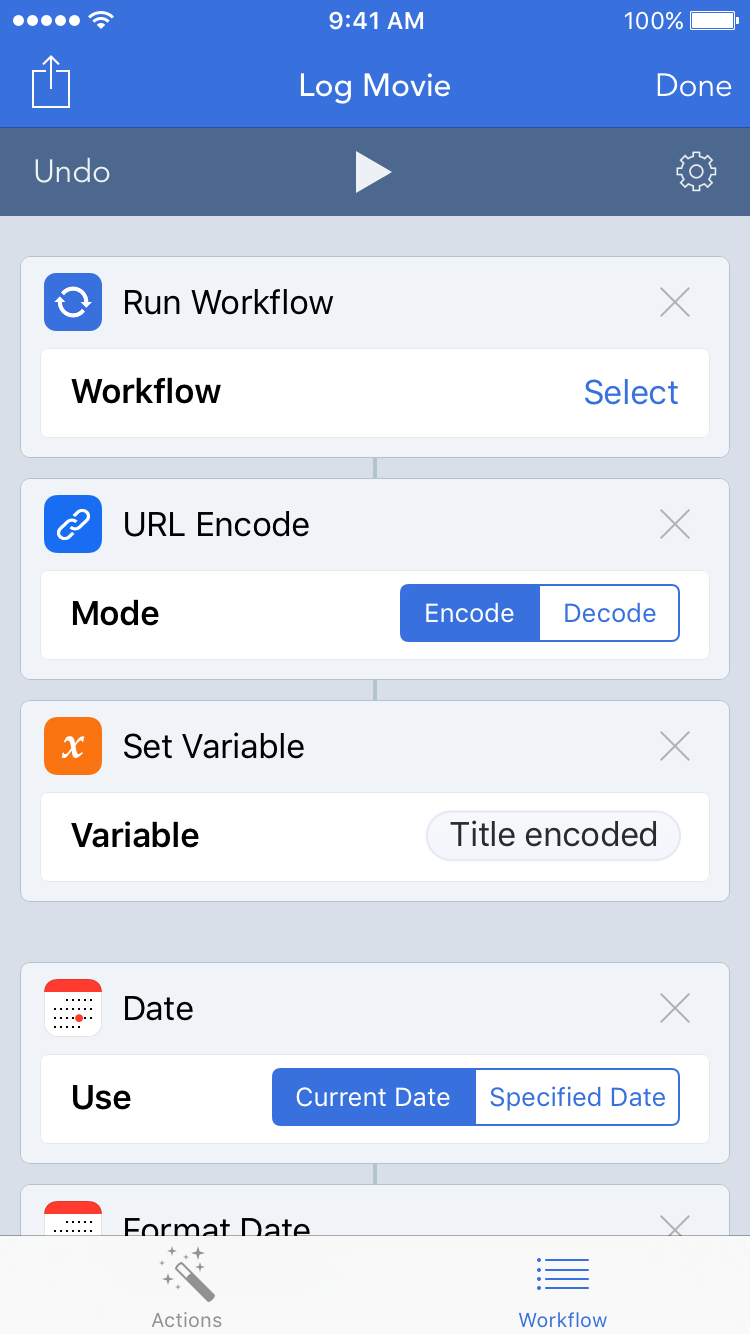
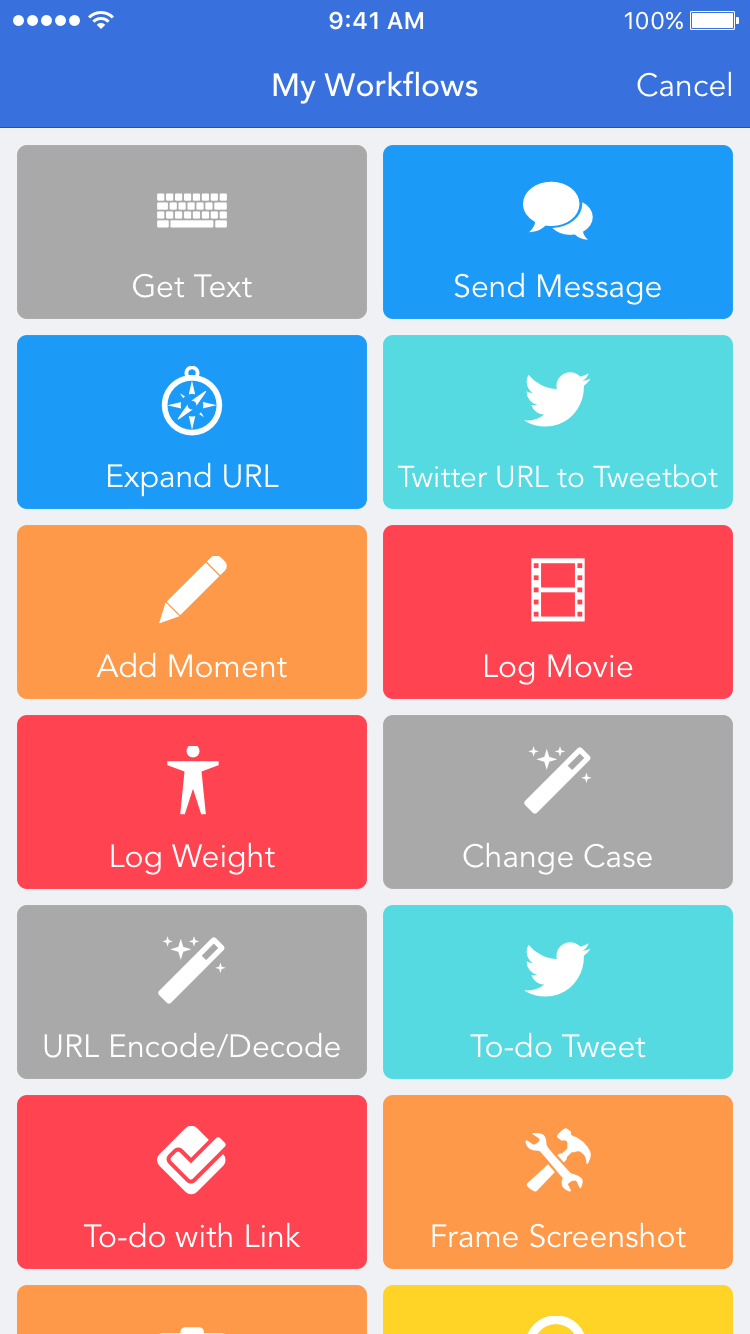
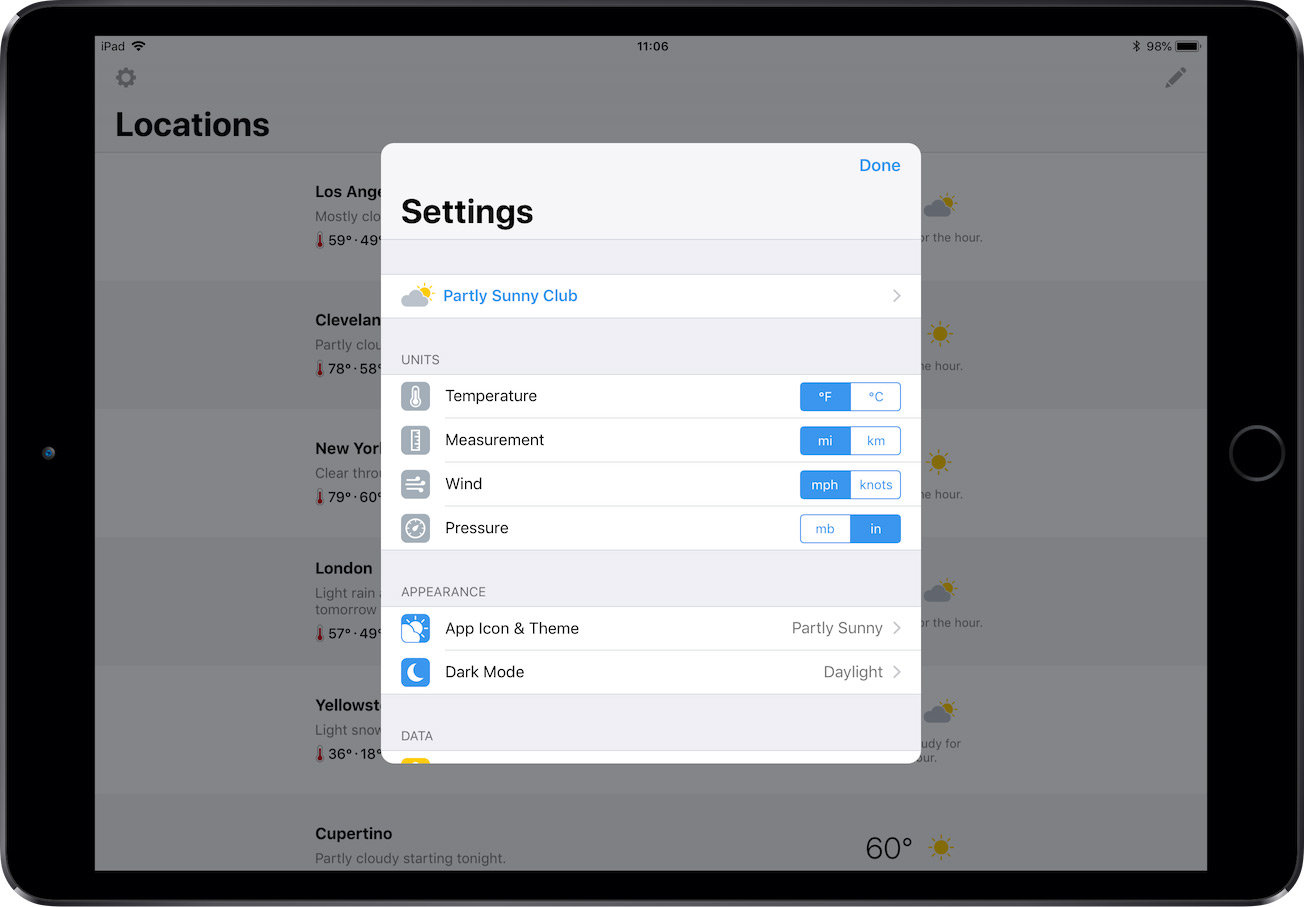
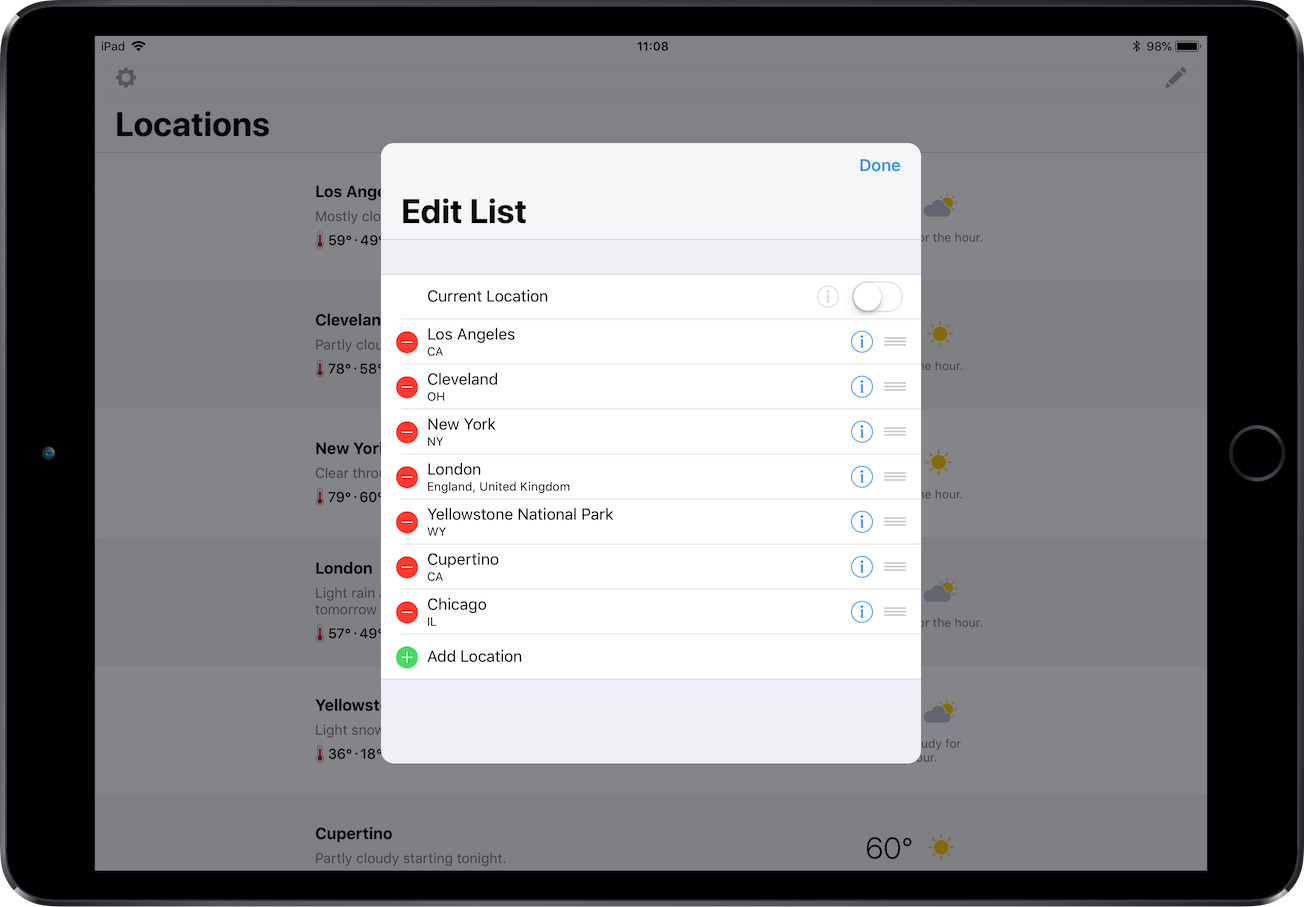
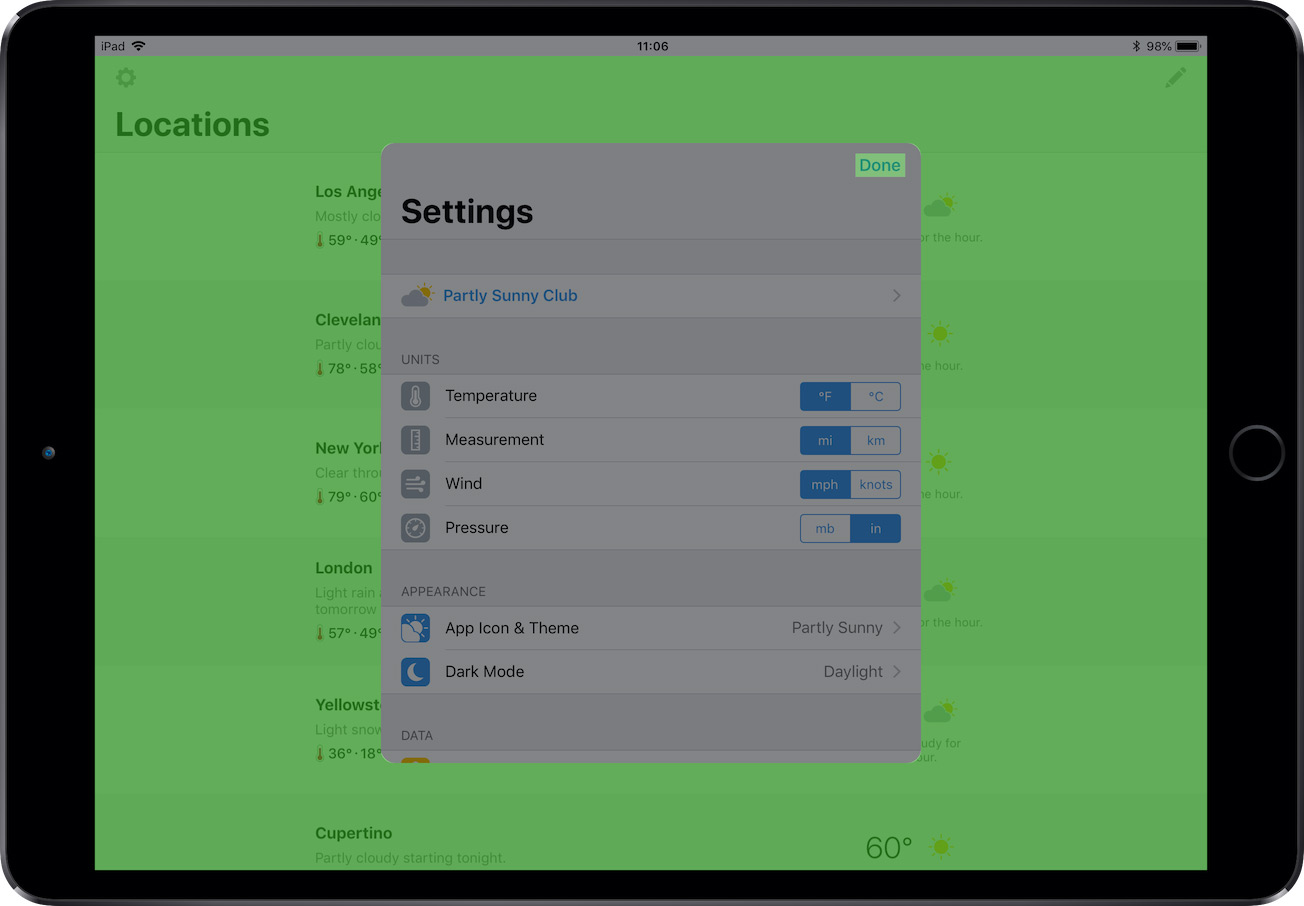
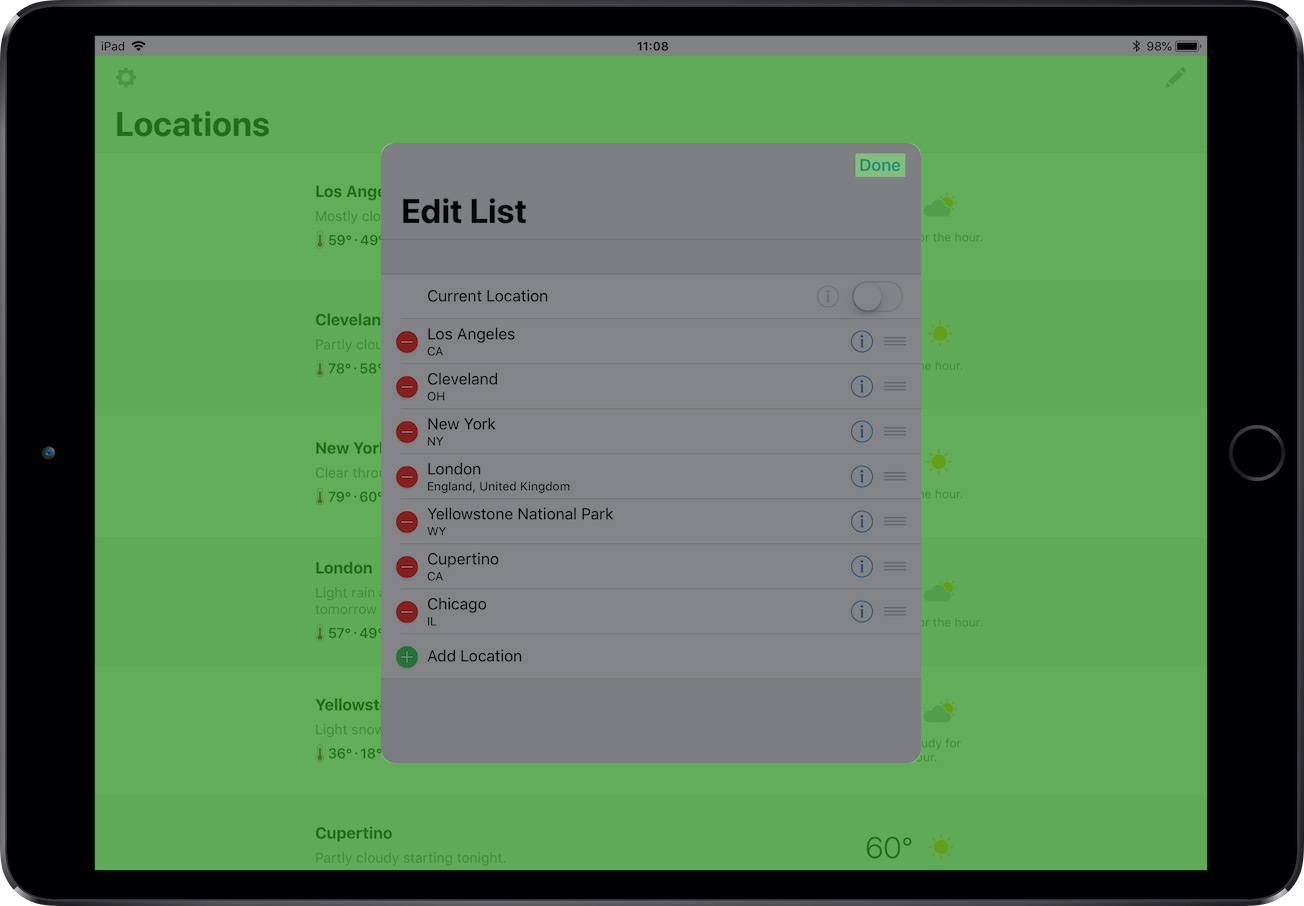
And in Partly Sunny, viewing settings, editing the locations list, and viewing radar all present a form sheet.

Partly Sunny settings

Partly Sunny edit list

Partly Sunny radar

So how can dismissing form sheets be made easier with gestures? Here are two ways.

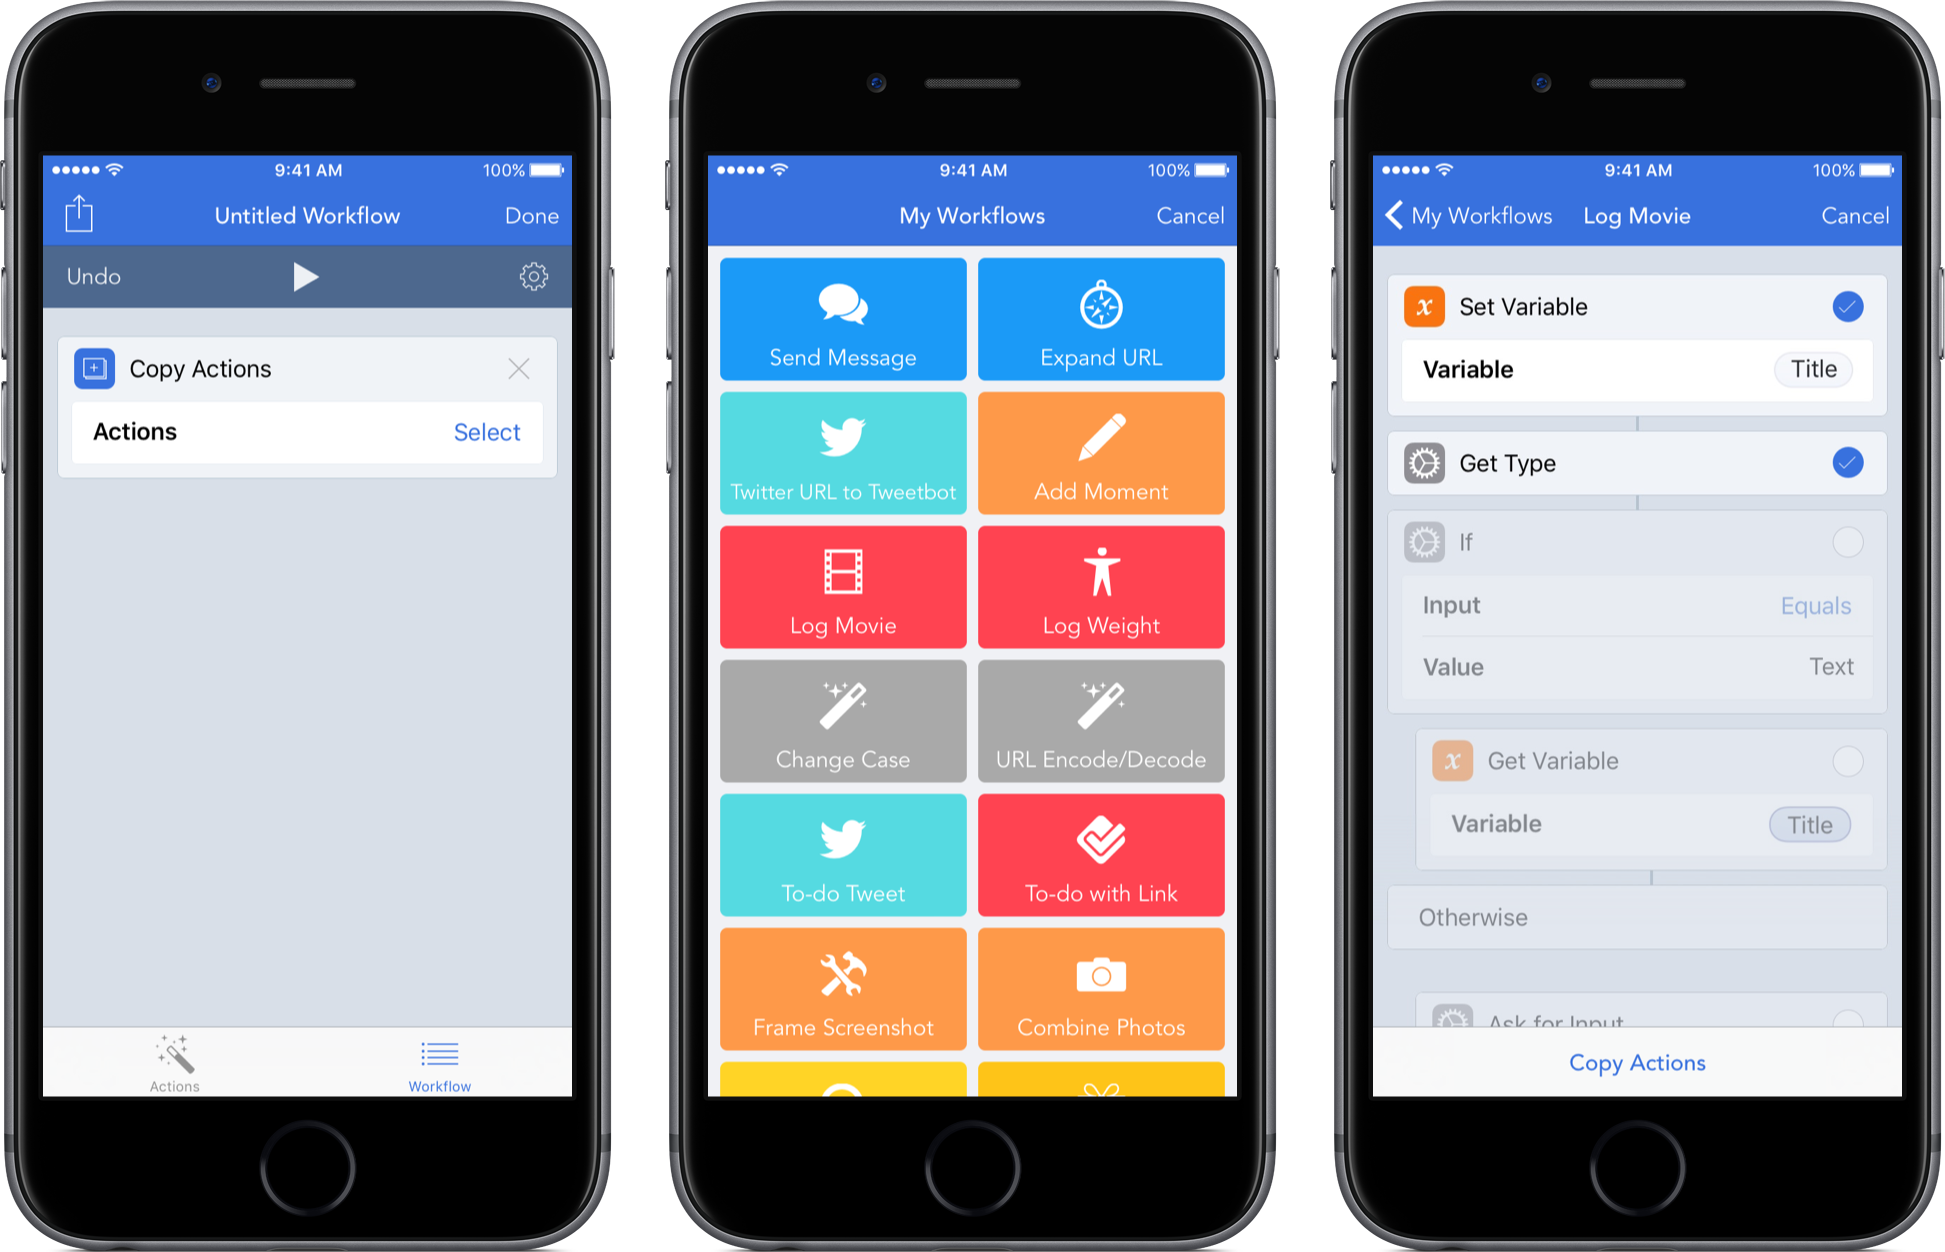
First, on iPad, tapping anywhere outside the form sheet where the parent view is dimmed underneath should dismiss it. Here’s the current active area of the screen where tapping will dismiss the form sheet: just the Done button.

Current tap area

And here’s what the active area to dismiss the form sheet should be: both the Done button AND the space outside the view (the status bar is still reserved for its interactions like scrolling a view to the top).

Proposed tap area

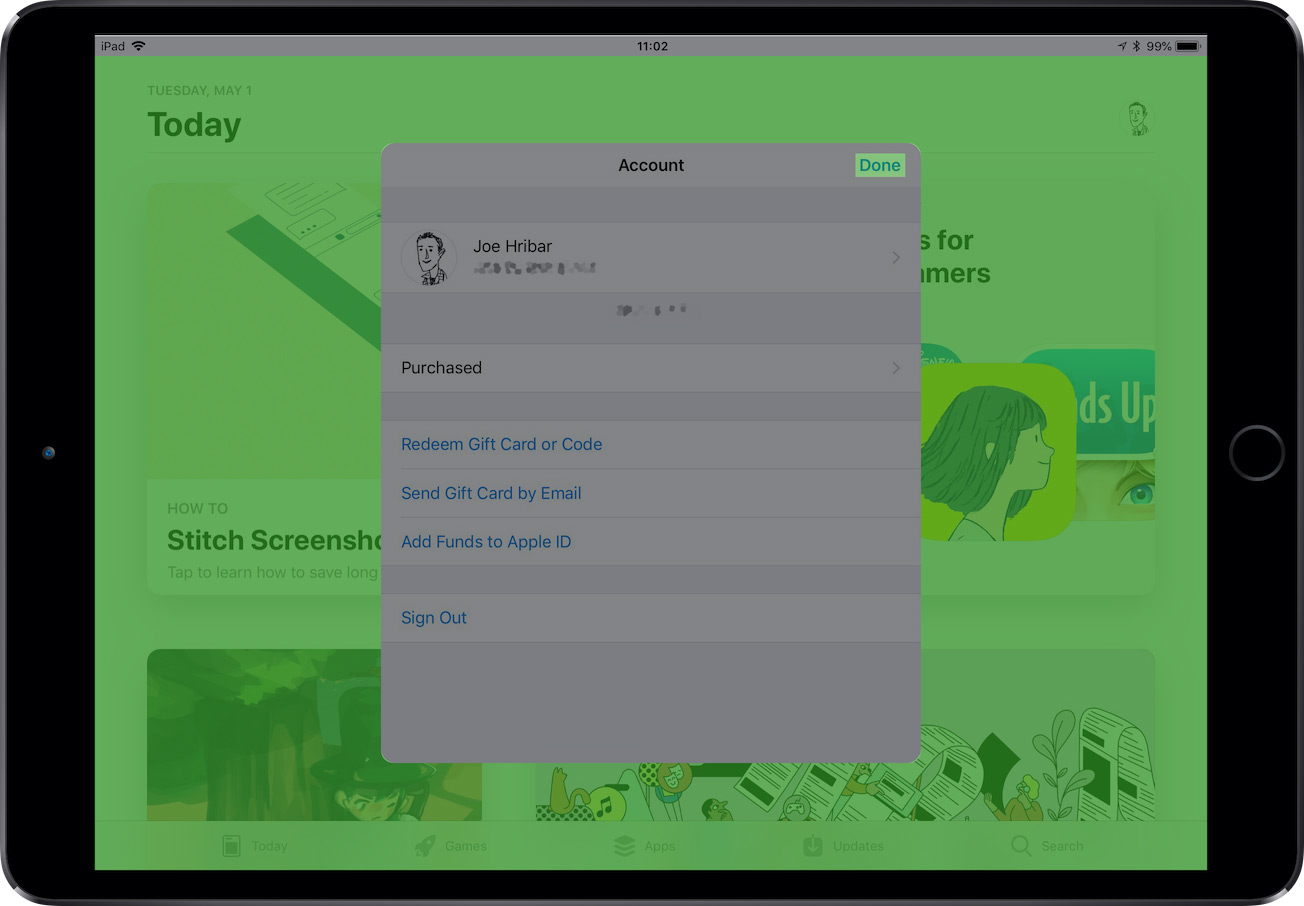
The space outside the form sheet currently is a touch dead zone; the dimmed area merely prevents taps to the view underneath. Why not use this space to dismiss the form sheet?

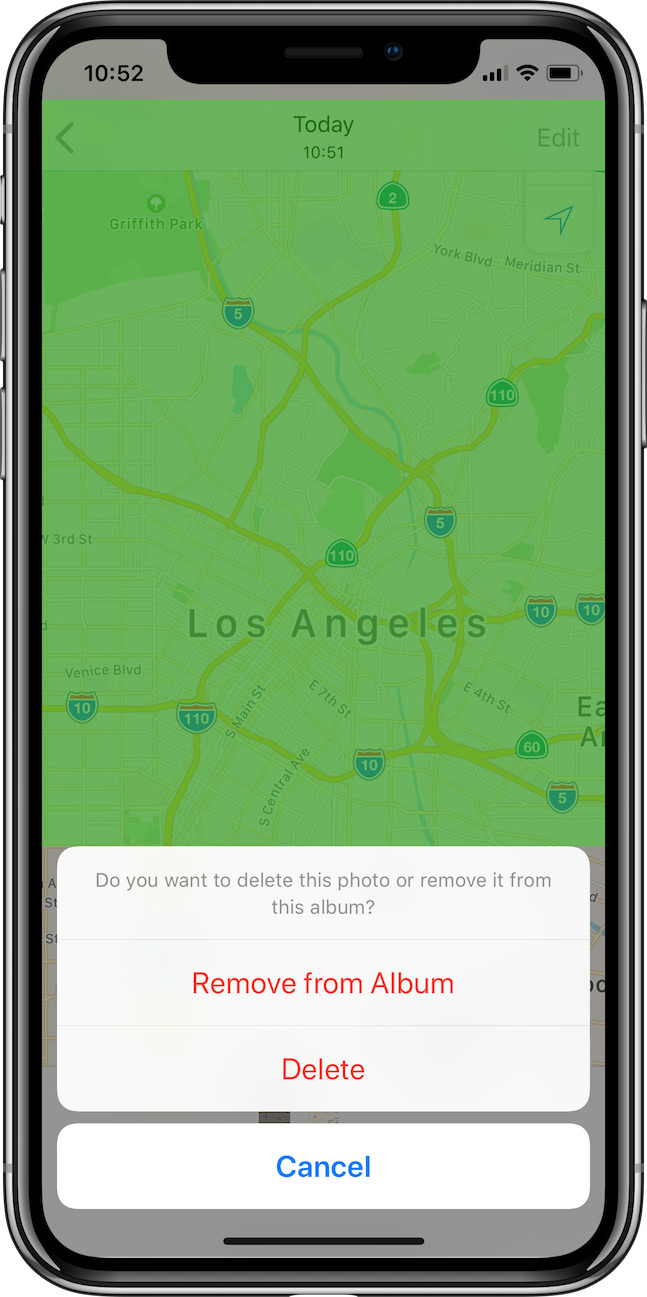
Tapping outside a view to dismiss it already exists elsewhere in iOS—even for dismissing modal views. When an action sheet or activity sheet is presented, tapping above or outside the buttons or view will dismiss the sheet.

Tap outside action sheet

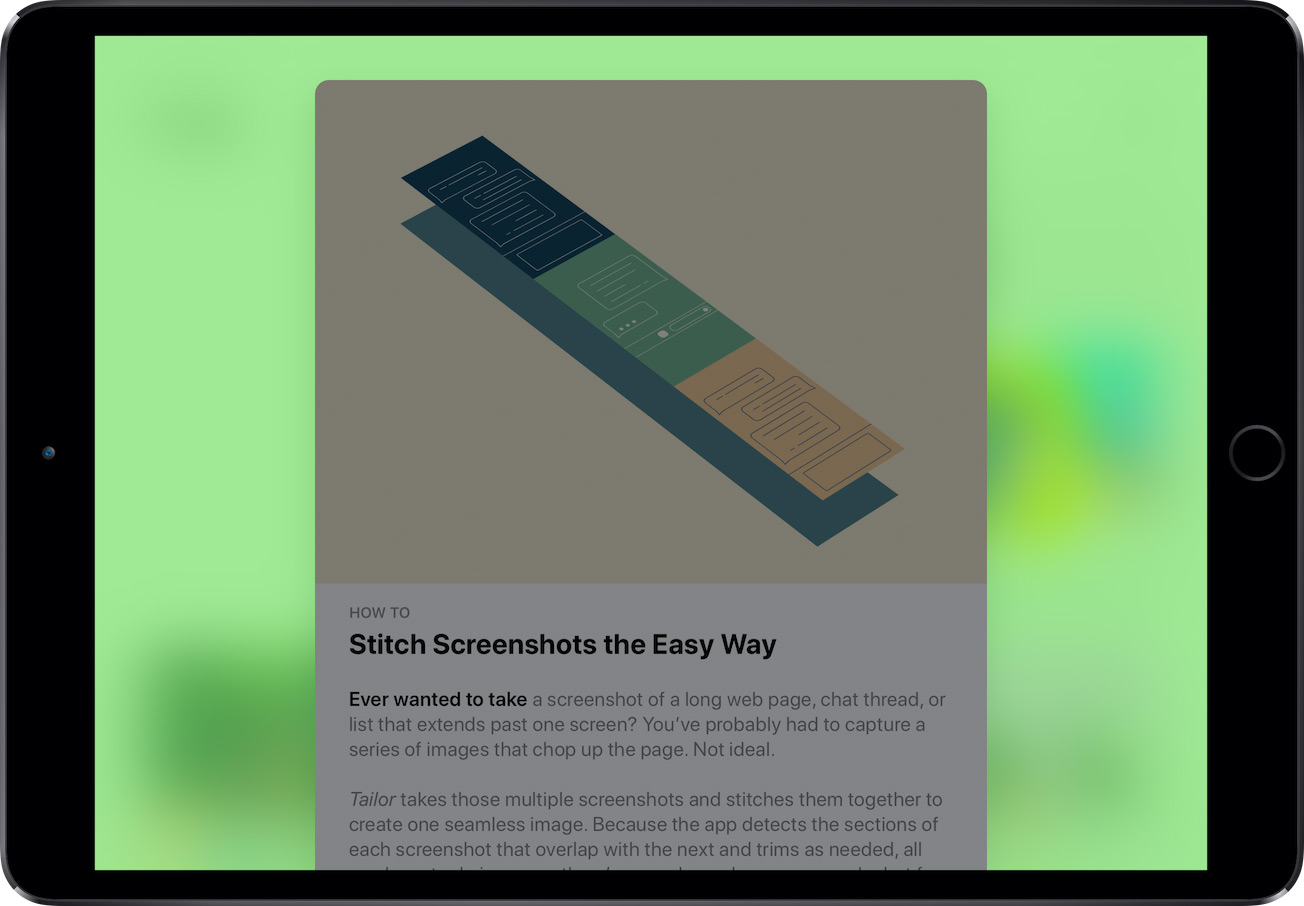
In the iOS 11 App Store, tapping a Today story tile or list tile opens a sort-of page sheet where, on iPad, tapping to the left or right of the view in the blurred area will dismiss the view.

Tap outside App Store tile

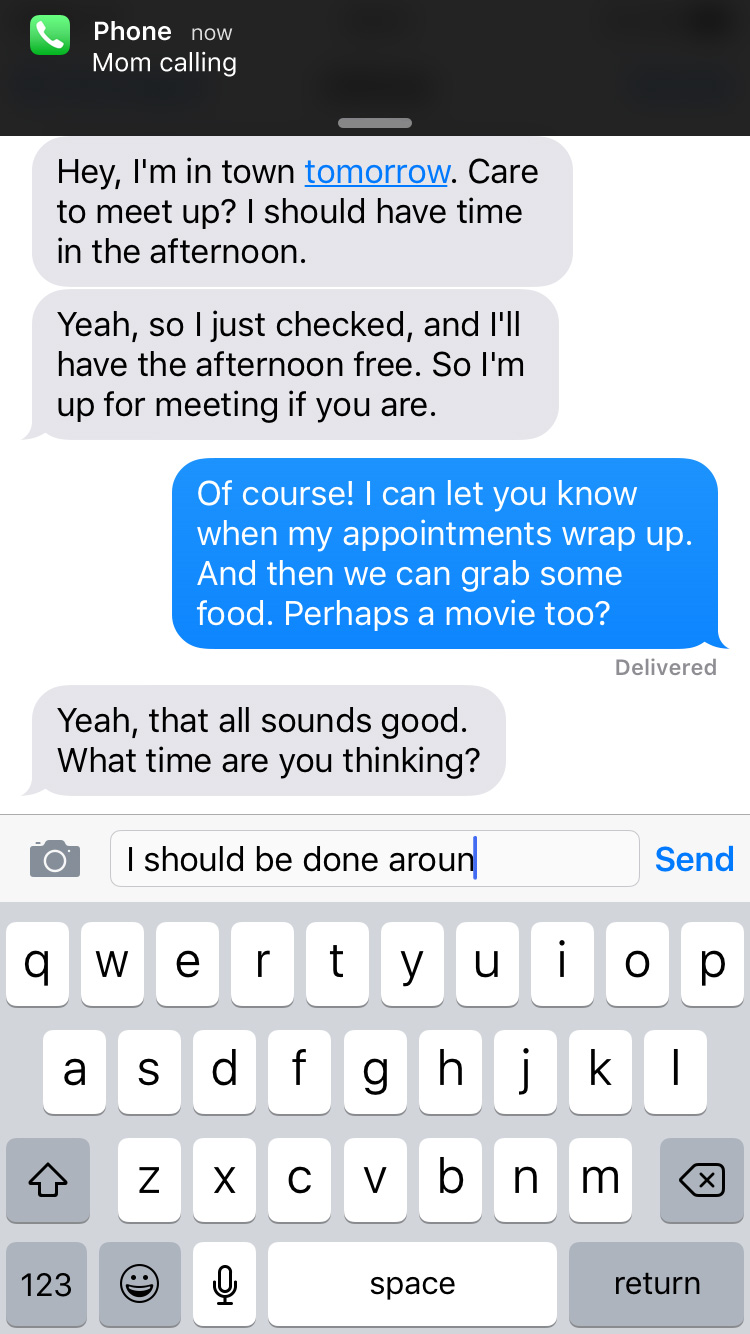
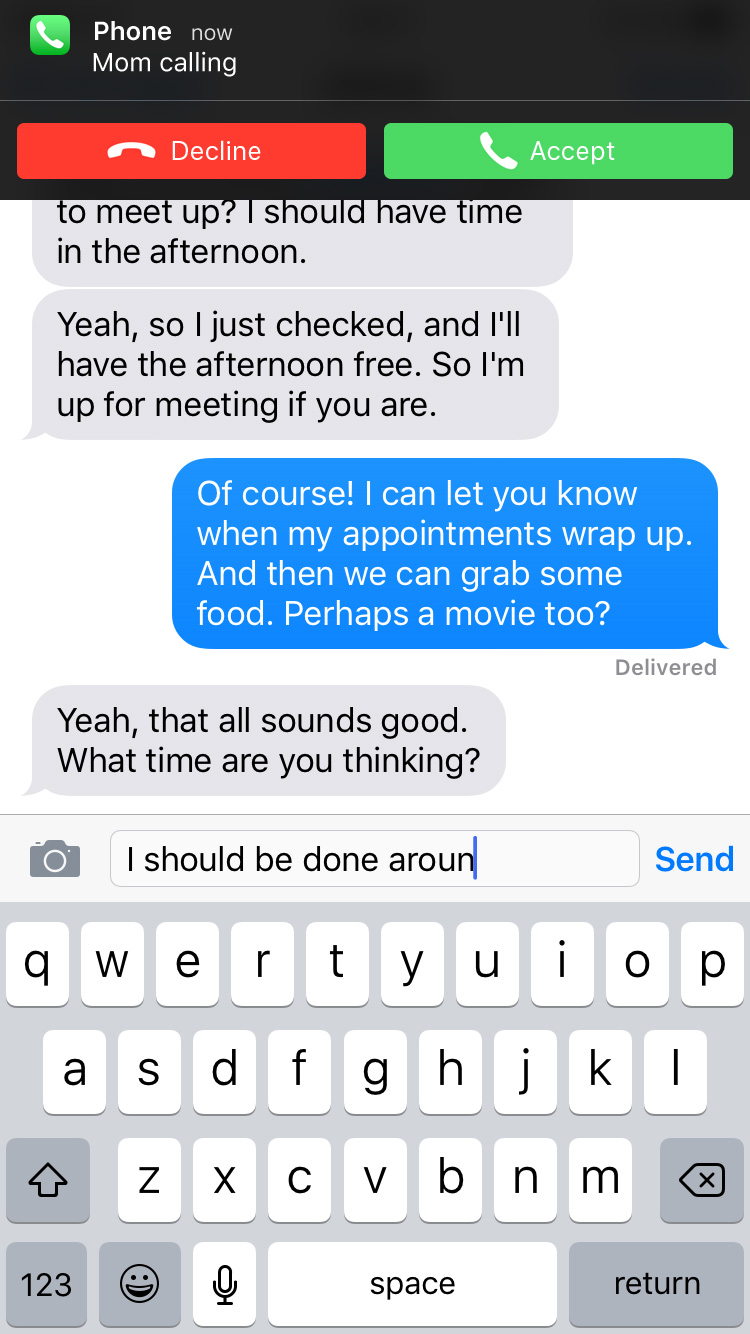
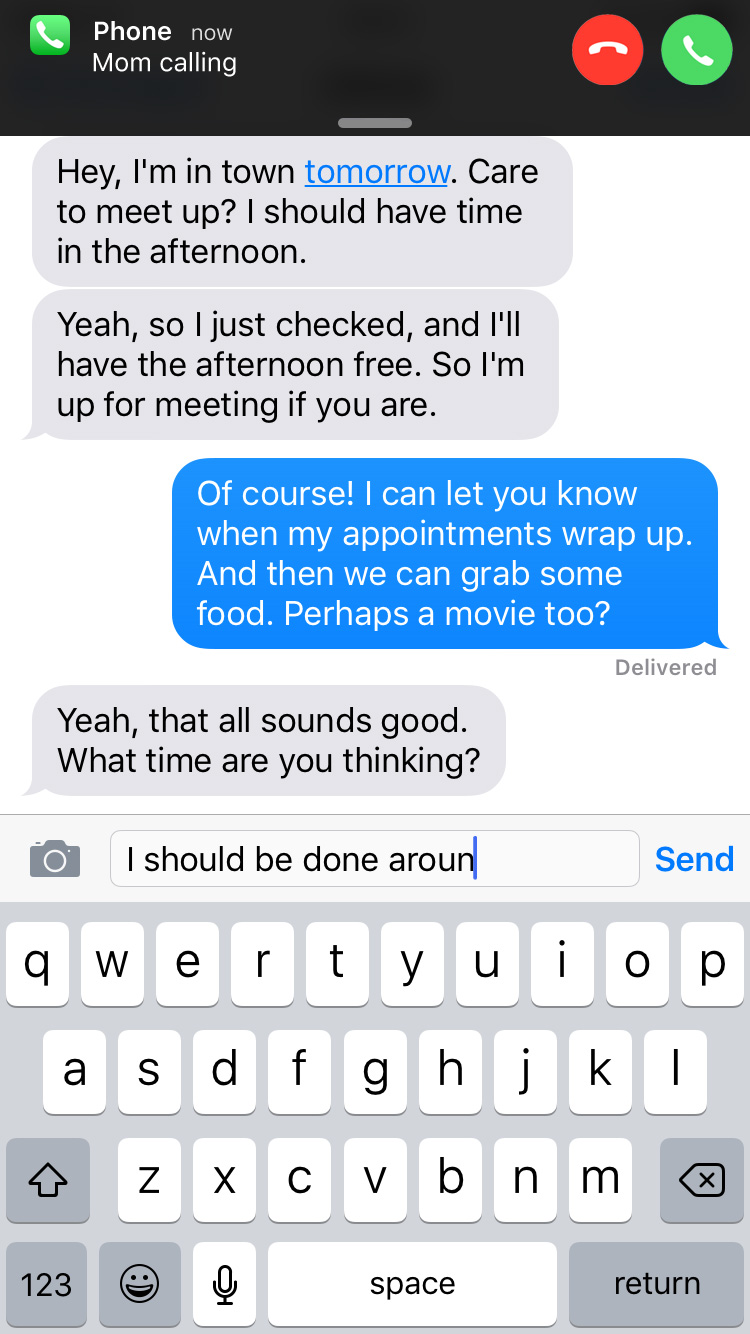
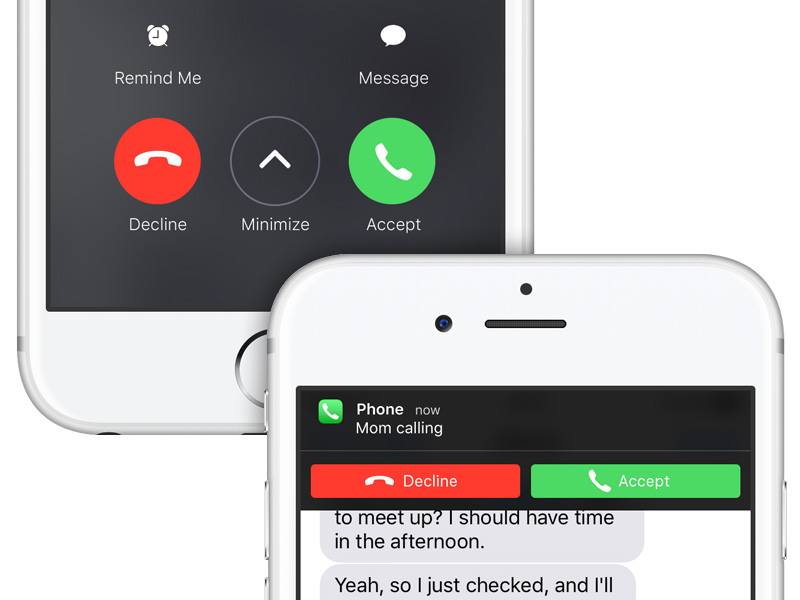
This example isn’t a modal view per se, but it applies. On iPad when pulling down on a Messages notification banner to reply to the message, tapping to the left or right of the messages view in the blurred area will dismiss the view.

With the latter two examples, perhaps these relatively new interaction methods will inform an updated modal system in a future iOS version.

In the meantime, there’s a workaround to capture taps outside the form sheet and have them dismiss the modal. This Stack Overflow thread discusses the solution. Since I first discovered this workaround, there’s been an update for Swift 4. I’ve reproduced and tweaked it here:

import UIKit

class FormSheetViewController: UIViewController, UIGestureRecognizerDelegate {
    // gesture recognizer to test taps outside the form sheet
    var backgroundTapGestureRecognizer: UITapGestureRecognizer!
    
    // dismiss the modal and perform any other related actions (e.g. inform delegate)
    func done() {
        dismiss(animated: true, completion: nil)
    }
    
    // check if the tap was outside the form sheet
    @objc func handleTap(_ sender: UITapGestureRecognizer) {
        if sender.state == .ended {
            let location: CGPoint = sender.location(in: view)
            
            // if outside, dismiss the view
            if !view.point(inside: location, with: nil) {
                view.window?.removeGestureRecognizer(sender)
                done()
            }
        }
    }
    
    override func viewDidAppear(_ animated: Bool) {
        super.viewDidAppear(animated)
        
        // set up gesture recognizer
        if backgroundTapGestureRecognizer == nil {
            backgroundTapGestureRecognizer = UITapGestureRecognizer(target: self, action: #selector(handleTap(_:)))
            backgroundTapGestureRecognizer.delegate = self
            backgroundTapGestureRecognizer.numberOfTapsRequired = 1
            backgroundTapGestureRecognizer.cancelsTouchesInView = false
            view.window?.addGestureRecognizer(backgroundTapGestureRecognizer)
        }
    }
    
    override func viewWillDisappear(_ animated: Bool) {
        super.viewWillDisappear(animated)
        
        // remove gesture recognizer
        if backgroundTapGestureRecognizer != nil {
            view.window?.removeGestureRecognizer(backgroundTapGestureRecognizer)
            backgroundTapGestureRecognizer = nil
        }
    }
    
    // don't forget the delegate method!
    func gestureRecognizer(_ gestureRecognizer: UIGestureRecognizer, shouldRecognizeSimultaneouslyWith otherGestureRecognizer: UIGestureRecognizer) -> Bool {
        return true
    }
}

Partly Sunny uses this workaround, so in any of the previously mentioned form sheets, tapping outside the view will dismiss it.

Tap outside Partly Sunny settings

Tap outside Partly Sunny edit list

Tap outside Partly Sunny radar

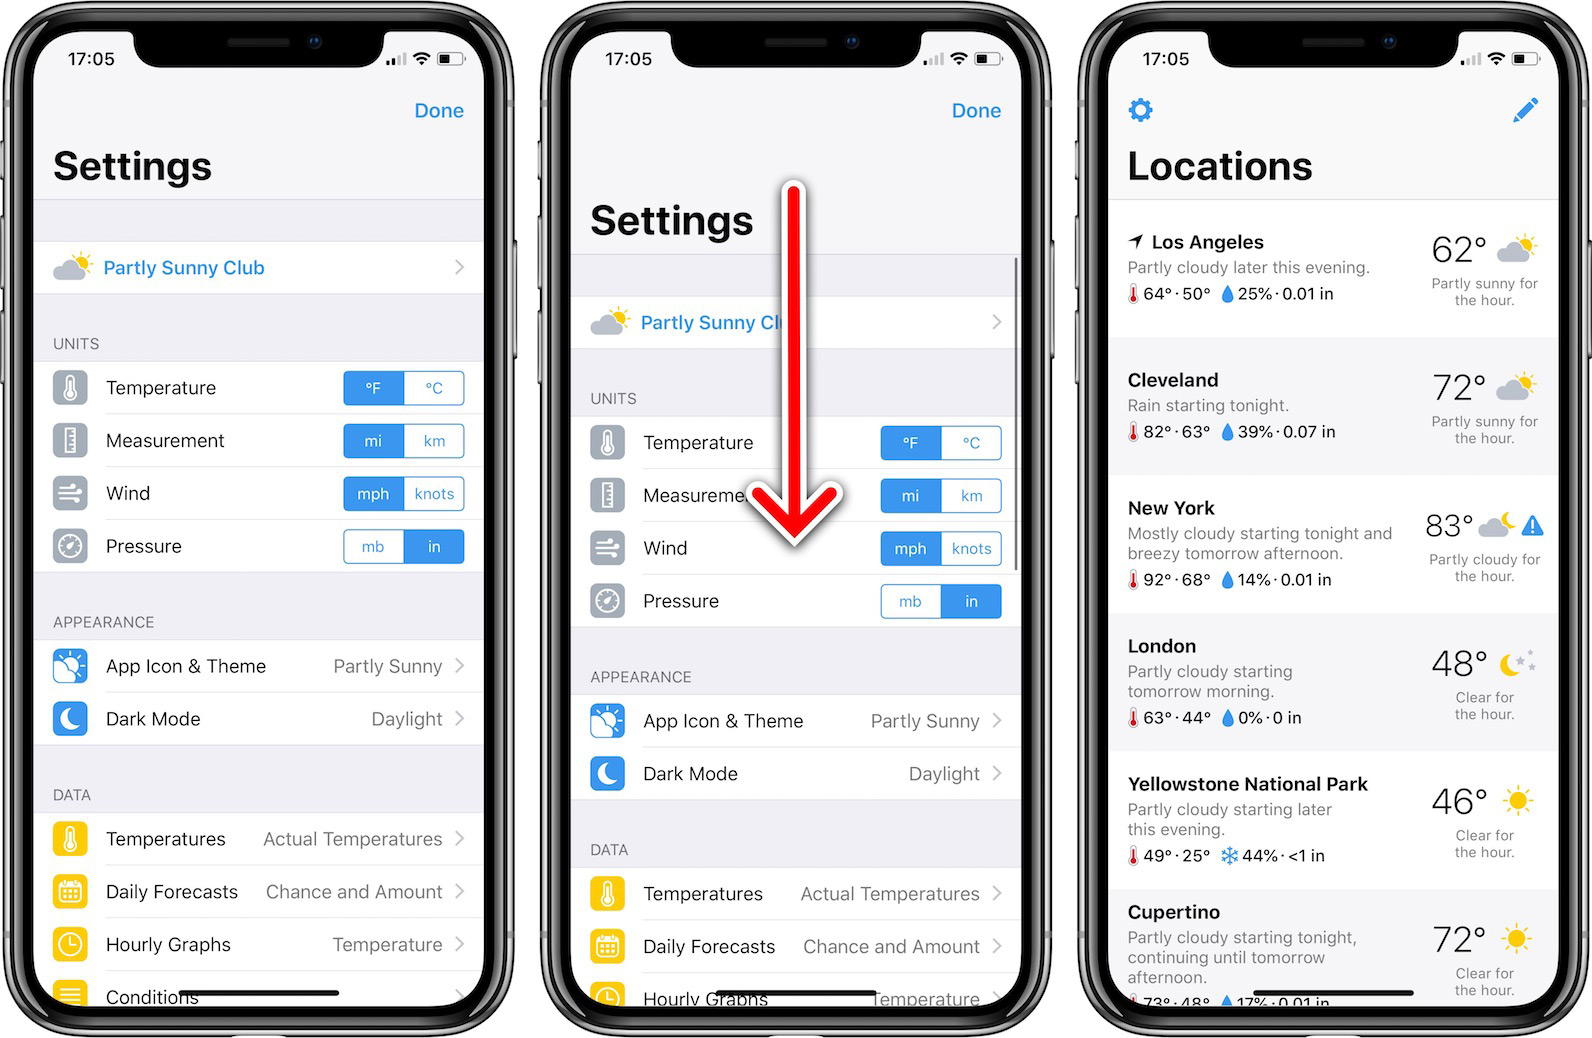
This works for iPad, but what about iPhone where the form sheets cover the full screen and there isn’t any dimmed area? The second way to make dismissing form sheets easier is dragging. Once the view is dragged down a certain amount, the view should dismiss. This would work on iPads too.

Drag to dismiss

This idea of dragging down to dismiss something exists elsewhere in iOS. In Photos, when tapping on a photo in the Camera Roll or an album, the photo goes full screen. Tapping the back button goes back to the album, but also dragging down on the photo will shrink it and fade it to reveal the album—in other words, dragging down dismisses it.

Drag photo to dismiss

While Maps doesn’t use traditional modal views, the system it uses allows for dragging the cards down to get back to the content underneath.

Drag map card to dismiss

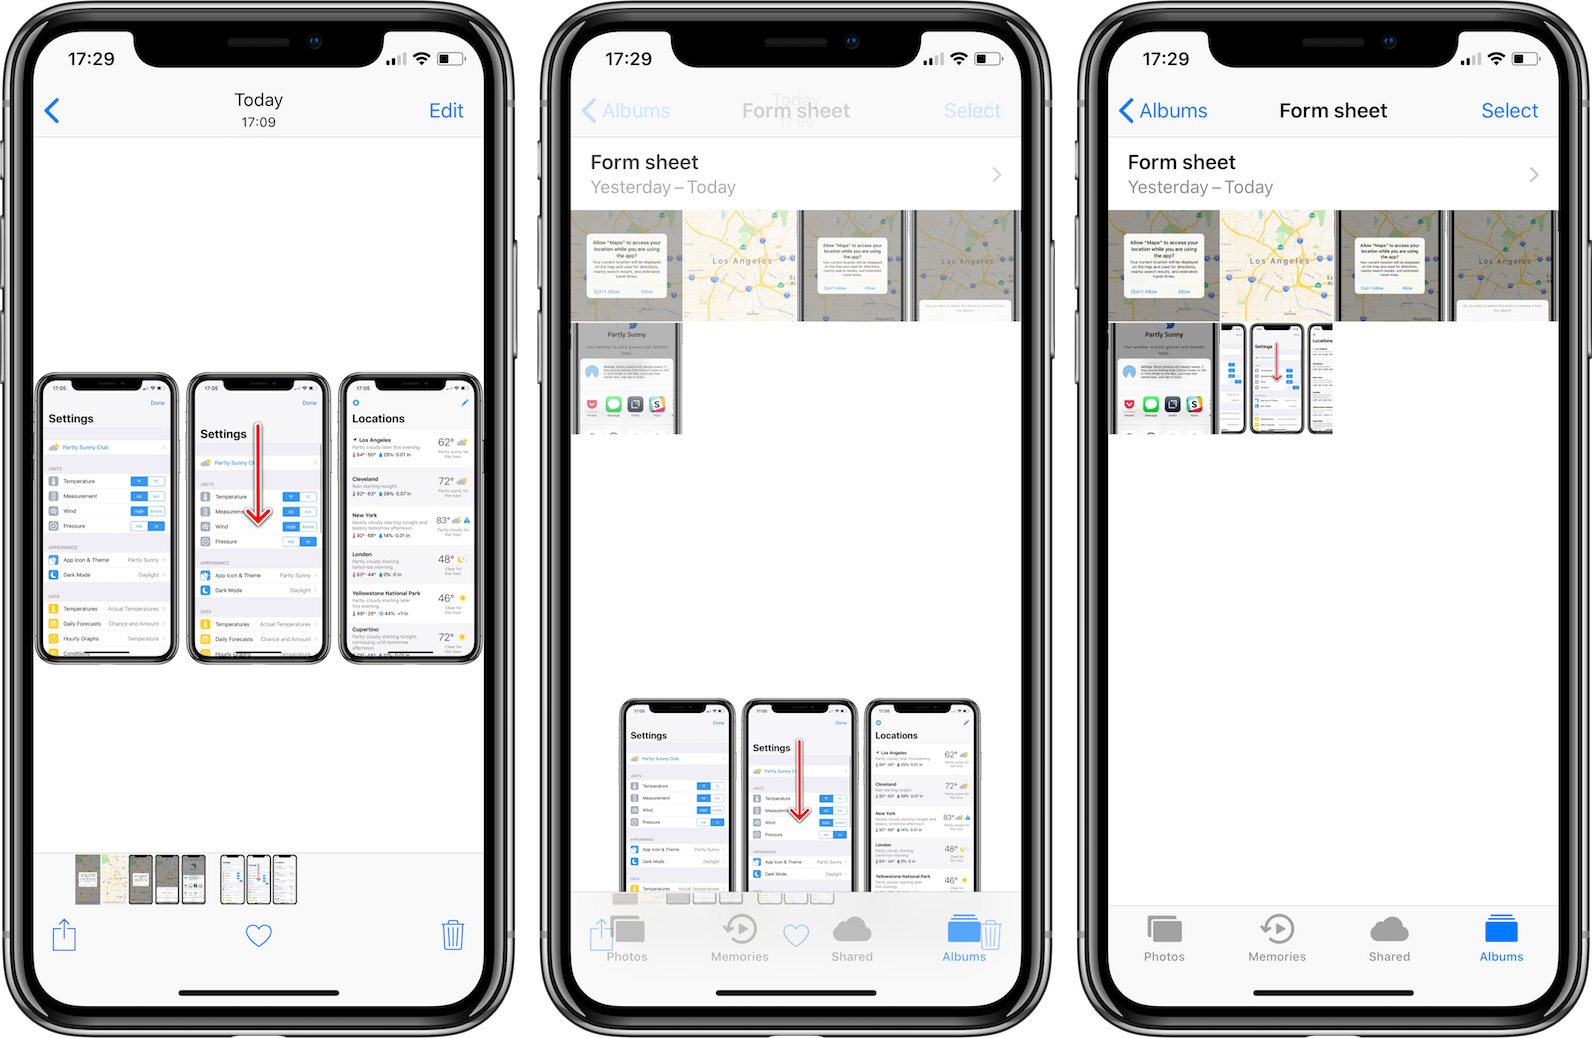
Third-party apps have started to employ dragging down modals to dismiss as well. I’m not sure where I first saw it, but I know of several apps that have this functionality. Partly Sunny is one of them. In any form sheet, dragging down on the view will dismiss it. Here it is in action:

Drag to dismiss

I added a sort-of guard to help prevent accidental dismissals. If you scroll the view and then scroll back to the top, if when you reach the top you’re still dragging down (so that the view is doing the iOS rubber-banding effect), the view won’t dismiss. But once you release, if you drag down again, the view will dismiss. I didn’t want anyone to be casually scrolling up and suddenly the view disappeared on them. Here’s what that code looks like added to the code above:

import UIKit

class FormSheetViewController: UIViewController, UIGestureRecognizerDelegate {
    // scroll view must be dragged down this distance to be dismissed
    var scrollDistanceToDismiss: CGFloat = 50
    
    // tracks whether or not the scroll view should be dismissed if dragged down from top boundary
    var dragScrollViewToDismiss = true
    
    // tracks whether or not dragScrollViewToDismiss is ready to be set
    var dragScrollViewToDismissIsReady = false
    
    // stores the initial offset of the scroll view
    var scrollViewInitialOffset: CGFloat = 0
    
    // stores if the scroll view was loaded; guards overwriting scrollViewInitialOffset
    var scrollViewLoaded = false


    // gesture recognizer to test taps outside the form sheet
    var backgroundTapGestureRecognizer: UITapGestureRecognizer!
    
    // dismiss the modal and perform any other related actions (e.g. inform delegate)
    func done() {
        dismiss(animated: true, completion: nil)
    }
    
    […]
}

extension FormSheetViewController: UIScrollViewDelegate {
    func scrollViewDidScroll(_ scrollView: UIScrollView) {
        // store initial content offset of scroll view
        if !scrollViewLoaded {
            scrollViewLoaded = true
            scrollViewInitialOffset = scrollView.contentOffset.y
        }
        
        if dragScrollViewToDismiss {
            // if scrolling up, cancel dismiss
            if scrollView.contentOffset.y - scrollViewInitialOffset > -scrollView.contentInset.top {
                dragScrollViewToDismiss = false
                dragScrollViewToDismissIsReady = false
            }
            // if scrolling down, dismiss view controller
            else if scrollView.contentOffset.y - scrollViewInitialOffset <= -scrollView.contentInset.top - scrollDistanceToDismiss {
                done()
            }
        }
        
    }
    
    // if scroll view released beyond top boundary, set dismiss ready
    func scrollViewDidEndDragging(_ scrollView: UIScrollView, willDecelerate decelerate: Bool) {
        if scrollView.contentOffset.y <= -scrollView.contentInset.top {
            dragScrollViewToDismissIsReady = true
        }
    }
    
    // if scroll view drifts beyond top boundary, set dismiss ready
    func scrollViewDidEndDecelerating(_ scrollView: UIScrollView) {
        if scrollView.contentOffset.y <= -scrollView.contentInset.top {
            dragScrollViewToDismissIsReady = true
        }
    }
    
    // if scroll-to-top activated, set dismiss ready
    func scrollViewDidScrollToTop(_ scrollView: UIScrollView) {
        dragScrollViewToDismissIsReady = true
    }
    
    // when tapping again on scroll view, set dismiss active
    func scrollViewWillBeginDragging(_ scrollView: UIScrollView) {
        if dragScrollViewToDismissIsReady {
            dragScrollViewToDismiss = true
        }
    }
}

Form sheets and modal views as a whole are important and useful tools for iOS app developers. Dismissing them could be a bit more user-friendly, and gestures—tapping outside the view and dragging down on the view—can accomplish that. I hope a future version of iOS gives developers out-of-the-box tools to do both and thus standardizes these interaction methods.

Until then, developers can use their own solutions like those above. If you have suggestions how I can improve tapping outside the view or dragging down on the view, please let me know. Now it’s time for me to swipe down on this and get back to work.

Copying Efficiency in Workflow

Workflow by DeskConnect has become one of my most used and most indispensable iOS apps. With its powerful and efficiency-gaining functionality, Workflow is an app I use repeatedly throughout the day and take delight experimenting with.

If you haven’t used Workflow before, the app connects and combines apps and actions to automate tasks on iPhone, iPad, and Apple Watch. With the ability to create workflows ranging from choosing pre-written messages to send someone to changing the case of a text string to combining burst photos into GIFs to adding entries into Health.app, Workflow has hundreds of actions to create countless combinations however you see fit.

If you have used Workflow before, perhaps you’ve run into the same situation I have: you have a string of actions in one workflow you’d like to have in another workflow, and getting those actions in the other workflow requires you to recreate them one by one. Depending on how many there are, this can be rather vexing. What Workflow could use is the ability to copy actions from one workflow to another. How might that work? Like this.

Start with a new workflow:

New Workflow

Like usual, you swipe right to reveal the actions view:

Favorite Actions

From there, you drag a new “Copy Actions” action to the workflow:

New Workflow With Copy

At first, this action doesn’t do anything as it awaits further, uh, action in case you want to set something else up first. When you’re ready to copy actions from another workflow, tap the “Select” button and you’re presented with a new view containing all your workflows:

My Workflows

Choose the workflow that has the actions you want to copy, and the workflow slides in from the right with its actions grayed out and selectable:

Copy Actions Unselected

From there, select the actions to copy:

Copy Actions Selected

Once you select all the actions you want to copy, press the “Copy Actions” button at the bottom, and the view disappears to reveal underneath the new workflow with the selected actions in place of the “Copy Actions” action:

New Workflow With Copied

And there we have an easy way to copy actions from one workflow to another that both maintains and builds upon the existing foundation and interactions in Workflow.

But why stop there? Perhaps you noticed another new action in the favorites list: “Run Workflow”. The block of actions copied above really could be a reusable workflow that is called from multiple other workflows. You could use the above method to copy the actions into those other workflows, but what happens when you want to update that reusable workflow? You’d have to update it in multiple places. Nah.

Instead, what Workflow could also use is a “Run Workflow” action that pauses the workflow it’s in, allows the designated workflow to run and optionally return something, and then continues the original workflow. How might that work? Like this.

Using the actions above, create a new workflow that checks for input text or otherwise asks for input. Below that block of actions, drag a new “Return” action:

New Workflow With Return

In this case, the action would return text, but in other workflows, it could return an image, a URL, a date, and more.

Back in the original workflow, you can now delete that block of actions and replace it with a “Run Workflow” action:

Run Workflow Unselected

Like with the “Copy Actions” action, tap the “Select” button, and you’re presented with a new view containing all your workflows:

My Workflows

From there, select the workflow to embed, and the view disappears and updates the action:

Run Workflow Selected

When you run the workflow, it executes the embedded workflow to get or ask for text, returns the text, and proceeds with the rest of the workflow.

Now in the future if you want to build on this reusable workflow (for example by adding a string of actions to replace dumb quotes with smart quotes), you can make edits in one place and have all the other workflows that embed the reusable workflow enjoy those edits. That’s far more efficient.

And efficiency is what this is all about. Each new version of Workflow gets better and better with more actions to build more workflows to be more efficient. And I hope one day soon building workflows becomes a bit more efficient with the ability to copy actions from one workflow to another and the ability to embed one workflow in another. If I may quote Workflow, that’s powerful automation made simpler.

Copying Efficiency in Workflow

Improving the iOS Incoming-Call Screen

My friend is coming into town, and he messaged me to see about meeting up. So I start typing a response. Type type type. While I’m typing, I’m suddenly interrupted, I lose control of my screen, and I can’t finish what I was doing. What happened? I received a phone call.

Or maybe I’m looking up which train I need to take home to leave me enough time before I have to be on my way somewhere else. And bam. Incoming-call screen.

Or maybe I’m editing a video and trying to precisely trim the end of it. And bam. Incoming-call screen.

Whatever the task, the incoming call commandeers my screen and forces me out of the task I was performing.

Because the device is a phone and making and receiving calls is a primary function, let’s assume the incoming-call screen is here to stay. So how can the screen be just a bit less intrusive? I have an idea.

Let’s say my friend John Appleseed is coming into town and wants to meet up. A text conversation might go something like this:

JA: Hey, I’m in town tomorrow. Care to meet up? I should have time in the afternoon.

Yeah, so I just checked, and I’ll have the afternoon free. So I’m up for meeting if you are.

JH: Of course! I can let you know when my appointments wrap up. And then we can grab some food. Perhaps a movie too?

JA: Yeah, that all sounds good. What time are you thinking?

I begin typing my response:

chat

…and bam. Incoming-call screen. Mom is calling:

Current incoming-call screen

On the incoming-call screen, I have a few options to deal with the call. I can accept the call, I can decline the call and send the caller straight to my voicemail, I can send the caller a text message, and I can set a reminder (with the last two requiring further steps). With the hardware side buttons, I have another option: silence the ringer. Although my phone stops sounding or vibrating, the call continues and after a period of time automatically goes to my voicemail.

When I receive a call I can’t (or in some cases don’t want to) take, I choose the latter. With the ringer-silencing option, the caller may think I’m unavailable. Or if the caller is an unrecognized number like from a marketing call, the caller may think the number isn’t actively used. If I decline the call, it sends the caller directly to voicemail letting them know I’m on the other end and deliberately ignoring them.

Choosing the latter, though, means I have to stare at the incoming-call screen until the call automatically goes to voicemail when I just want to get back to the task I was performing.

But what if I could dismiss or minimize the incoming-call screen without taking or declining the call? That’s what I propose.

When a FaceTime call fails, iOS presents a screen with three buttons: “Call Back”, “Cancel”, and “Leave a Message”:

FaceTime unavailable

Let’s take that middle button and add it to the incoming call screen. So now when someone calls, the screen would look like this:

New incoming-call screen

If I tap the new “Minimize” button, the screen would animate out of view while a notification banner would animate on:

chat

Like when I press the volume buttons on the side of my iPhone, the ringer would silence, and the call would continue until it automatically went to my voicemail. But unlike when I press the volume buttons, I could resume the interrupted task.

Because phone calls—and the incoming-call screen—get an intrusive level of priority, the banner notification would as well. While the call continued until it automatically went to my voicemail, the banner would remain at the top of the screen.

While other banner notifications can be swiped up to dismiss them, this one would remain pinned to the top. If I tapped the notification, I would return to the incoming-call screen. Though I wouldn’t be able to swipe up on the notification to dismiss it, I would be able to swipe down on it to reveal action buttons:

chat

Once the call automatically went to voicemail, the banner notification would disappear like normal as I continued my task.

Ideally, I would like iOS to ditch the incoming-call screen altogether and just present an actionable banner notification when I receive a call (like other notifications, it would be customizable to appear as an alert box instead). Maybe the banner would look something like this:

chat

This way, there’s a far smaller interruption of my task. More of a distraction rather than a full interruption. The decline or accept buttons on the banner would do exactly that. If I couldn’t or didn’t want to take the call, I could still press the volume buttons on the side of my iPhone to silence the call and let it automatically go to voicemail. And if I swiped down on the banner, I could chose to be reminded or send the caller a message:

chat

But assuming the incoming-call screen is here to stay and an actionable banner notification isn’t in iOS’s future, this new workflow could be a way to dismiss the screen without telling the caller I’m ignoring them.

Because I promise I’m not ignoring you, mom.

incoming call screen

Improving iPad Multitasking

Multitasking on iPad received an enormous update in iOS 9 in the form of Slide Over and Split View. But however advanced and, well, pretty cool both are, the execution of Slide Over has puzzled me since I first played with it. The list of apps available for multitasking is presented in an excessively roomy fashion—meaning finding the app you’re looking for can be unnecessarily difficult.

Jason Snell wrote this week about a few ways to improve iPad multitasking. After reading the article and finding myself in agreement, I mocked up some ideas last night based on his suggestions. Let’s start.

Here’s what Slide Over looks like currently on an iPad mini.

Current Slide Over

There are four (FOUR!) apps visible in the menu. Finding the app you’re looking for can result in scroll after scroll after scroll.

Jason wrote, “A denser design that presented the app list in a more straightforward manner would be welcome, especially when the list is long.” So what might that look like?

Compact Slide Over

I made the buttons a comparable size to a list view for familiarity, but perhaps they could be a smidge bigger. Also, I’m designing for an iPad mini, and I realize what looks good on the mini might not look good on the pro, so perhaps some dynamic resizing could be in order depending on the device.

I think this is already an improvement. Sure the list is still long (a product of having so many great apps!), but the compact nature reduces the amount of scrolling necessary.

In addition to the “denser design”, there is a search bar at the top. Don’t want to scroll to find the app you’re looking for? Search for it instead.

Also of note is the button shape. I retained the rounded rectangles with the idea of keeping a similar shrink-down animation when closing an app in Slide Over.

Now that more apps are visible, finding the app you want is easier. But what if there are a few apps you want quick access to in Slide Over. Why not pin them as Jason suggests? Tap “Edit Favorites” to enter edit mode. App icons and names slide over to reveal a star outline.

Add favorites

Tap the star, and the app animates into your favorites list.

Add favorites

(Since Twitter’s favorites and stars have recently found themselves unemployed, I put them to work here.)

Add favorites

Grips on the right of the buttons give you the ability to reorder your favorites as you see fit. Tapping a star on a favorited app would animate it back to the list of unfavorited apps. Tap “Done” to exit edit mode.

Add favorites

Now we have a more compact design, the ability to search for an app, and the ability to pin apps for quick access.

The final bit of functionality to add is the ability to save app pairings—app buddies as Jason called them. The idea here is to have quick access to two apps you like to use together in Split View. The current system, as he describes, can make getting those two apps together a pain. So how about favoriting an app pairing? In edit mode, tap “Add App Pairing” to open a popup with the list of available multitasking apps.

Add app pairing

Select two apps, tap “Done”, and Split View will now remember you want those two apps together.

Add app pairing

I imagine when selecting a paired favorite from the list, an elegant animation would animate the current app off the screen and the two selected apps into position. And tapping on the star of an app pair would simply delete the pairing.

Slide Over redesigned

So there you have it. While iOS 9 introduced great new multitasking tools, selecting apps to multitask with can be a chore. But a few tweaks and some new bits of functionality could go a long way to improving iPad multitasking.

Slide Over redesigned

Improving iTunes 11 Expanded View

After installing iTunes 11 this past weekend, I quickly developed a sour opinion of the design of the expanded/open “folders” of TV shows. Bothered enough by these issues, I attempted to fix them. (Click any photo below for a larger view.)

This is what an open folder for content purchased on iTunes looks like:

And this is what an open folder for content that was digitized and imported (sorry, Library of Congress) looks like:

Here are some of my issues:

  • What’s with all the colors? I’m sure an iTunes engineer is extremely proud of the algorithm he or she developed to lift colors from album art and assign them to text and backgrounds (and rightfully so), but yikes! iTunes preferences offers a checkbox to disable the colors, but then you lose the big album art.
  • Speaking of album art, yikes! Why the edge fades and decreased opacity?
  • Why are the season buttons tucked away in a corner almost blending into the album art? As they serve a kind of important function (you know, showing more content), shouldn’t they be in a more prominent place?
  • Why why why when switching seasons does the album art for that season not display? In this expanded view, only the art for the first available season of the show is displayed.
  • Is the close button really necessary? And why is the spacing to the right of the season buttons different than the spacing to the left of the close button?
  • How about all that text? For imported content, there’s not much, so compared to purchased content, the text is drowning in negative space. And those horizontal divider lines between episodes? They’re so transparent they might as well not even be there.
  • Purchased content displays the episode’s air date between the episode number and episode length. But for imported content, this data cannot be entered (so far as I know), so we’re left with a hole between the episode number and length.

What I propose: chuck the colors, move the season buttons, create a better album-art display, and reformat the text.

Imported content would look like this:

Switching seasons would display the proper art:

Purchased content would look like this:

I think these changes offer a cleaner, better organized display of content. And the design elements here (the bars, “3D” album art) fit in with existing iTunes design elements. (Thanks to Neven Mrgan for inspiring the art.)

In addition to design nitpicks, I have a functionality nitpick, too, with TV shows. Season two of Breaking Bad in its current iTunes display looks like this:

When you scroll down, you lose a way to quickly identify what you’re looking at:

What season is this again? When you scroll down, why not have the show/season header lock to the top of the screen until the last episode pushes it out of view? Just like headers in scrollable lists on iOS devices work.

The redesigned Breaking Bad season two:

What it would look like after scrolling with the title/season bar locked to the top:

In addition to giving a quick visual identifying what season you’re browsing, you can also quickly switch seasons. That episode you were looking for wasn’t in season two? No problem. Click another season in that locked header, and iTunes would scroll to the top of the expanded view and switch to that season. In the current setup, you’d have to scroll back up yourself and find those tucked-away season buttons over by the album art to switch to another season.

Overall, the expanded views of TV shows feel like they were rushed to completion. The design needs improving, and there are numerous bugs when viewing and editing info in seasons other than the show’s first available season (in building these examples, I experienced many WTF moments in iTunes). Here’s hoping we get some improvements soon.

(P.S.: Yeah, I like the Golden Girls. Thank you for being a friend and not judging me.)

Siri Should Tame the Mountain Lion

OS X Mountain Lion roared into existence this week featuring many smart additions inspired by iOS. One addition I would like to see in the final build of Mountain Lion is Siri.

But where would Siri live? Easy. Notification Center is hiding under the right side of the desktop wallpaper. Why not have Siri hiding under the left side of the wallpaper?

siri_mac

Here’s a mock-up (click for larger version):

siri_mac

Just like with Notification Center, a trackpad gesture can slide the wallpaper and activate Siri. And perhaps a menu bar icon and a keyboard shortcut (or even a dedicated key) could as well.

I have to imagine someone in Cupertino has Siri running on their Mac today. Let’s hope we all will this summer.

iOS Linen and Other Grip(e)s

iOS linen doesn’t really bother me; it’s Apple’s favorite texture right now, and that’s fine. What does bother me is inconsistency in visual and interaction design.

Say this is my home screen with one of my photos (click on any photo for a larger version):

current iPhone home screen

When I open the Utilities folder, something heinous happens:

current iPhone folder

My wallpaper gets split and filled with linen. Because my wallpaper and my apps are treated as the same layer in the home-screen hierarchy, both the wallpaper and the apps divide and split apart when opening a folder; revealed underneath is the layer with the folder apps and linen.

Here’s another example with a nice wallpaper by Louie Mantia:

current iPhone home screen

Folder opened:

current iPhone folder

Visually, I have two issues with this. First, I don’t want my wallpaper split in two. Second, I don’t want additional colors (or texture) introduced behind my apps. I want a consistent wallpaper behind my apps.

So here’s what I propose: introducing three layers instead of two and saying goodbye to linen. Instead of the top layer consisting of the home-screen apps and wallpaper and the bottom layer consisting of the folder apps and linen, the top layer will consist of home-screen apps, the middle layer folder apps, and the bottom layer wallpaper.

When a folder opens, instead of the wallpaper splitting and moving up and down from the break, the wallpaper will remain stationary. The apps will still split as they do now to reveal the folder apps, but replacing the linen behind the apps will be a blurred section of the wallpaper:

proposed iphone folder

With this functionality, the wallpaper doesn’t split in two, and the wallpaper color scheme stays intact.

proposed iphone folder

But what about other instances of linen? This solution works with both the multitasking drawer and Notification Center. Currently when the multitasking drawer opens, everything above it slides up to reveal the apps and, of course, more linen:

current iPhone multitasking drawer

In my proposal, when the drawer opens, the apps will slide up, but the wallpaper will remain stationary just like when a folder opens. And instead of linen behind the drawer, there will be a blurred section of the wallpaper.

proposed iphone multitasking drawer

(What’s that grip for? I’ll come back to that shortly).

Notification Center will display similarly. Instead of linen in the background, you guessed it: blurred wallpaper.

proposed iphone notification center

But this treatment for Notification Center only works if the functionality of Notification Center changes as well. Instead of pulling down over the home screen, Notification Center will push down the home screen just like how the multitasking drawer pushes up the home screen. Just as I do now, I will swipe down from the top bar to open Notification Center, and all the home-screen apps will move down with Notification Center. (As Neven Mrgan pointed out, the current Notification Center grip needs some work; I used his solution.)

And since I can swipe down to open Notification Center, I should be able to swipe up to open the multitasking drawer hence the grip above. Max Rudberg has an example video of this. Swiping up takes far less effort than double clicking the home button and will be consistent with how to open Notification Center. (One additional note, for consistency, I also propose to keep the top bar visible when the multitasking drawer is open. Currently, when the multitasking drawer is open, the top bar slides up with the apps and wallpaper and is not visible, but when a folder is open, the apps and wallpaper slide under the top bar keeping it visible.)

So there’s my proposal: greater visual consistency in the wallpaper and improved behavioral and gestural consistency in the multitasking drawer and Notification Center. As a result, no more linen.

But if you really like that linen texture, you could always make it your wallpaper; it might even look nice blurred.

Some side-by-side comparisons:

folder comparison

multitasking drawer comparison

notification center comparison

(Many thanks to Teehan+Lax and their iOS 5 GUI PSD for help with the Notification Center and multitasking drawer images.)