My Home Screen Setup: December 2019 Edition

I haven’t posted about my iPhone Home screen since last December because not much had changed since then. My arrangement is pretty similar, and the apps on it are nearly all the same.

After listening to the Thanksgiving episode of Connected where Federico Viticci, Myke Hurley, and Stephen Hackett mentioned some apps they were thankful for, I thought about doing the same with some utility apps I use frequently but aren’t prominently displayed on my Home screen. Then I decided to do that plus a Home screen post. And then I started experimenting with having launchers from Shortcuts app on my Home screen. So this post will cover all those things!

My Home Screen

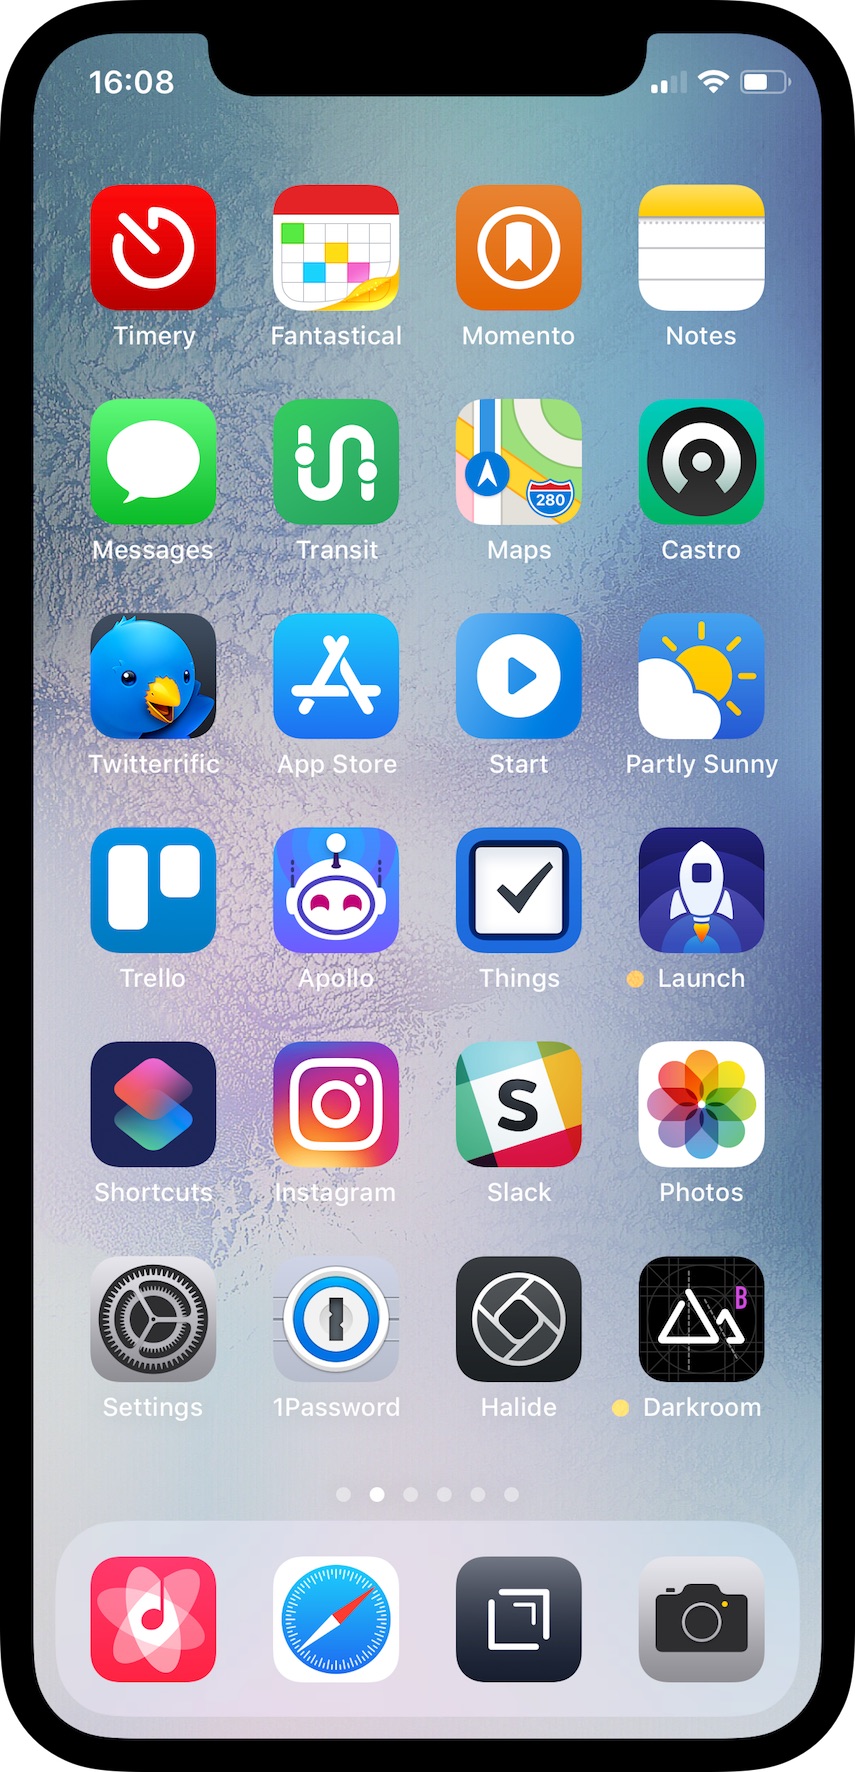
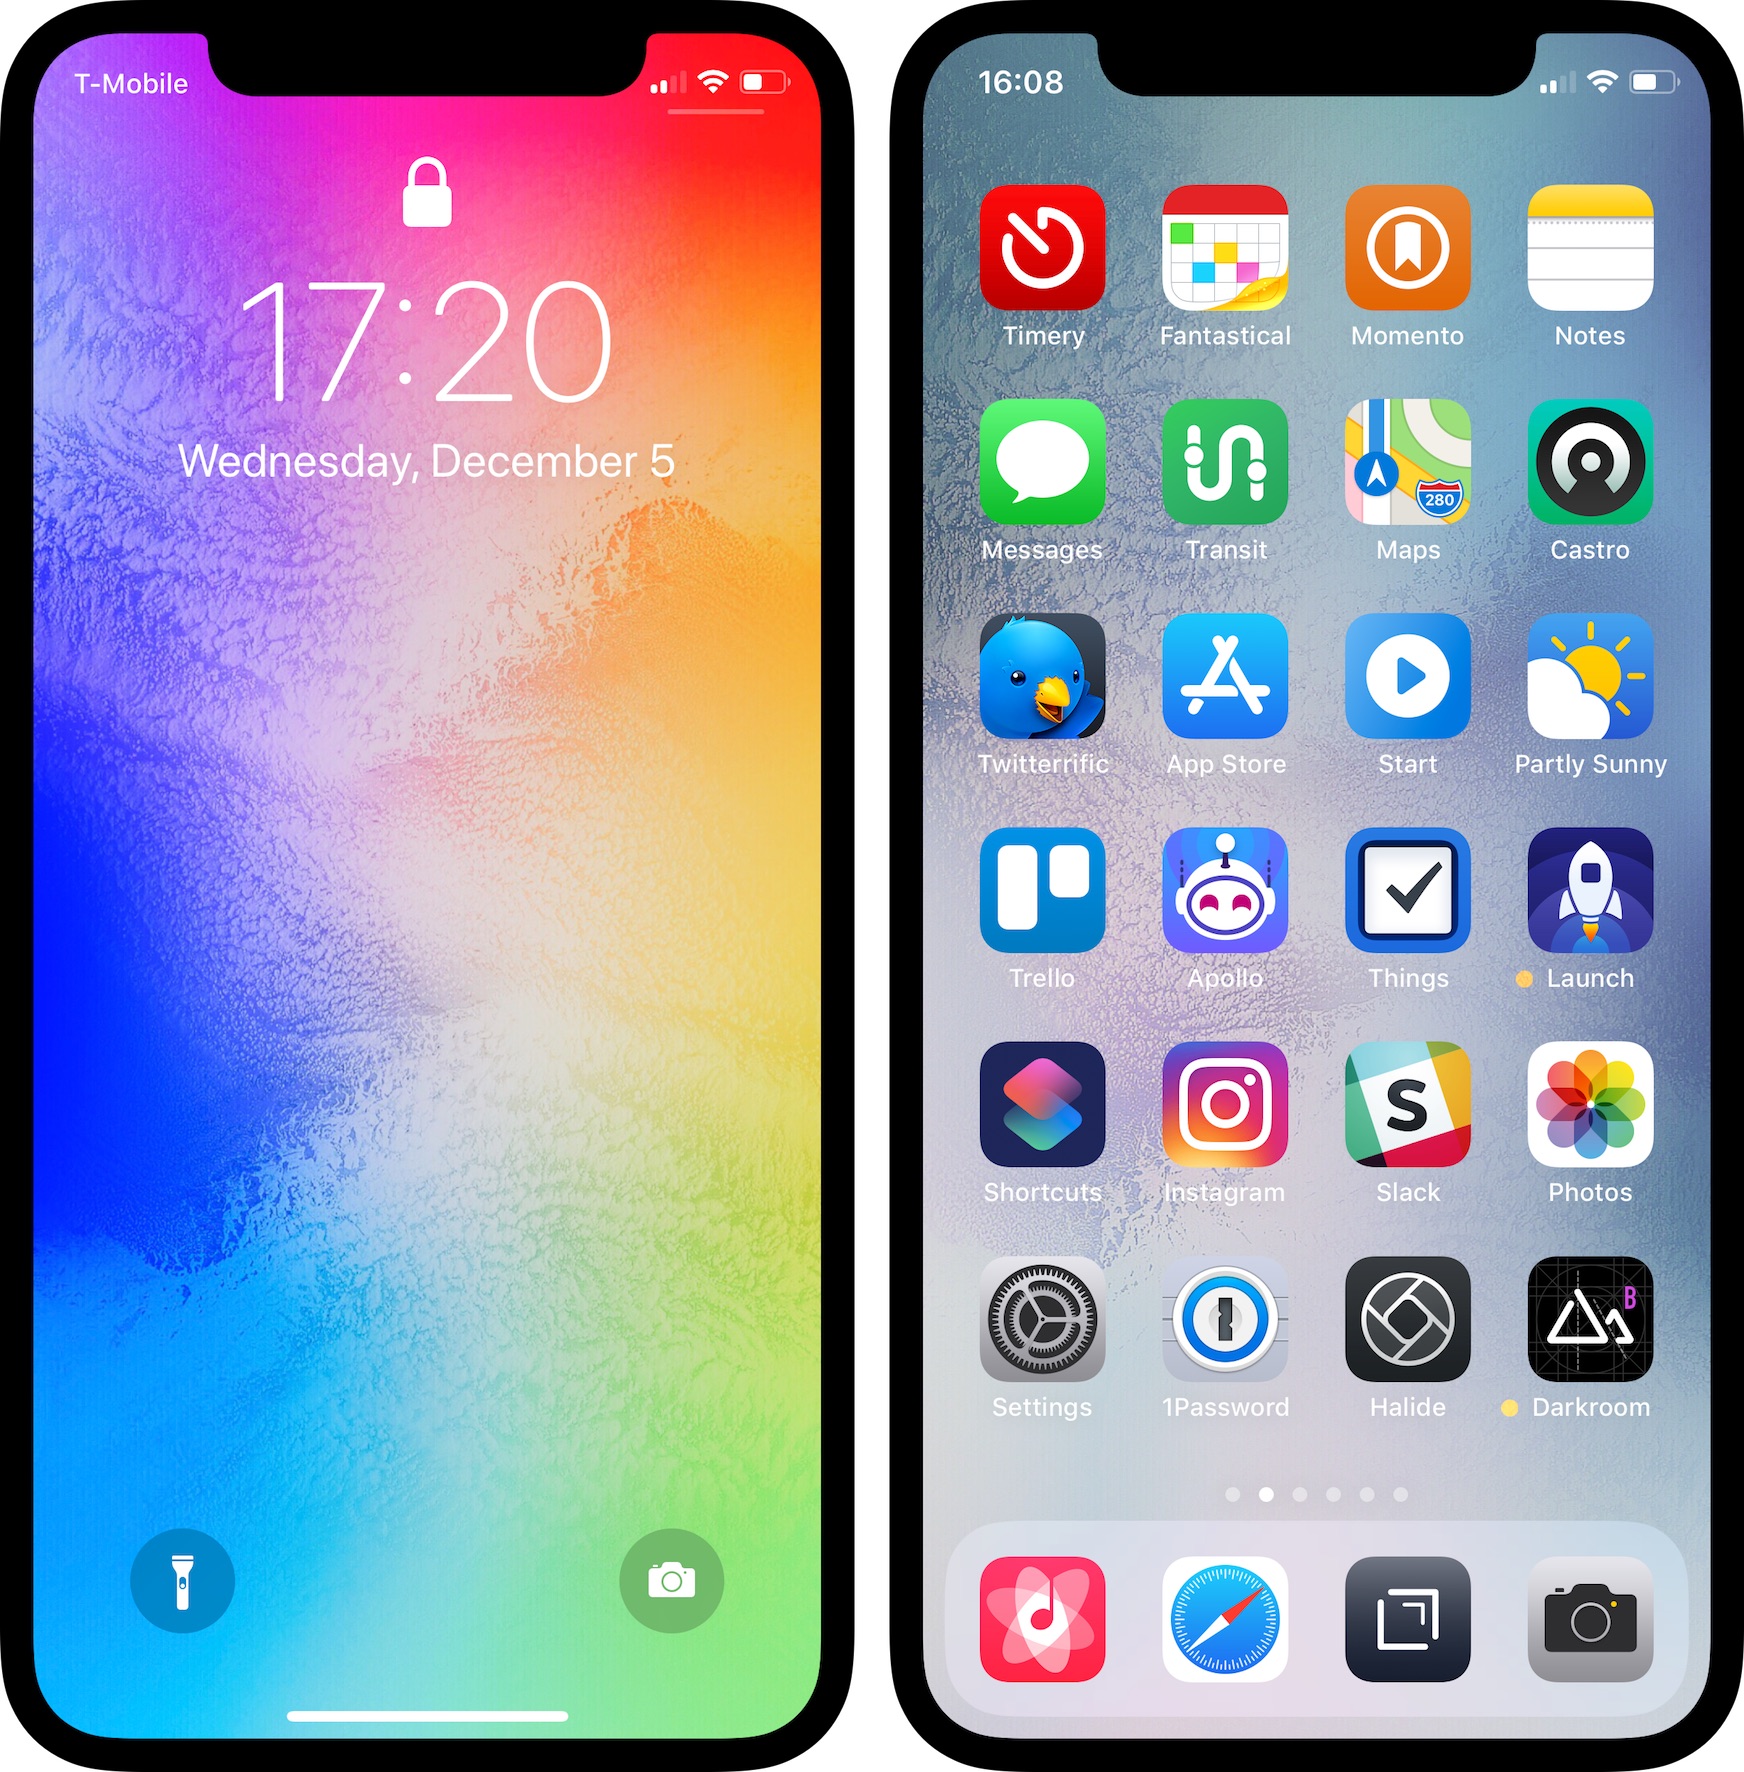
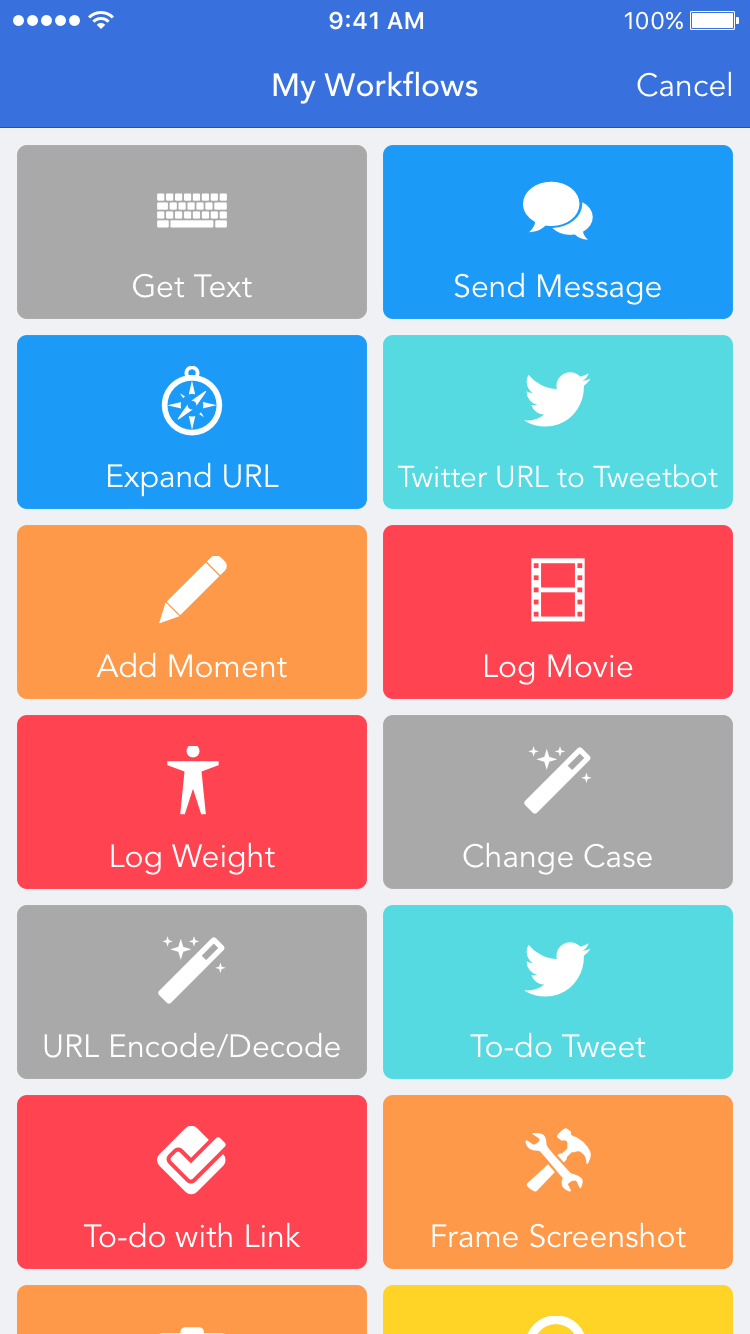
Here’s my Home screen as of December 2019. A while back I was inspired by the iOS Setups subreddit to arrange my apps by color, and I’ve stuck with it. I tried earlier this year going back to an arrangement where similar types of apps were grouped together, but I quickly reverted because color order is much more visually pleasing to me. So here it is (select to view a larger version):

home screen december 2019

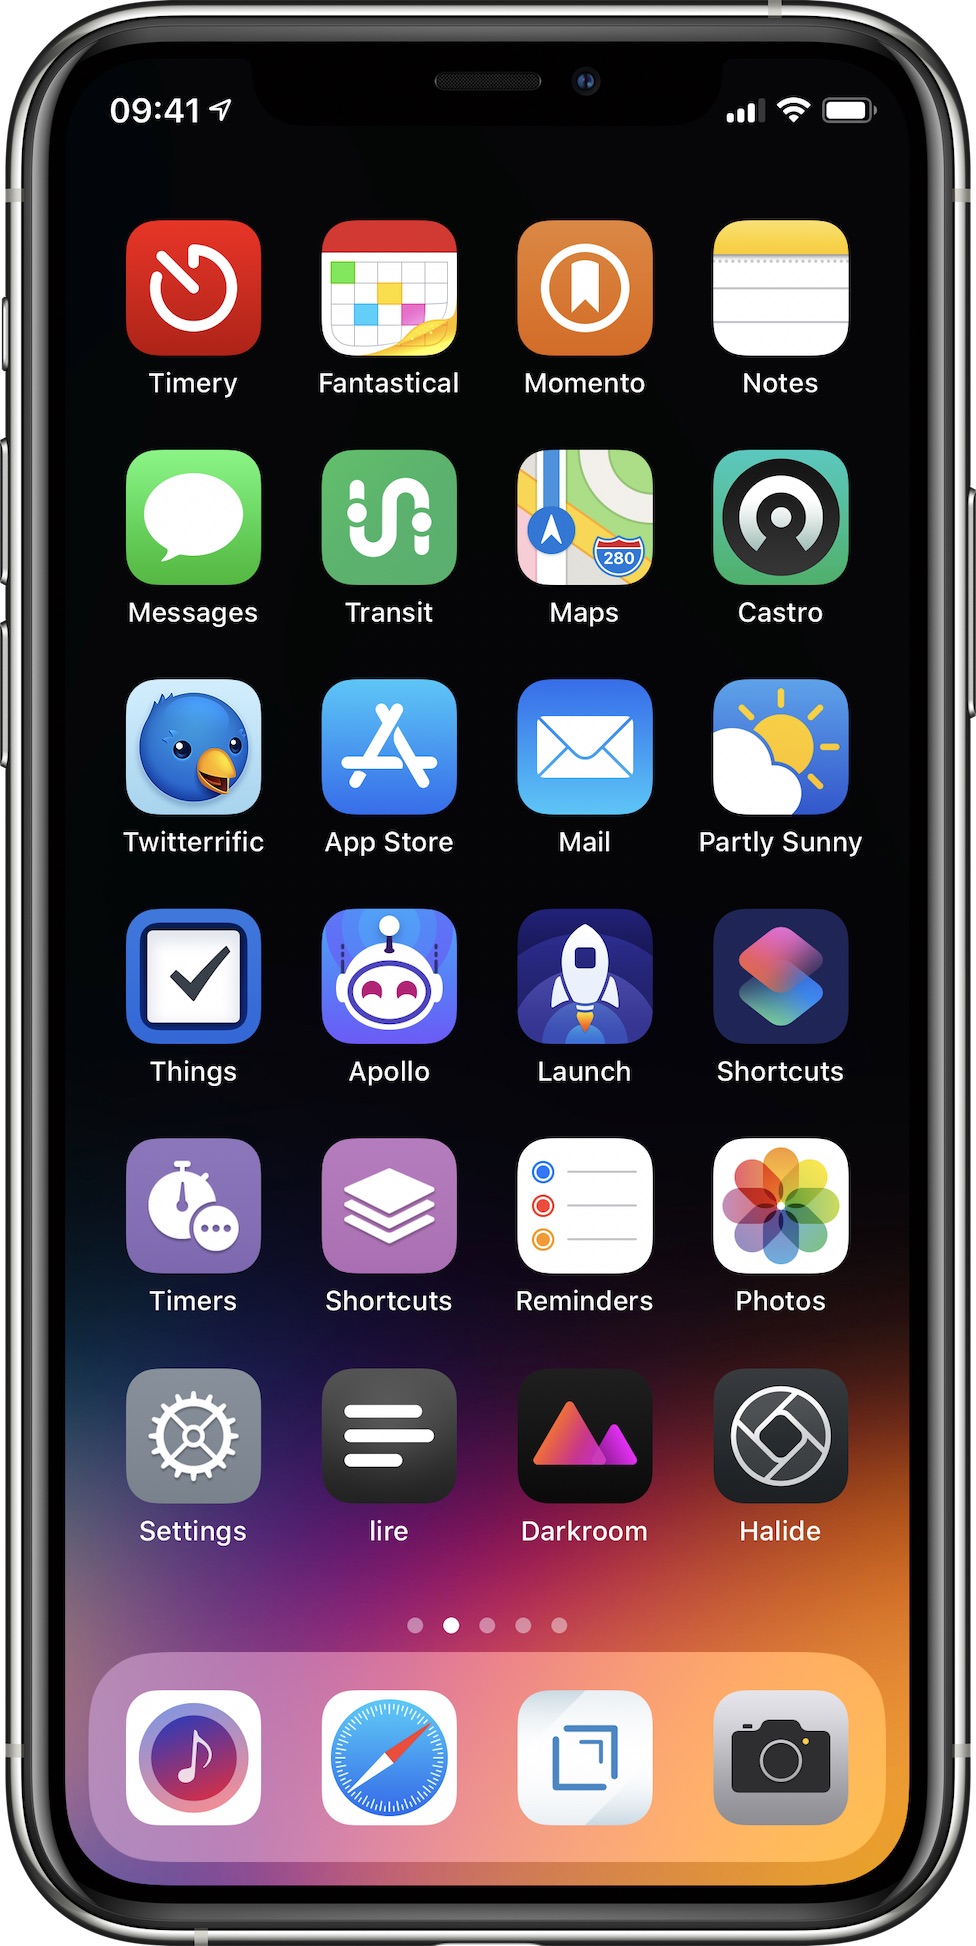
These are the apps I use the most or I want easy access to. My wallpaper is “gradient special edition 1” by AR72014. I like how the icons pop against the black background, but I like the color emanating from the dock. Below are a few notes on why I use these apps and what I like about them.

timery

Timery
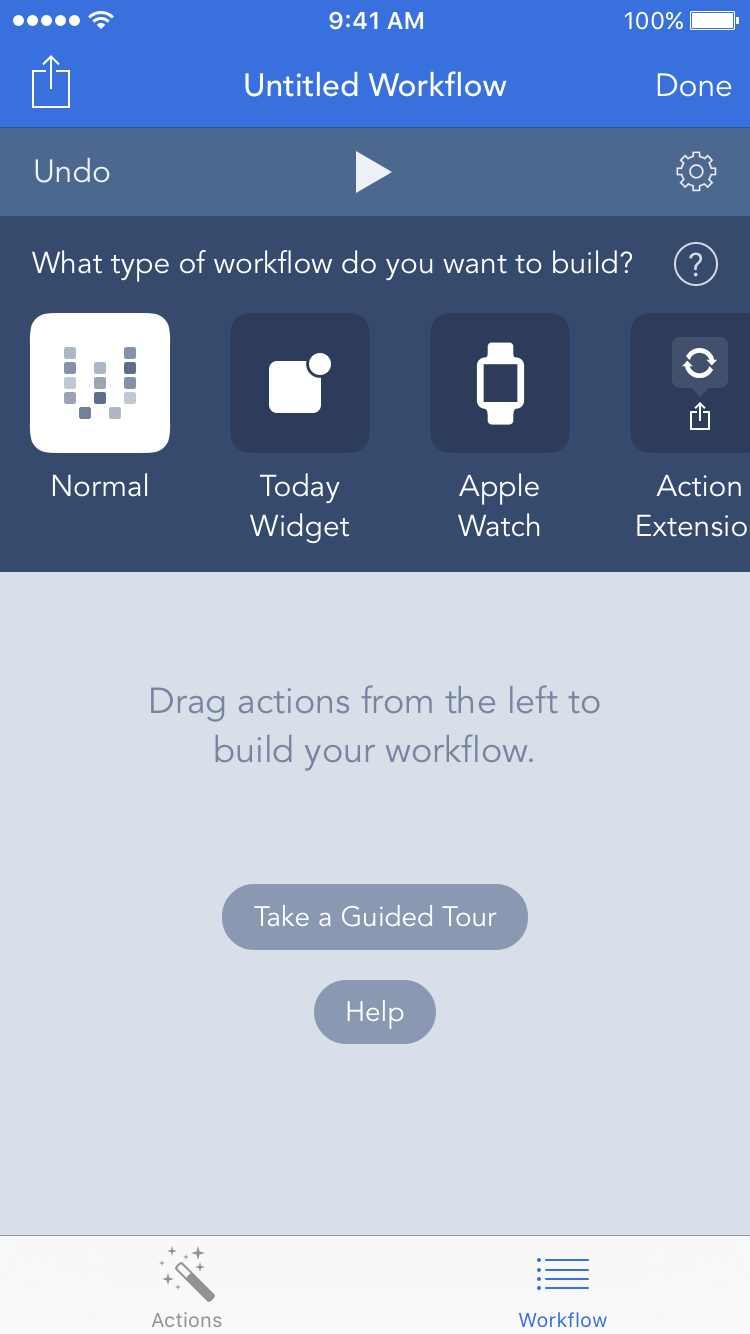
I use Toggl to track my time on various things. Originally, I used various Workflow workflows to interface with the Toggl API, but I eventually outgrew them, so I made Timery and released it earlier this year. It started as an app for me, but I’m so pleased to hear how it’s helped so many others besides me, and I continue to be blown away by the response to it. From starting favorite timers with one tap to managing time entries, projects, and tags to using Siri and Shortcuts to automate tasks, my goal was to make time tracking with Toggl easy.

fantastical

Fantastical
I don’t usually have many calendar entries, but when I need to add one, I enjoy Fantastical’s, well, fantastic natural-language parsing. And I like seeing both my calendar events and my reminders in the same view.

momento

Momento
This is a journaling app that collects manual thoughts and media and also automatically imports tweets, Instagram and Facebook posts, and other social-media feeds. I’ve been using Momento for almost ten years now, and looking back at memories and what I was doing, thinking, and even tweeting years ago is something special.

notes

Notes
I don’t do a whole lot of writing, so Notes is good enough for me. I appreciate my notes being available on all my devices and the easy sharing of notes if I ever need to.

transit

Transit
Despite living in the sadly car-centric Los Angeles, I regularly use the public transportation system, and I use Transit to help me navigate. Many public transit lines run infrequently or have earlier-than-ideal-end-of-service times, and Transit has some key features to help with that: its active-trip mode lets me know when to get off, whether or not I’ll make a connection, and what my ETA is so I can plan accordingly if necessary.
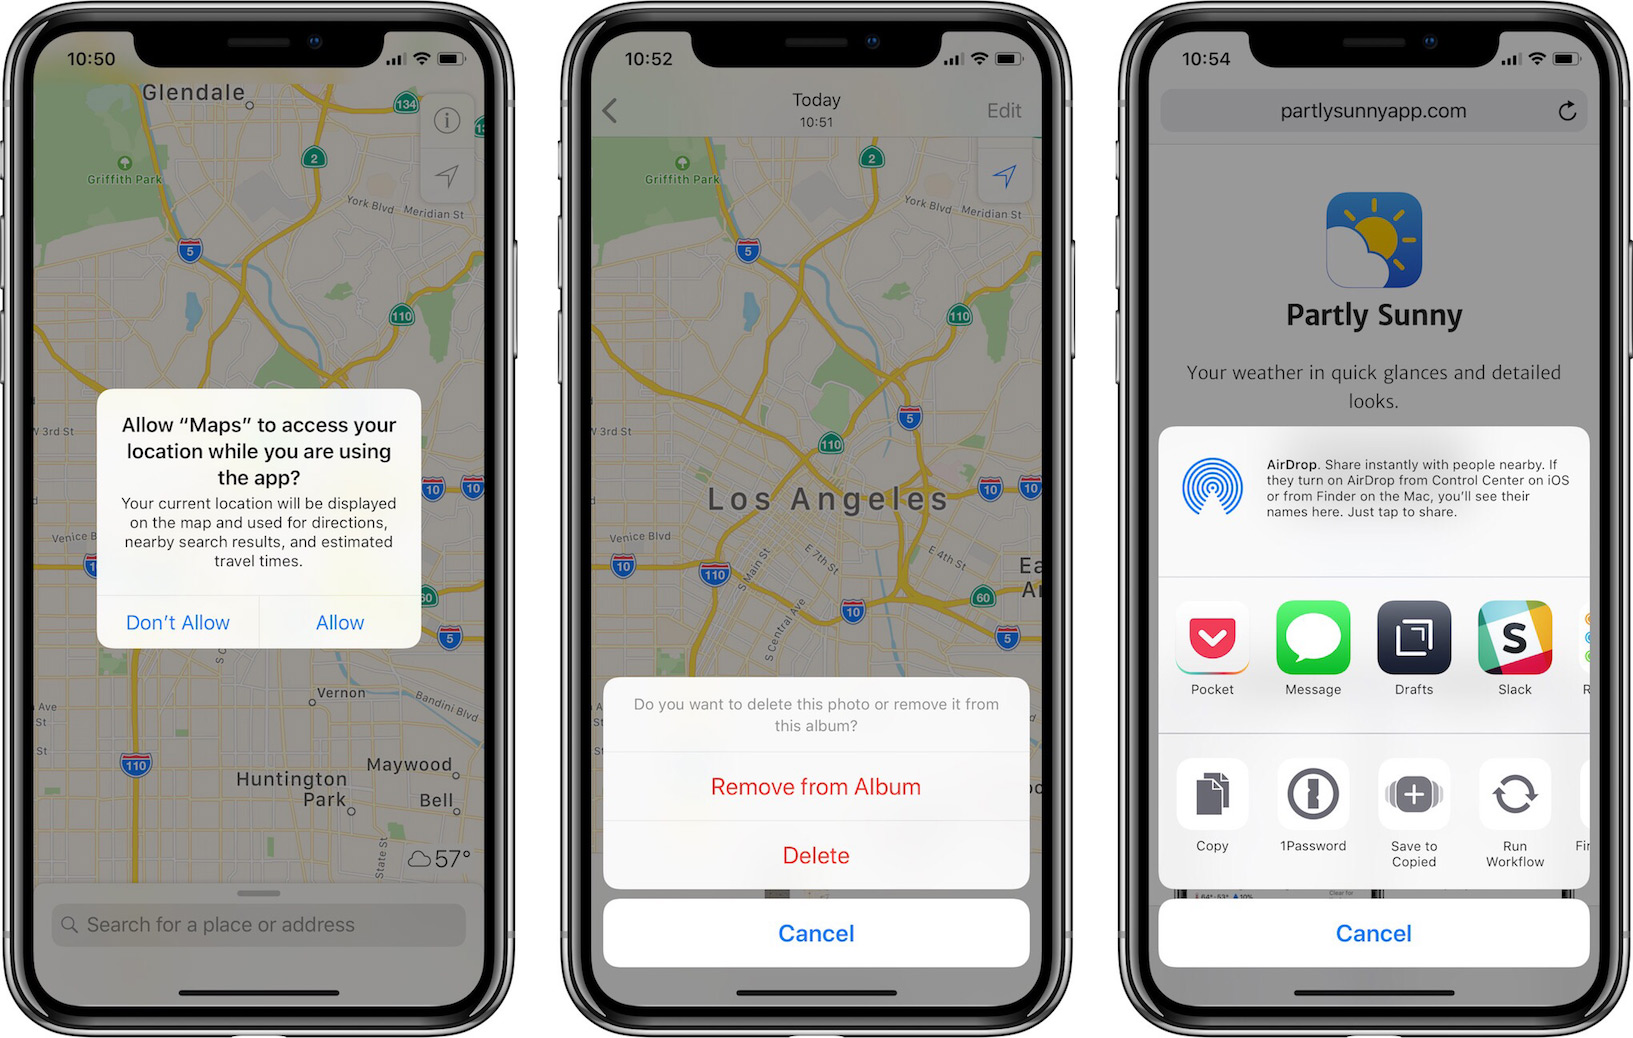
maps

Maps
Since I rarely drive, I mostly use Maps to look up points of interest and for checking traffic on major streets to help plan which public transit routes to take. But on those rare occasions I do drive, I appreciate the lane guidance and speed-limit icons as well as the turn-by-turn haptic feedback that I get on my Apple Watch. Also, I really dig the iOS 13 dark mode map.

castro

Castro
I’ve been using this as my podcast app for a while now. One thing in particular I appreciate is in the chapter list for episodes, I can tap the chapters to jump around as well as deselect them to skip certain chapters (especially useful to queue up what I’m listening to before I go for a run).

twitterrific

Twitterrific
I started using Twitterrific as an experiment a while ago, and it stuck. Some of the things I like about it: muffling people or things (unlike muting, which can be done too, I can still see a muffled person tweeted or a muffled thing was tweeted about, but if I don’t want to actually see the tweet, I don’t have to), synced feeds between my iPhone and iPad, permanent chronological feed, customizable tabs, and being able to create my own themes for the app. I’ve made a light theme, a dark theme, and a black theme to suit my tastes. Plus the icon is so darn cute.

mail

Mail
There are no perfect mail apps because perfect for one person is terrible for someone else. But Mail is good enough for me. While some of the interactions have degraded a bit in iOS 13 (I’m looking at you, swipe actions) and there is still room for improvement, I still would rather have my mail not routed through some third-party company’s servers.
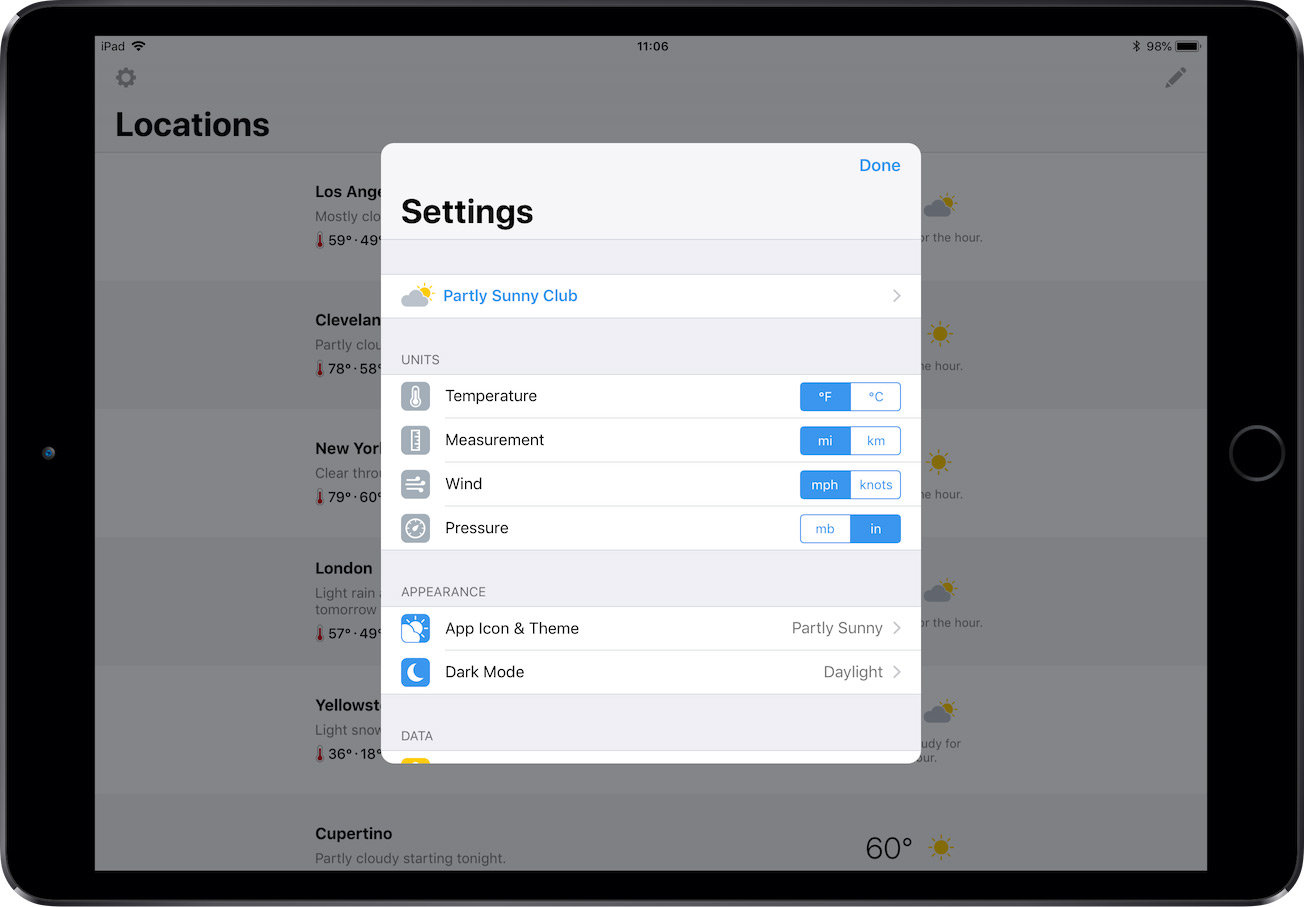
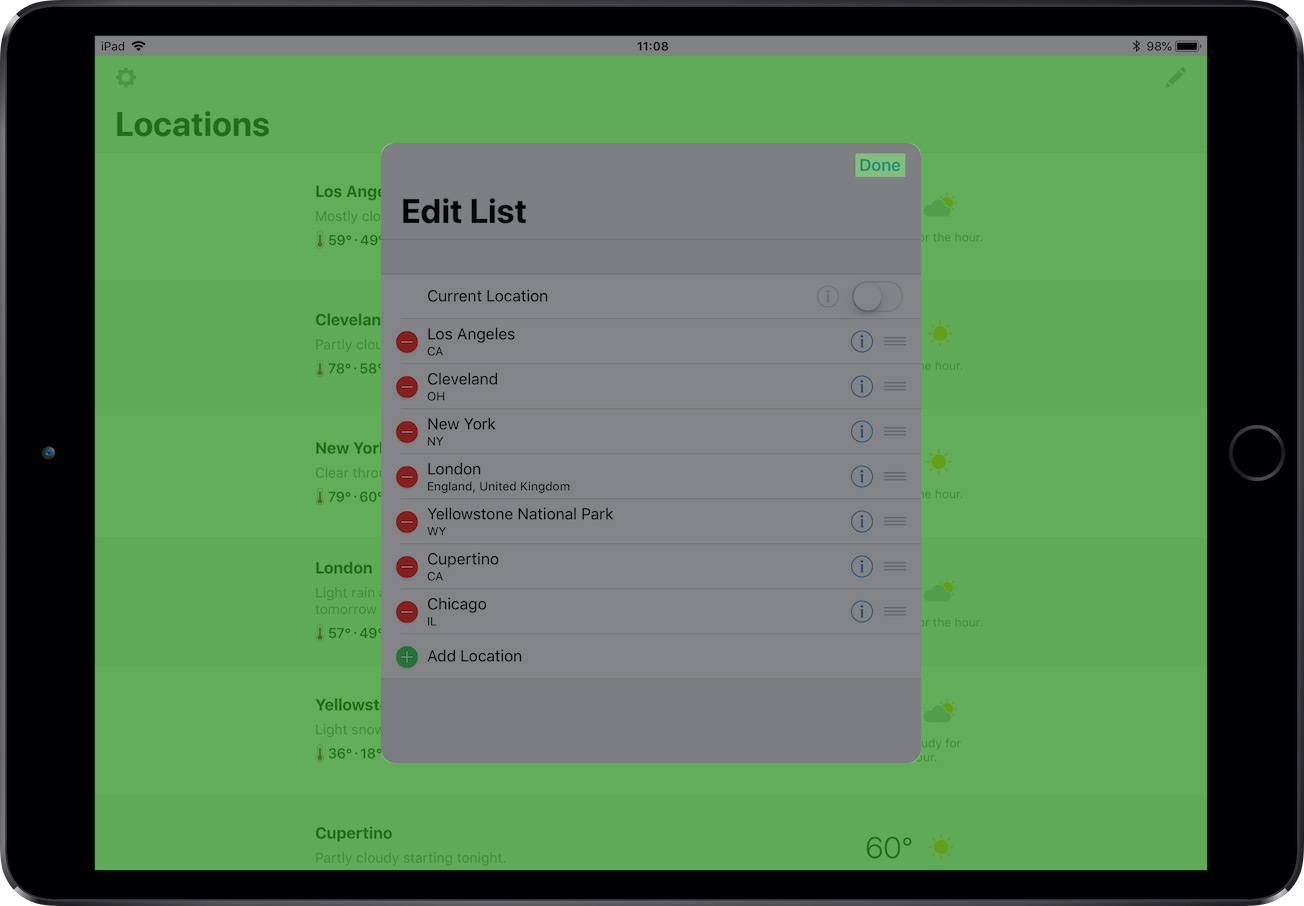
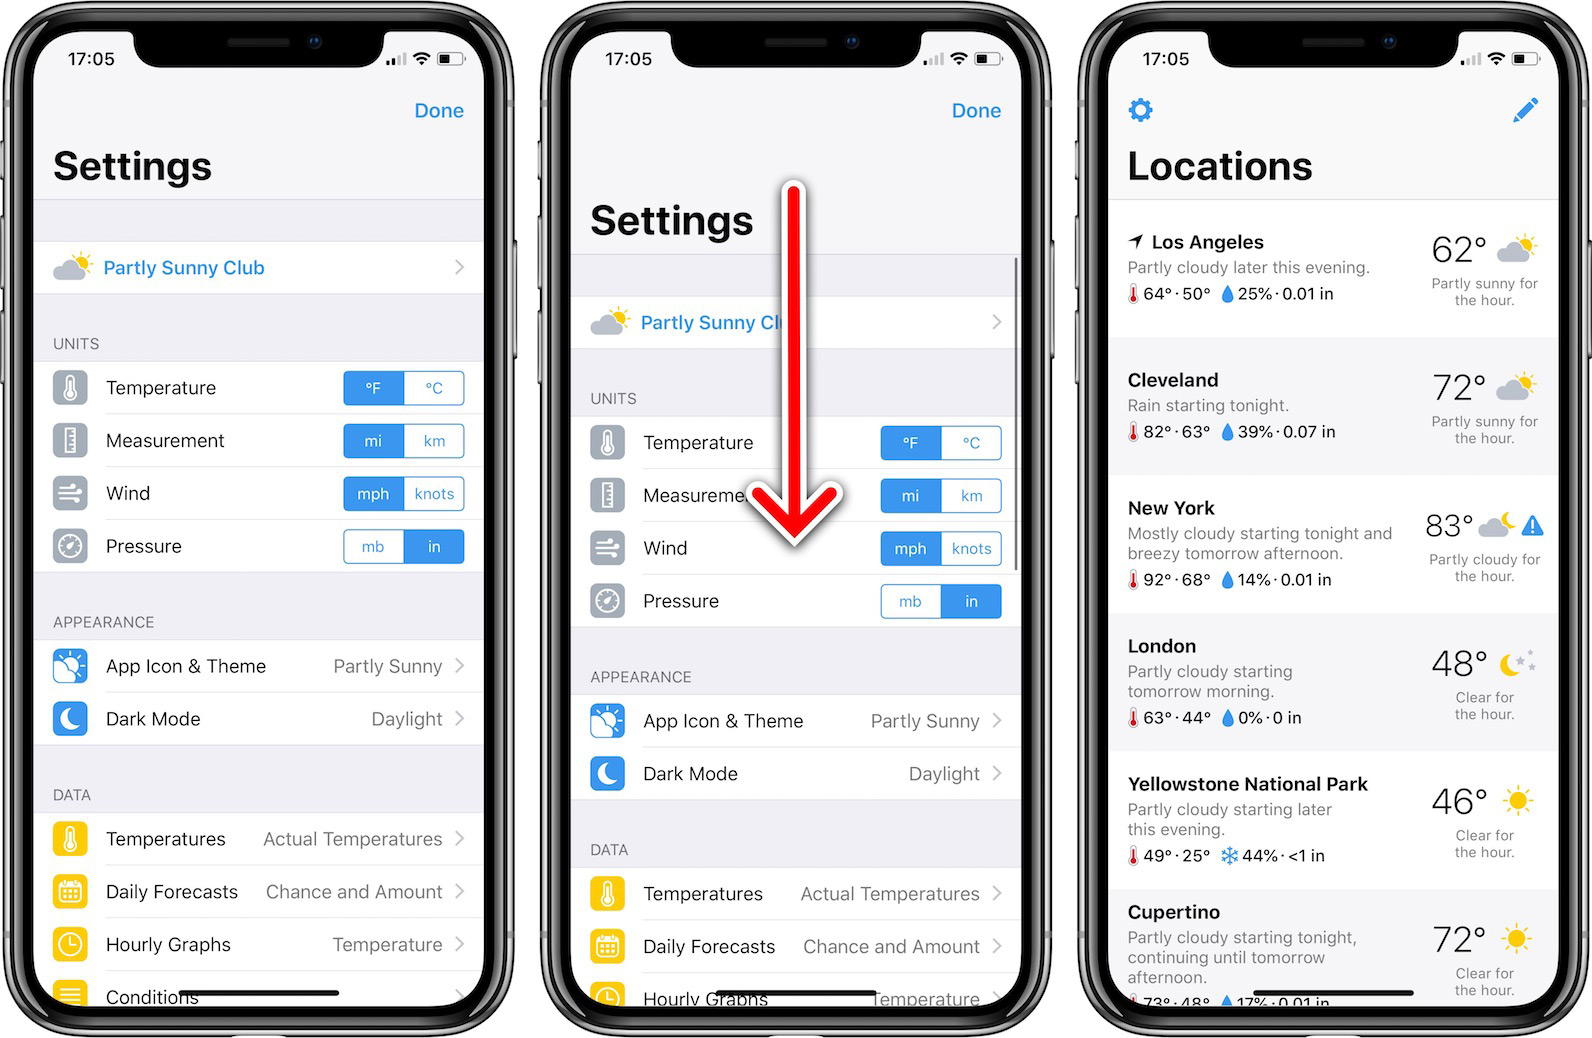
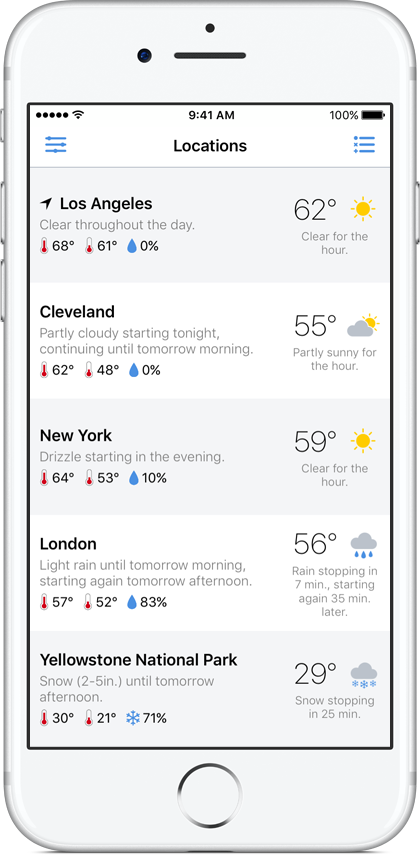
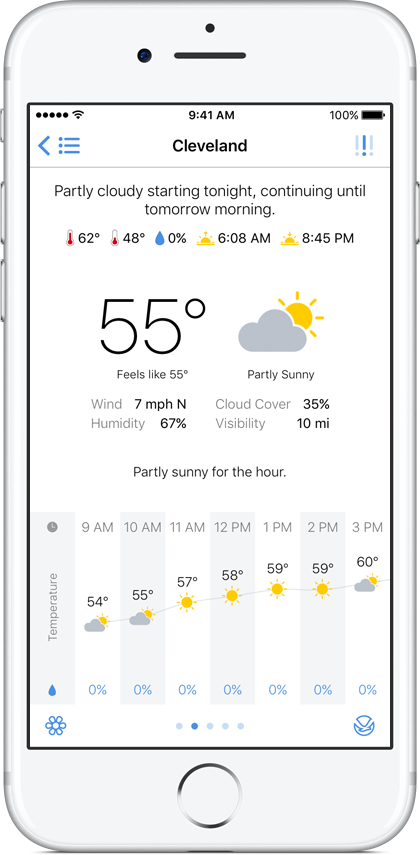
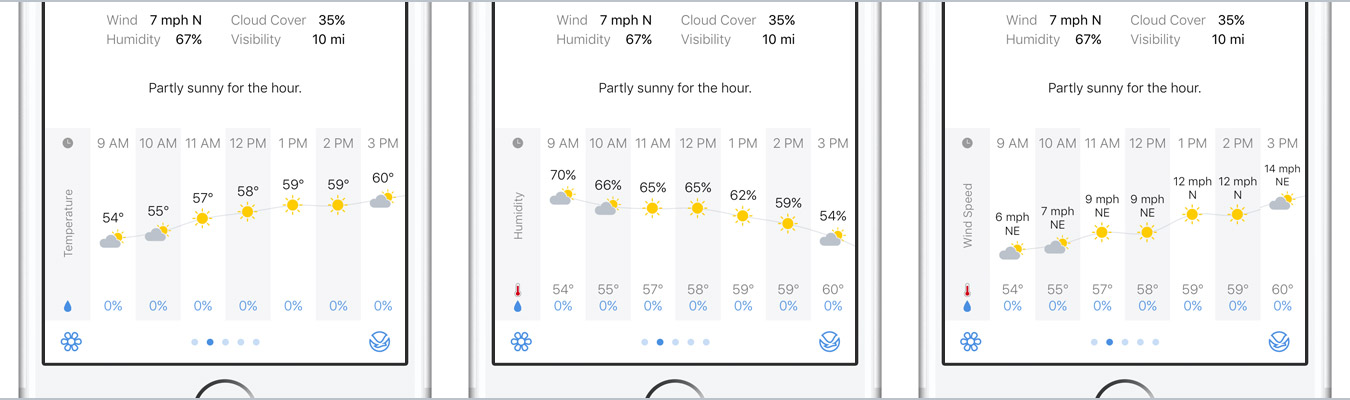
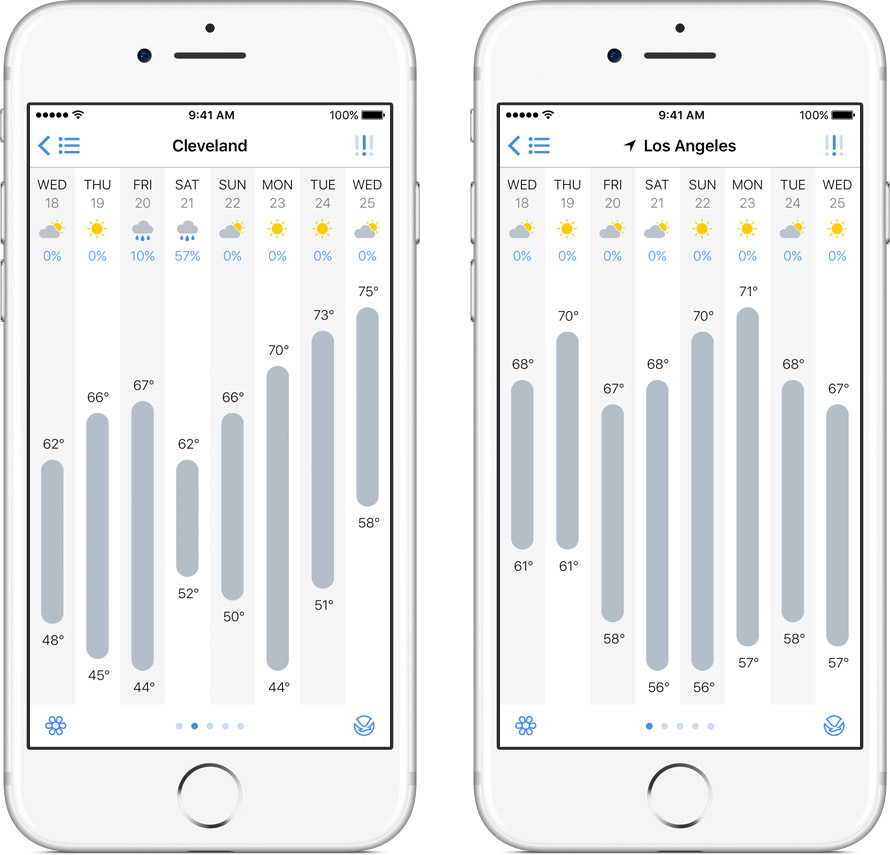
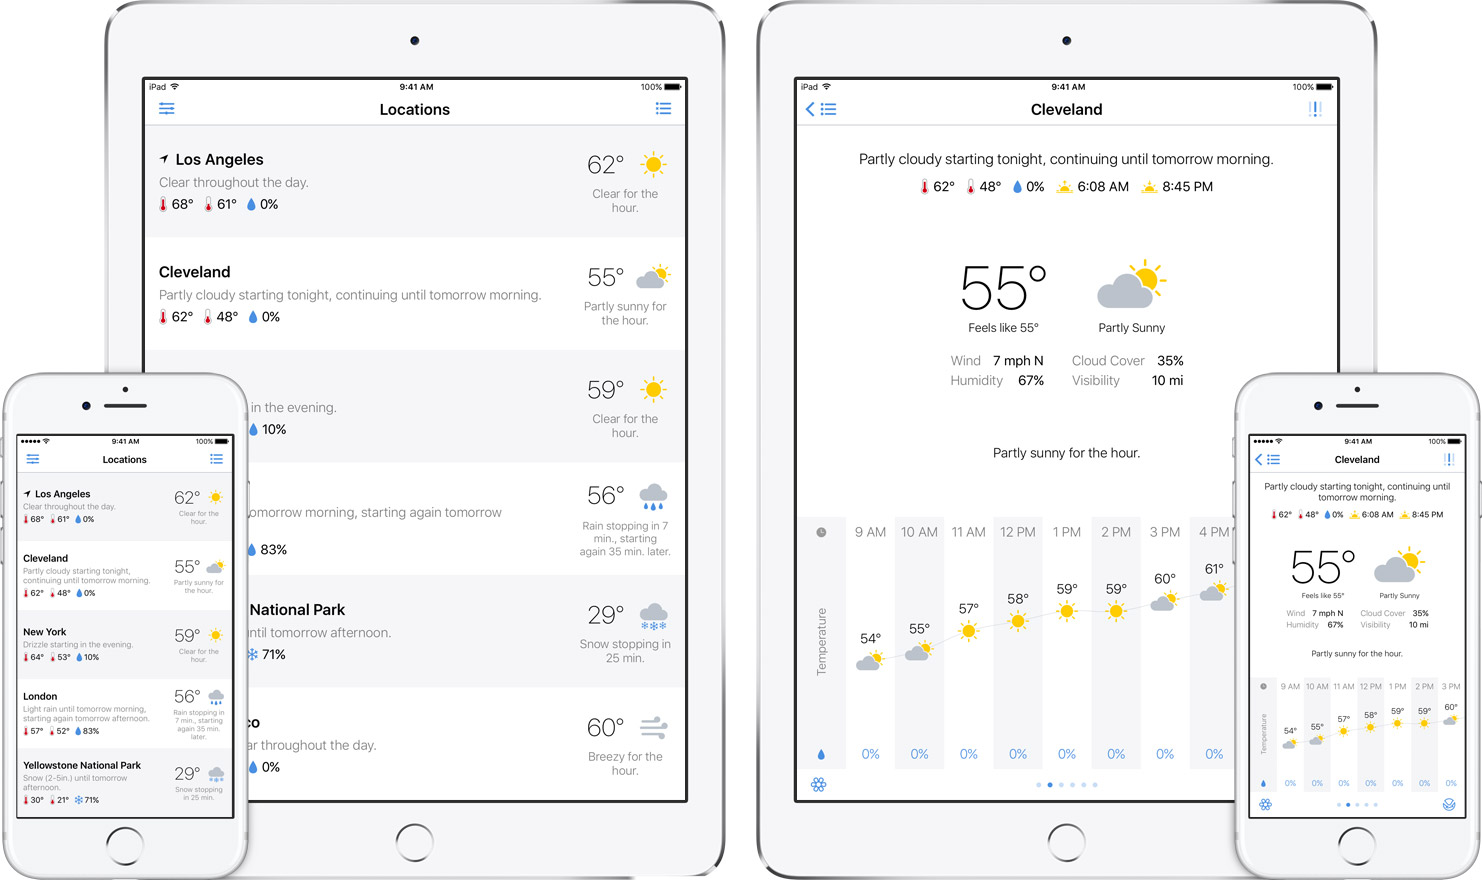
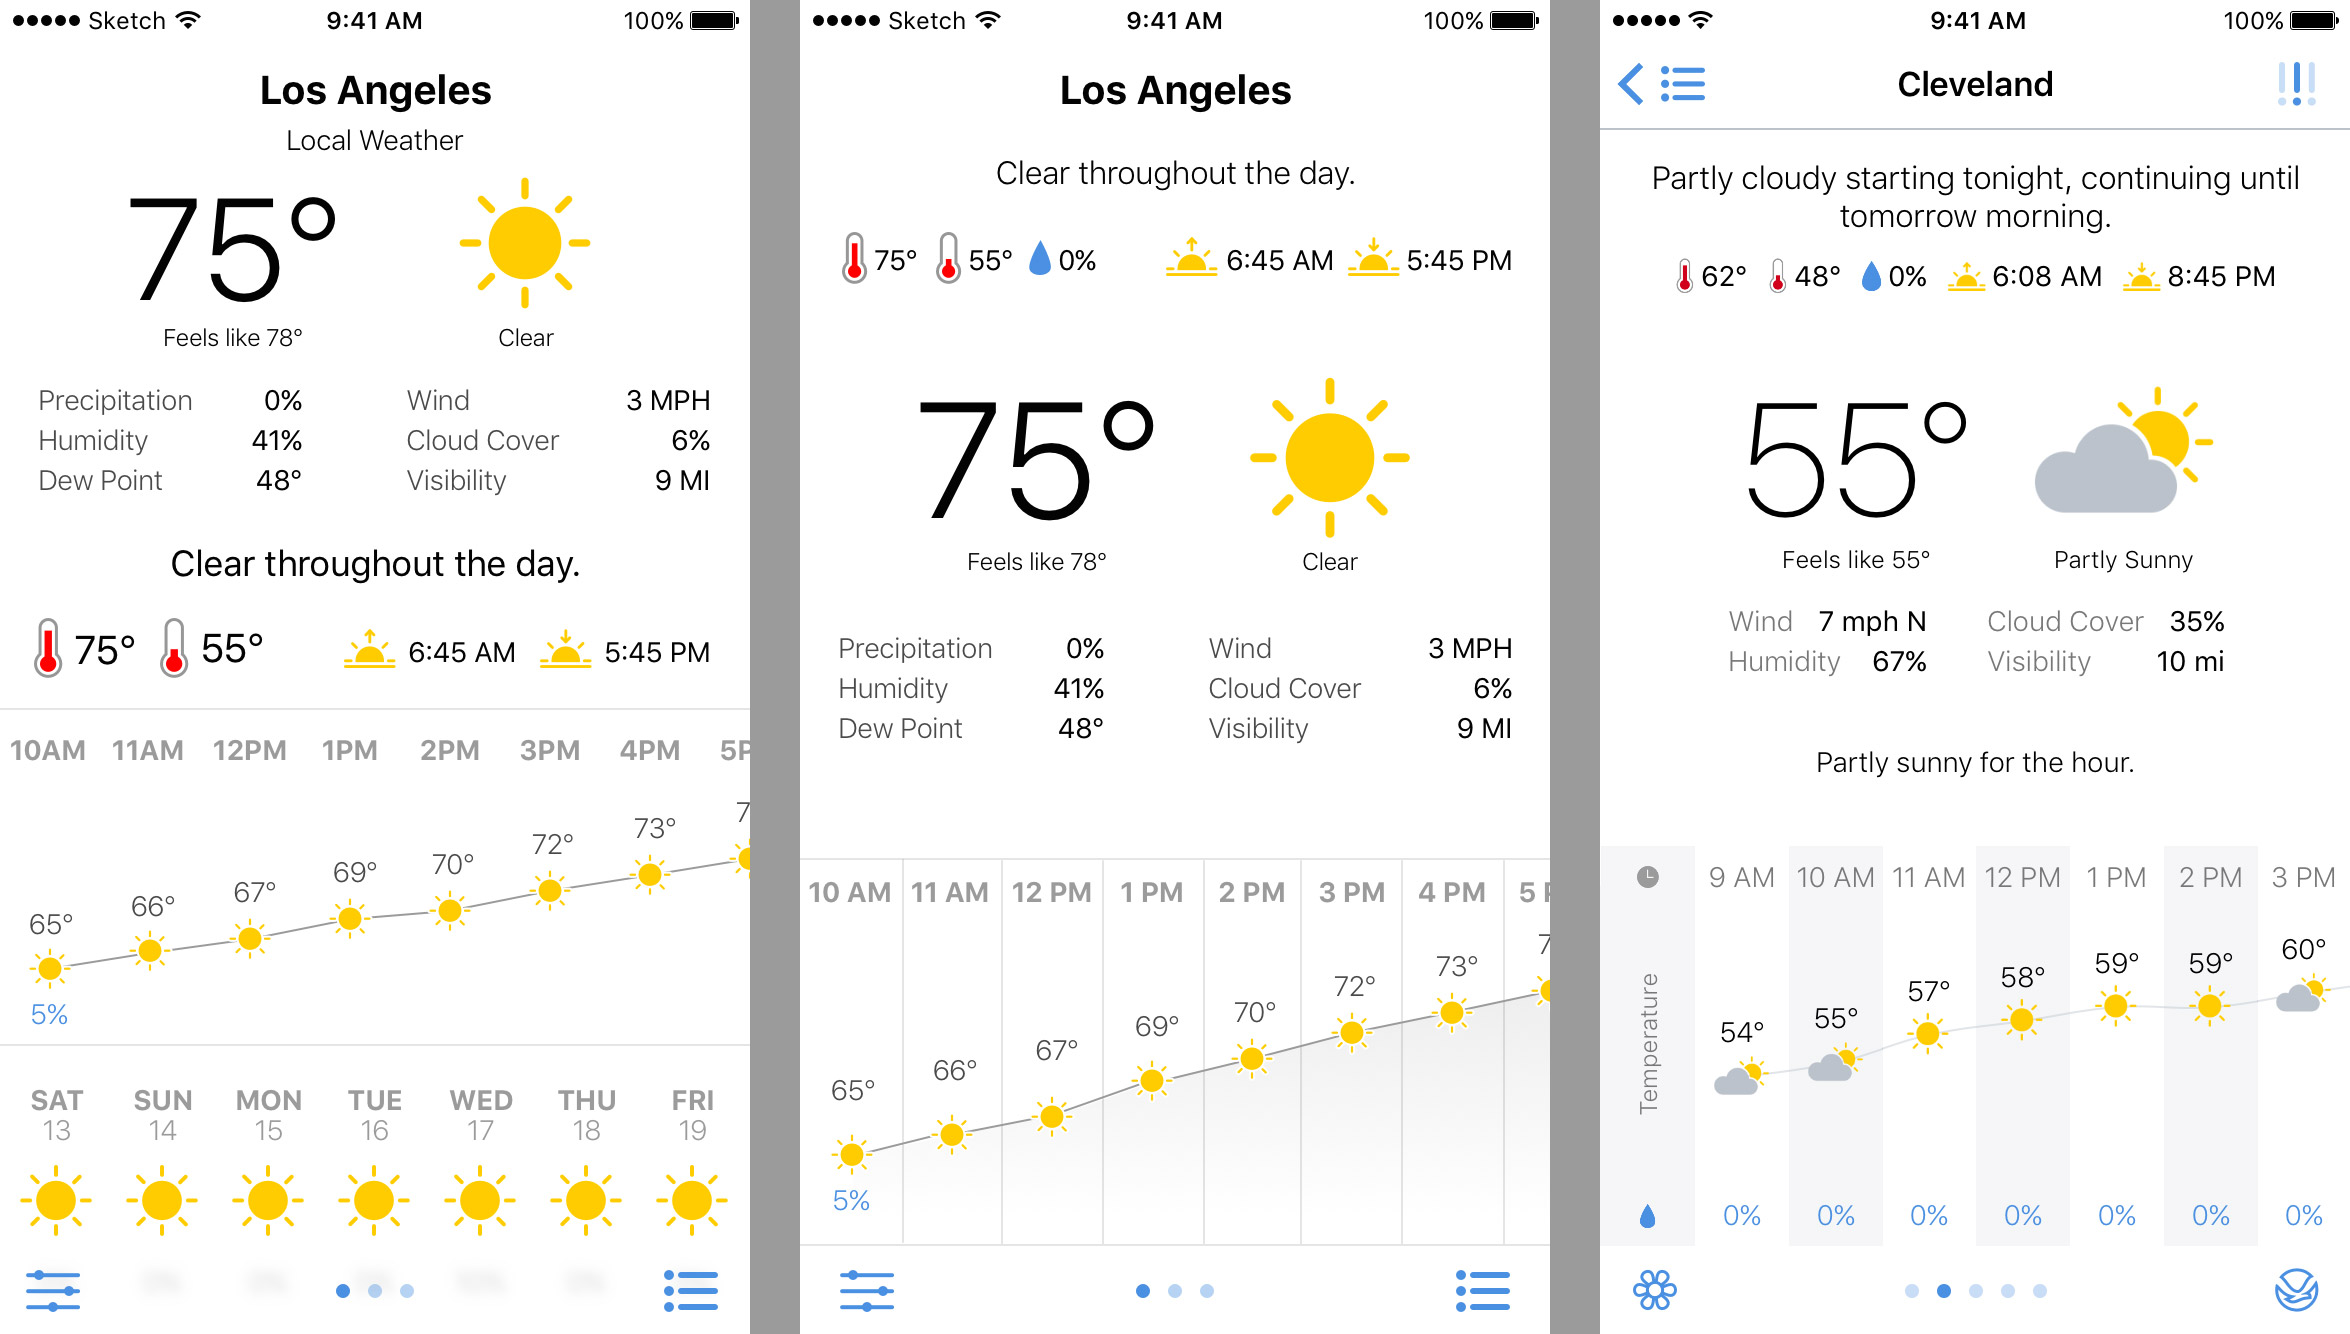
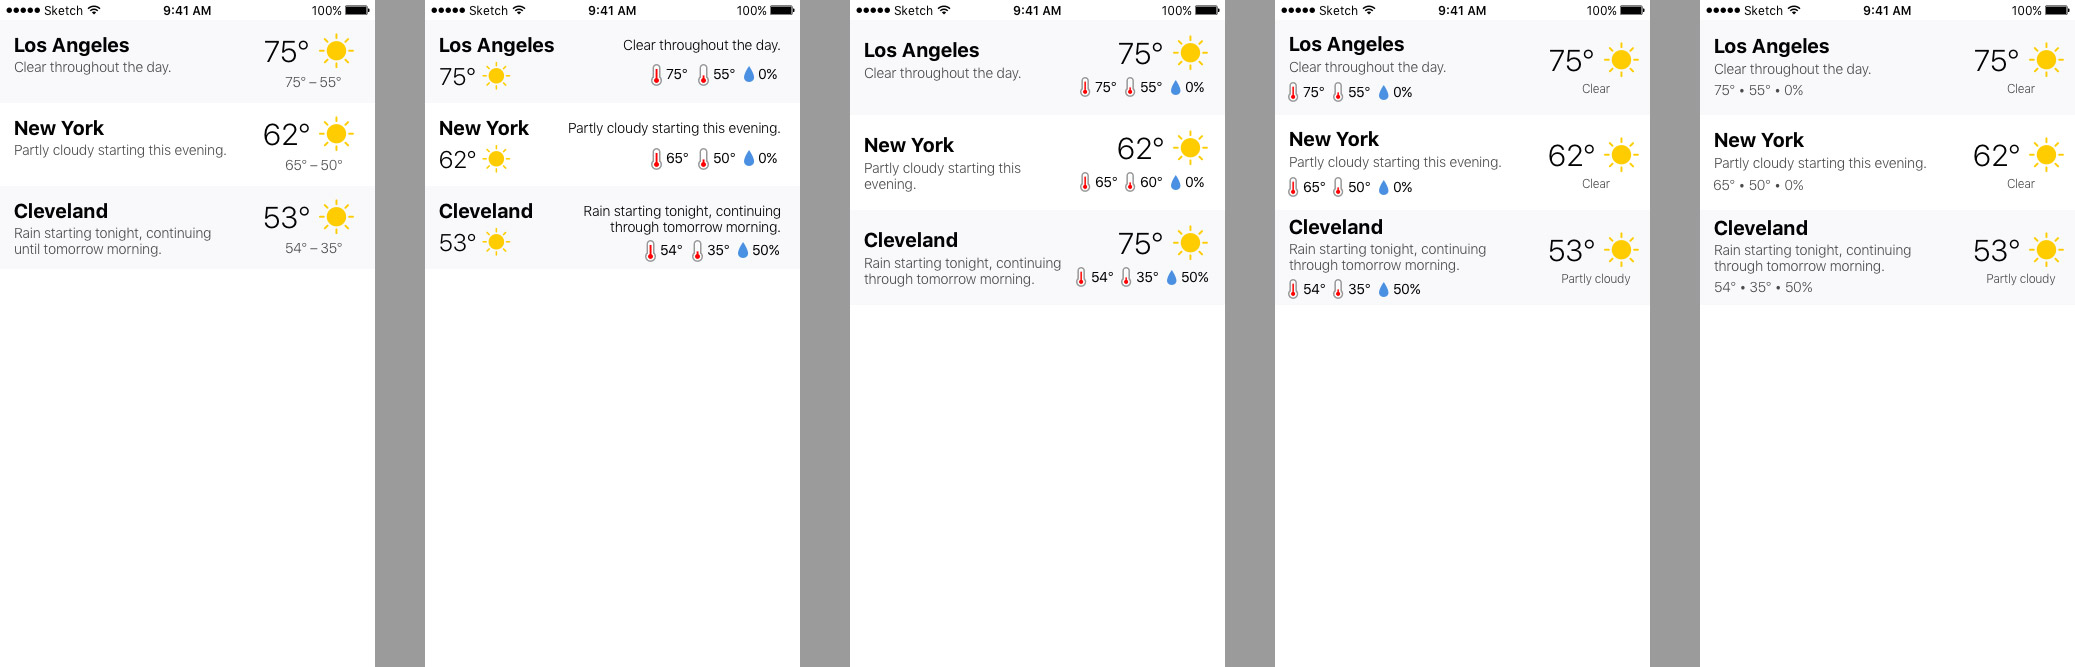
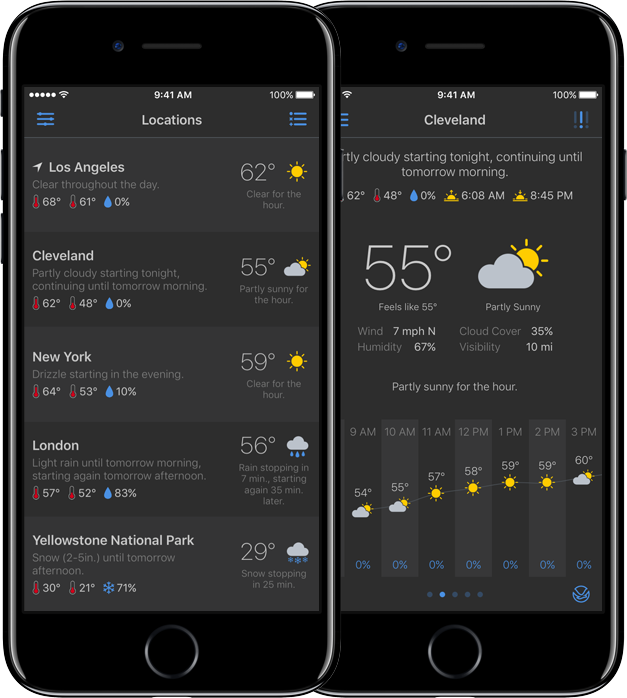
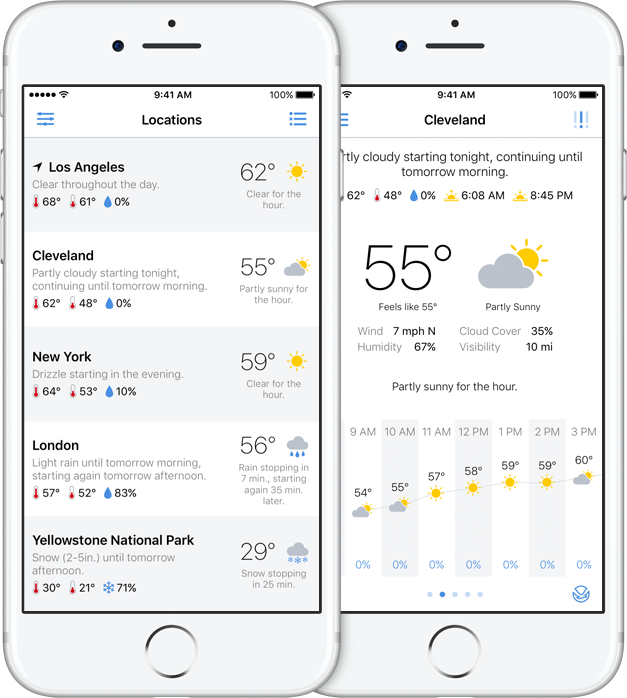
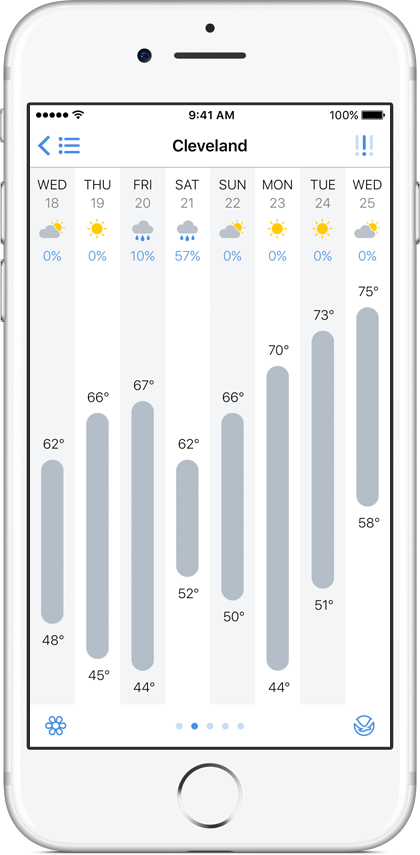
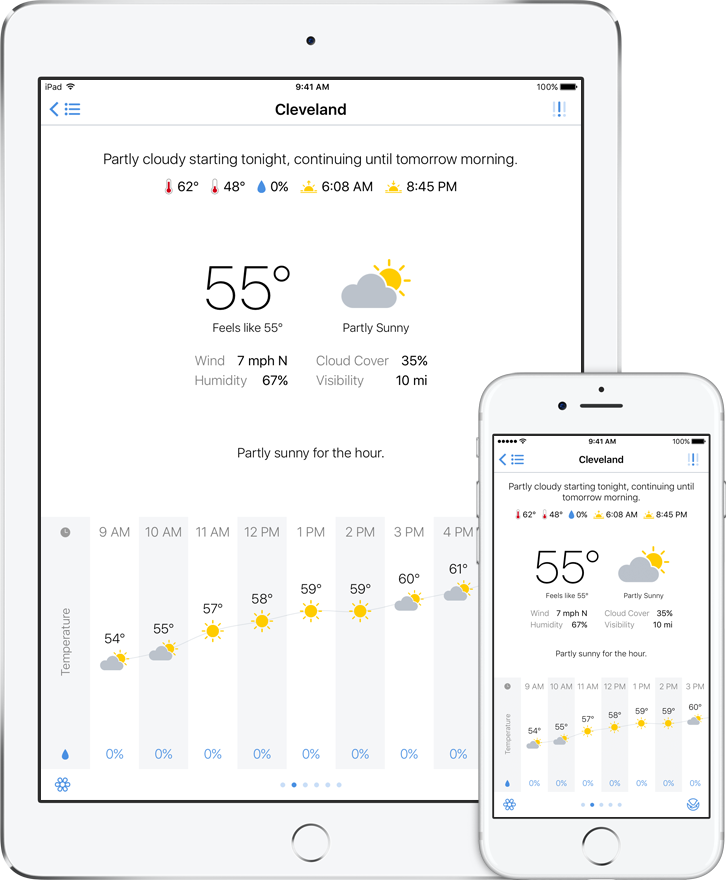
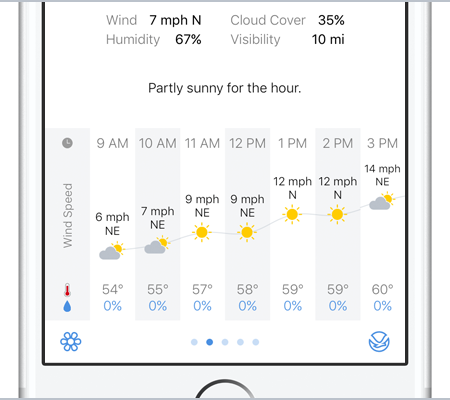
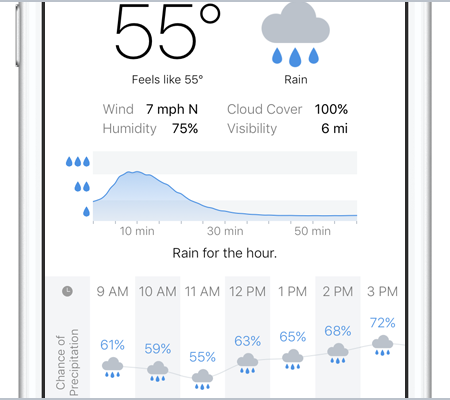
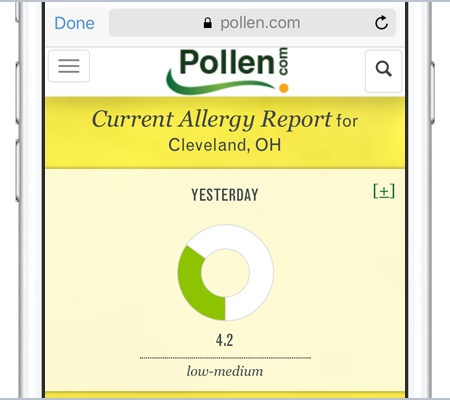
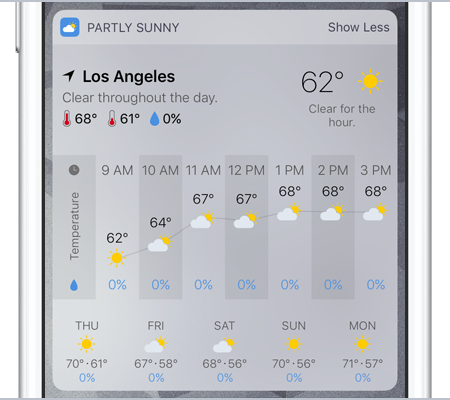
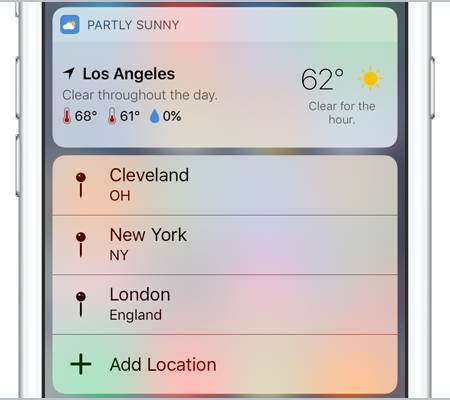
partly sunny

Partly Sunny
This is my weather app that shows quick glances and detailed looks at weather. I like having both a visual and textual representation of weather (having both graphs and written summaries), so both exist throughout the app. I’ve tried to design everything so the details are there if you want them but don’t get in the way if you don’t.

things

Things
I feel like every few years I reach a point with my to-do app of choice where I’ve put too many things in it that for one reason or another I keep putting off, and then I have to manage my to-do app more than I should. Eventually I give up and move to a new app. I’ve been using Things for a while, and have been enjoying it (though I wish I could complete a recurring to-do before it’s due!), but I think I’m at that point with it. iOS 13 came along with the big Reminders update, and I’m now experimenting with using Reminders as my to-do app. I still really like Things and its design, so I’m not sure how this will play out. Perhaps I use Things more for project tasks and Reminders more for day-to-day stuff. We’ll see!

apollo

Apollo
With its many customization options, gestures, and the jump bar, Apollo is such a delight to use (it’s easy to tell much thought and love has been poured into the app). And it feels at home on iOS (always a bonus for me when apps do).

launch center pro

Launch Center Pro
Though Shortcuts, widgets, and Home screen quick actions have largely taken over what I previously used Launch Center Pro for over the years, it’s still great for launching into deeper parts of apps. And usually a few times a day I’m launching other apps from the app-icon widget.

shortcuts

Shortcuts
Shortcuts is so integral to my day-to-day iOS usage I can’t imagine iOS without it now. From previewing my day and the weather tomorrow to adding reminders to adding device frames for screenshots to presenting menus to start time tracking and check my tracked times, the automations I’ve set up save me so much time and effort.
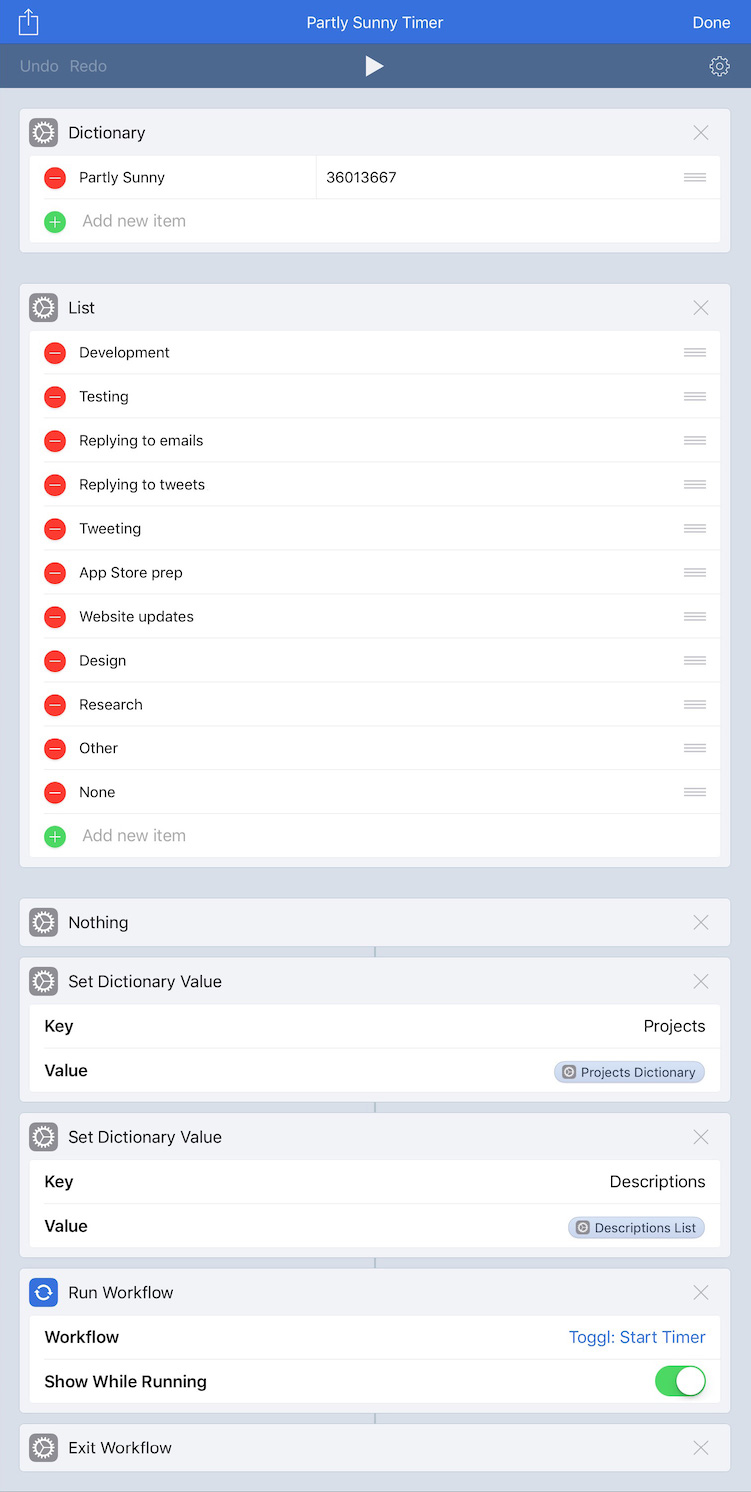
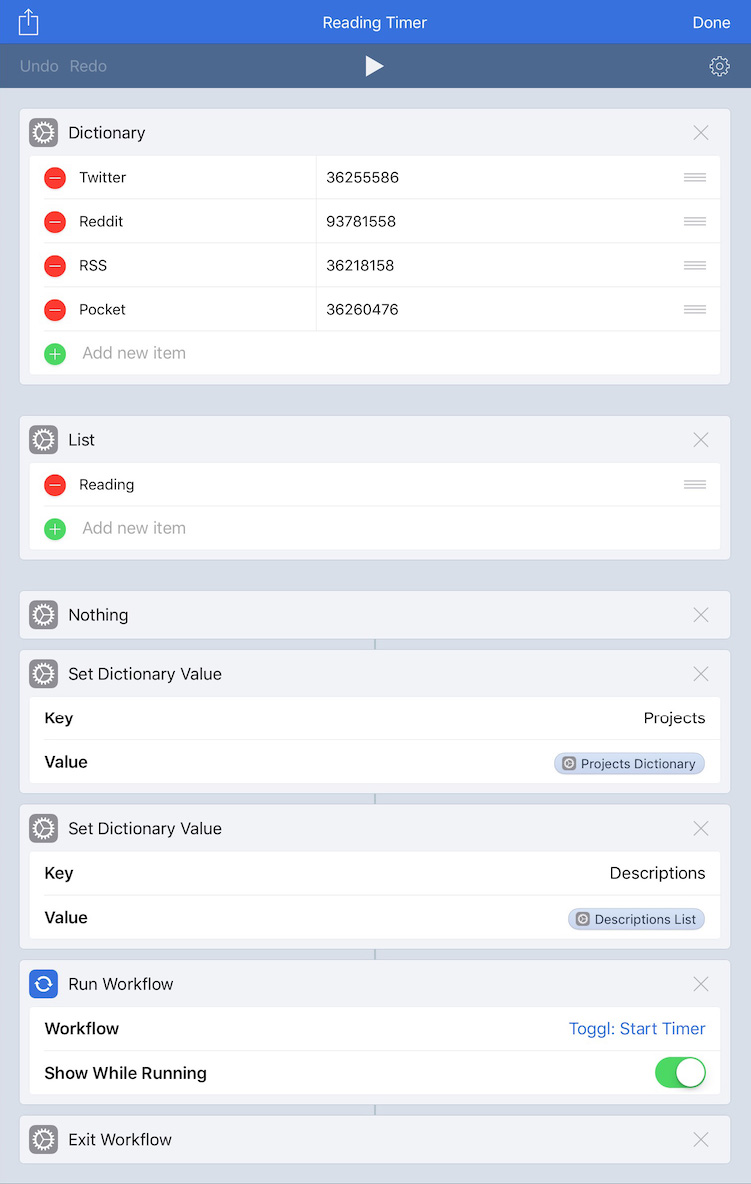
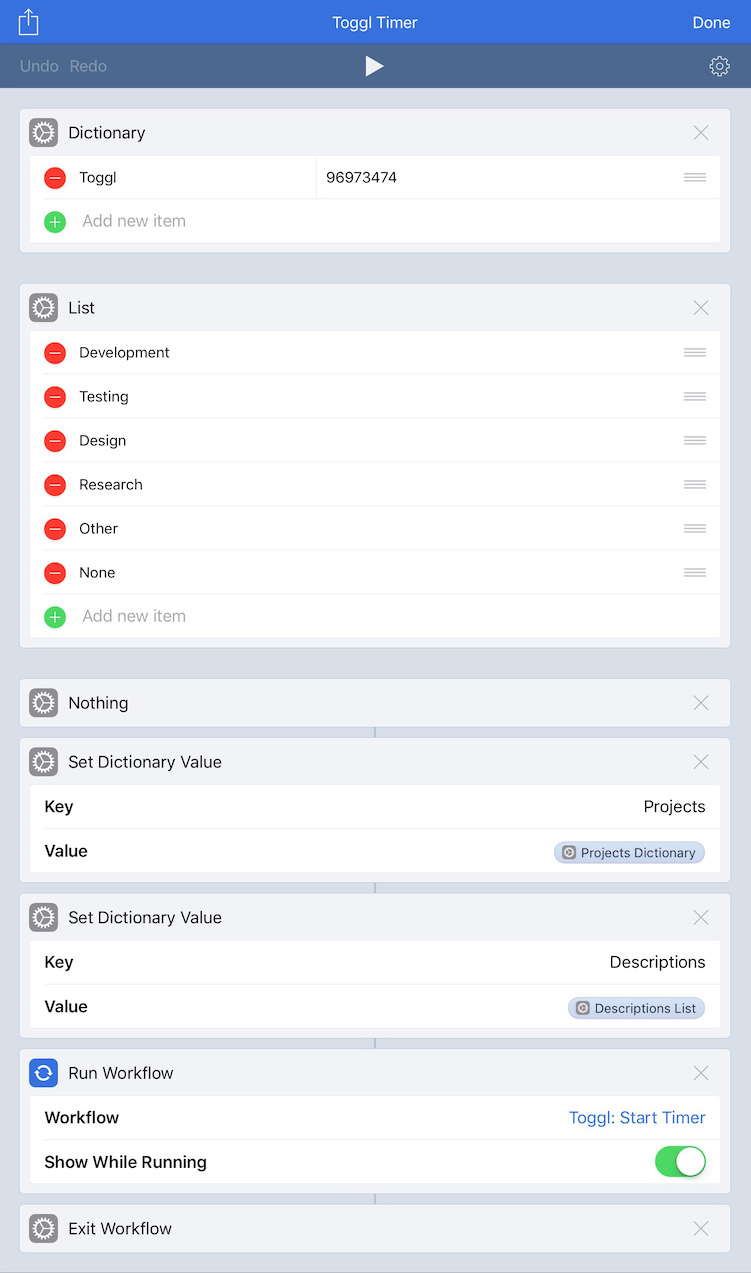
timers

Timers
As mentioned at the start of this, I’m experimenting with having launcher shortcuts on my Home screen. This particular shortcut shows me a menu of projects I choose from, and depending on my choice, it runs other shortcuts to show another menu of things I work on for the chosen project. Once I’ve made my selections, this shortcut system uses my selections to fill in parameters (huzzah to iOS 13 Shortcuts parameters!) in a Timery action to start a time entry. This shortcut as well as the other two use icons from the MacStories Shortcuts Icons.

shortcuts

Shortcuts
Another shortcut launcher. This one presents a menu of other shortcuts I use frequently. When I select one, it runs that shortcut.

reminders

Reminders
As discussed with Things, I’m experimenting with Reminders in iOS 13. While of course there are still improvements that can be made (I’d like to see better organizing & grouping in the Today list and have more robust Reminders actions in Shortcuts (why can’t I set a due date without a time?) for example), this is a big and welcomed change from the previous version of the app.

settings

Settings
Another shortcut launcher. This one is adapted from Federico Viticci’s Settings launcher he built after finding the URL schemes to launch into specific menus and submenus throughout Settings. My tweak (more on this below) is to show icons in the menu Shortcuts presents.

lire

lire
My RSS client of choice. I’m partial to lire because of its text previews in each subscription’s list. Plus it feels right at home on iOS.

darkroom

Darkroom
A polished, powerful photo editor. I appreciate being able to copy the edits from one photo to another so if I’m editing multiple photos taken in the same environment, I don’t have to make my adjustments on the first and then repeat them all on the others.

halide

Halide
A polished, powerful manual camera app. One of my favorite features is when in manual-focus mode, I can turn on highlighting of what’s in focus in the frame—immensely helpful when I’m trying to compose a shot with a particular thing in focus. Something I like about Halide in particular over other manual camera apps is that it doesn’t overwhelm me. Some manual camera apps have so much going on they become intimidating or convoluted. But Halide keeps things simple while still being powerful.

And in my Dock:

marvis

Marvis
I maintain a local library synced from my Mac, and since the focus of Apple’s Music app is on Apple Music, it isn’t for me. I want faster access to playlists, albums, etc.—what used to be in tabs in Music. So I’ve been using a third-party music app for several years. I had been using Cs Music Player (formerly Cesium), and I still like it. For the past couple months or so, I’ve been trying out Marvis. I particularly like the home screen with its customizable content and layout. From changing how views are displayed to how lists are sorted and what metadata is displayed, customization is at the forefront in the app.

safari

Safari
If you hadn’t gathered from Notes, Maps, and Mail, I’m all-in on the Apple ecosystem, and that, of course, includes my browser. The privacy focus, content blockers, Keychain sync and auto-fill, 1Password auto-fill, synced bookmarks, showing open tabs across my devices, and more keep me on Safari.

drafts 5

Drafts
This is my go-to app for jotting down a quick note or writing longer texts that I later plan on doing something with or sending somewhere else. I often write tweets and tweet threads in it, and I wrote most of this post in it too. And I love having my drafts available on Mac now too.

camera

Camera
I’ve kept this in my dock for easy access since iPhone X moved Control Center to the top of the screen. If my phone is unlocked and I want to quickly take a photo, it’s far easier to hit the icon in the dock than reaching up for the icon in Control Center.

A Few More

These apps aren’t on my Home screen, but I use them frequently and am thankful they exist.

1password

1Password
You’re using a password manager with unique passwords for all your logins, right? If you aren’t already, please do! The system integration since iOS 12 allowing easy filling of passwords has been such a great improvement.

adaptivity

Adaptivity
A great resource for iOS developers & designers as well as for people who are iOS curious. Check sizes & margins, see how things change in Slide Over & Split View, check system colors, search & inspect all the SF Symbols, and more.

dark noise

Dark Noise
A really good-looking ambient-noise app with great Shortcuts support. The shortcut I run before bed starts the “Airplane Interior” noise for my flight to dreamland every night. And the shortcut I run when my flight lands in the morning stops the noise.

gifwrapped

GIFwrapped
I don’t have that large of a GIF (not pronounced like the peanut butter) library, but GIFwrapped shows me my collection for easy sharing and allows me to search for new ones to share or add to my library.

guardian

Guardian
Third-party analytics and tracking libraries are a real problem on iOS, and for Apple’s (laudable) stance on user privacy, I’m genuinely surprised they haven’t done more to limit these libraries (I think they should). Enter Guardian which is both a VPN and a firewall. Traffic to these nefarious third-party libraries is blocked so they aren’t invisibly collecting information about me. The app maintains a list of things it blocks, and looking at the ever-growing number of things in it is eye-opening. I’m very eager to see how the app develops in the future.
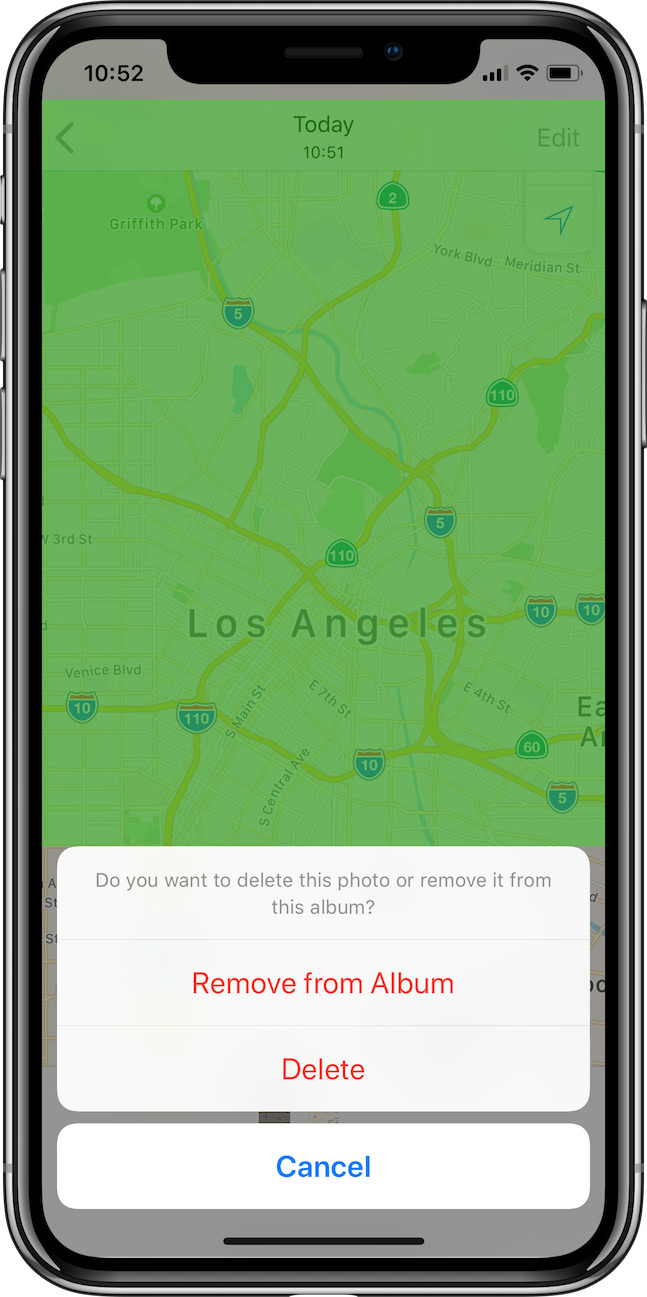
metapho

Metapho
This app allows me to easily remove location information from photos if I want to before sharing them. And if the location or the date & time are wrong on a photo (like if I saved a photo from somewhere and it uses the date I saved it instead of the date it was taken), I can easily edit them to the correct information.
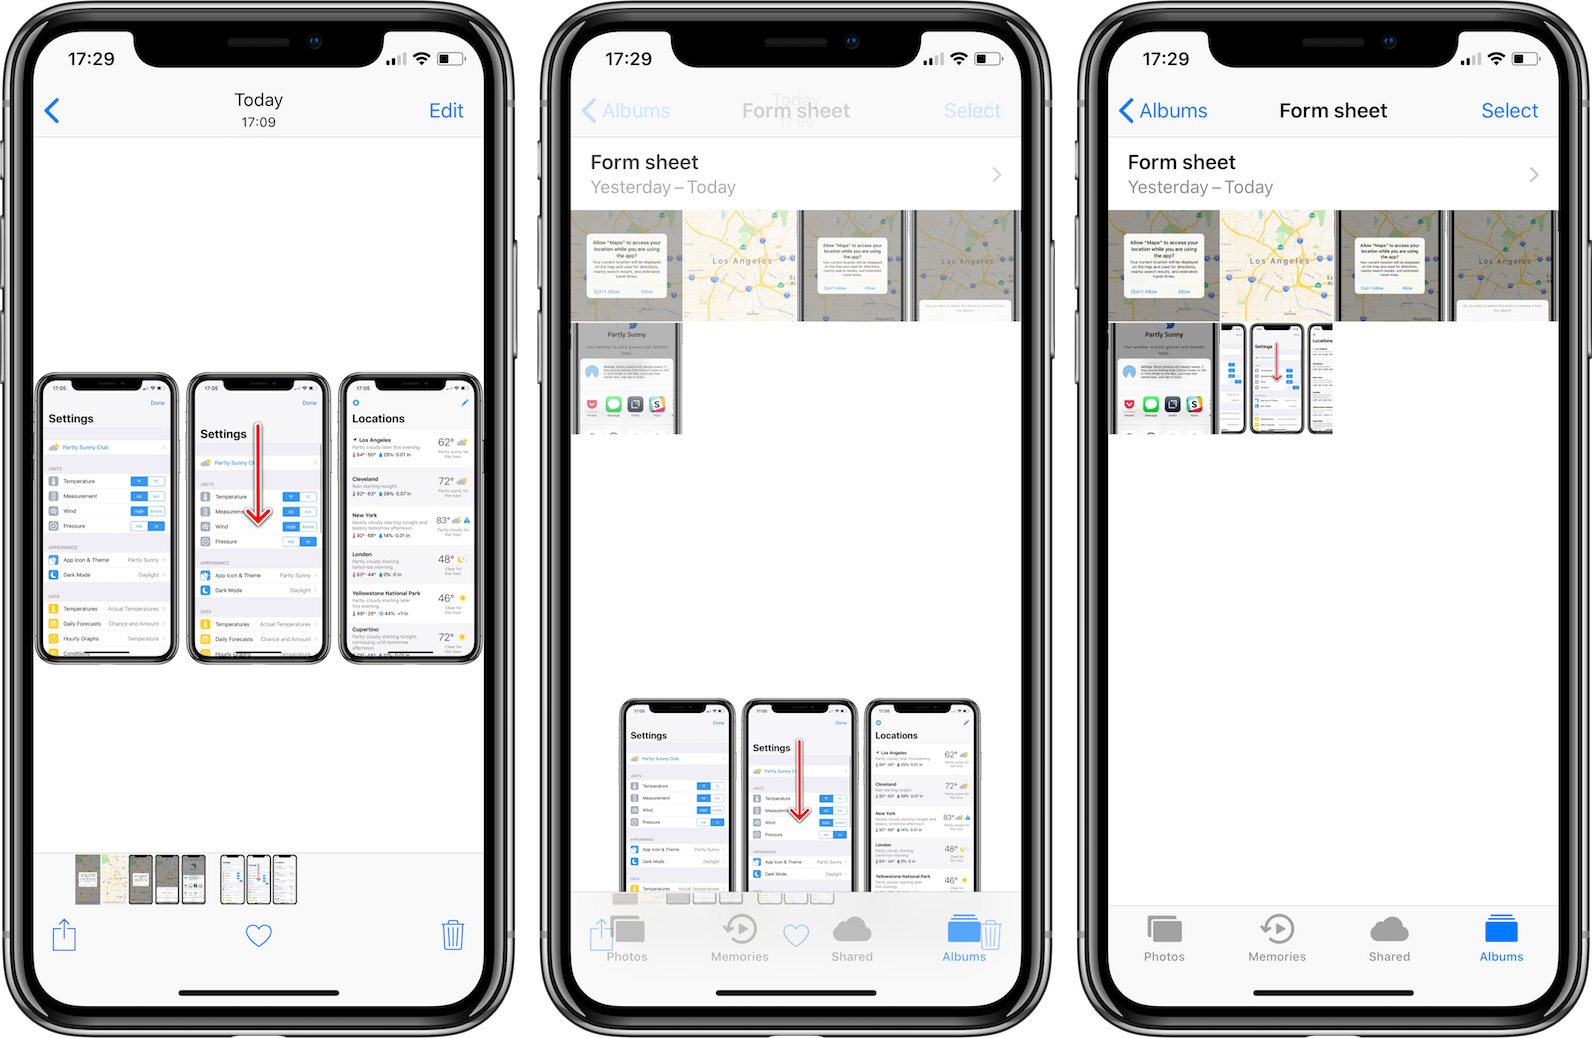
picsew

Picsew
This is a great app to stitch together multiple screenshots into one long one. The very tall screenshots later in this post of a long shortcut were stitched together from several using Picsew. Once the app generates what it calls the “scrollshot” from the multiple images, it can delete them from the photos library too so they aren’t cluttering my Photos library.

toolbox pro

Toolbox Pro
A wonderful utility that takes advantage of iOS 13 shortcuts with parameters and output details to add power-user actions to Shortcuts that aren’t natively available. With Toolbox Pro, it feels like they are! The app has helped making the menus each of my shortcut launchers present.

Shortcuts Launchers

Let’s talk more about those shortcut launchers and take a peek inside.

I’m thankful iOS 13 improved running shortcuts saved to the Home screen where it no longer launches a new tab in Safari first and then Shortcuts like it did in iOS 12. Now, shortcuts on the Home screen launch straight into Shortcuts. It’s a small thing but a definite improvement.

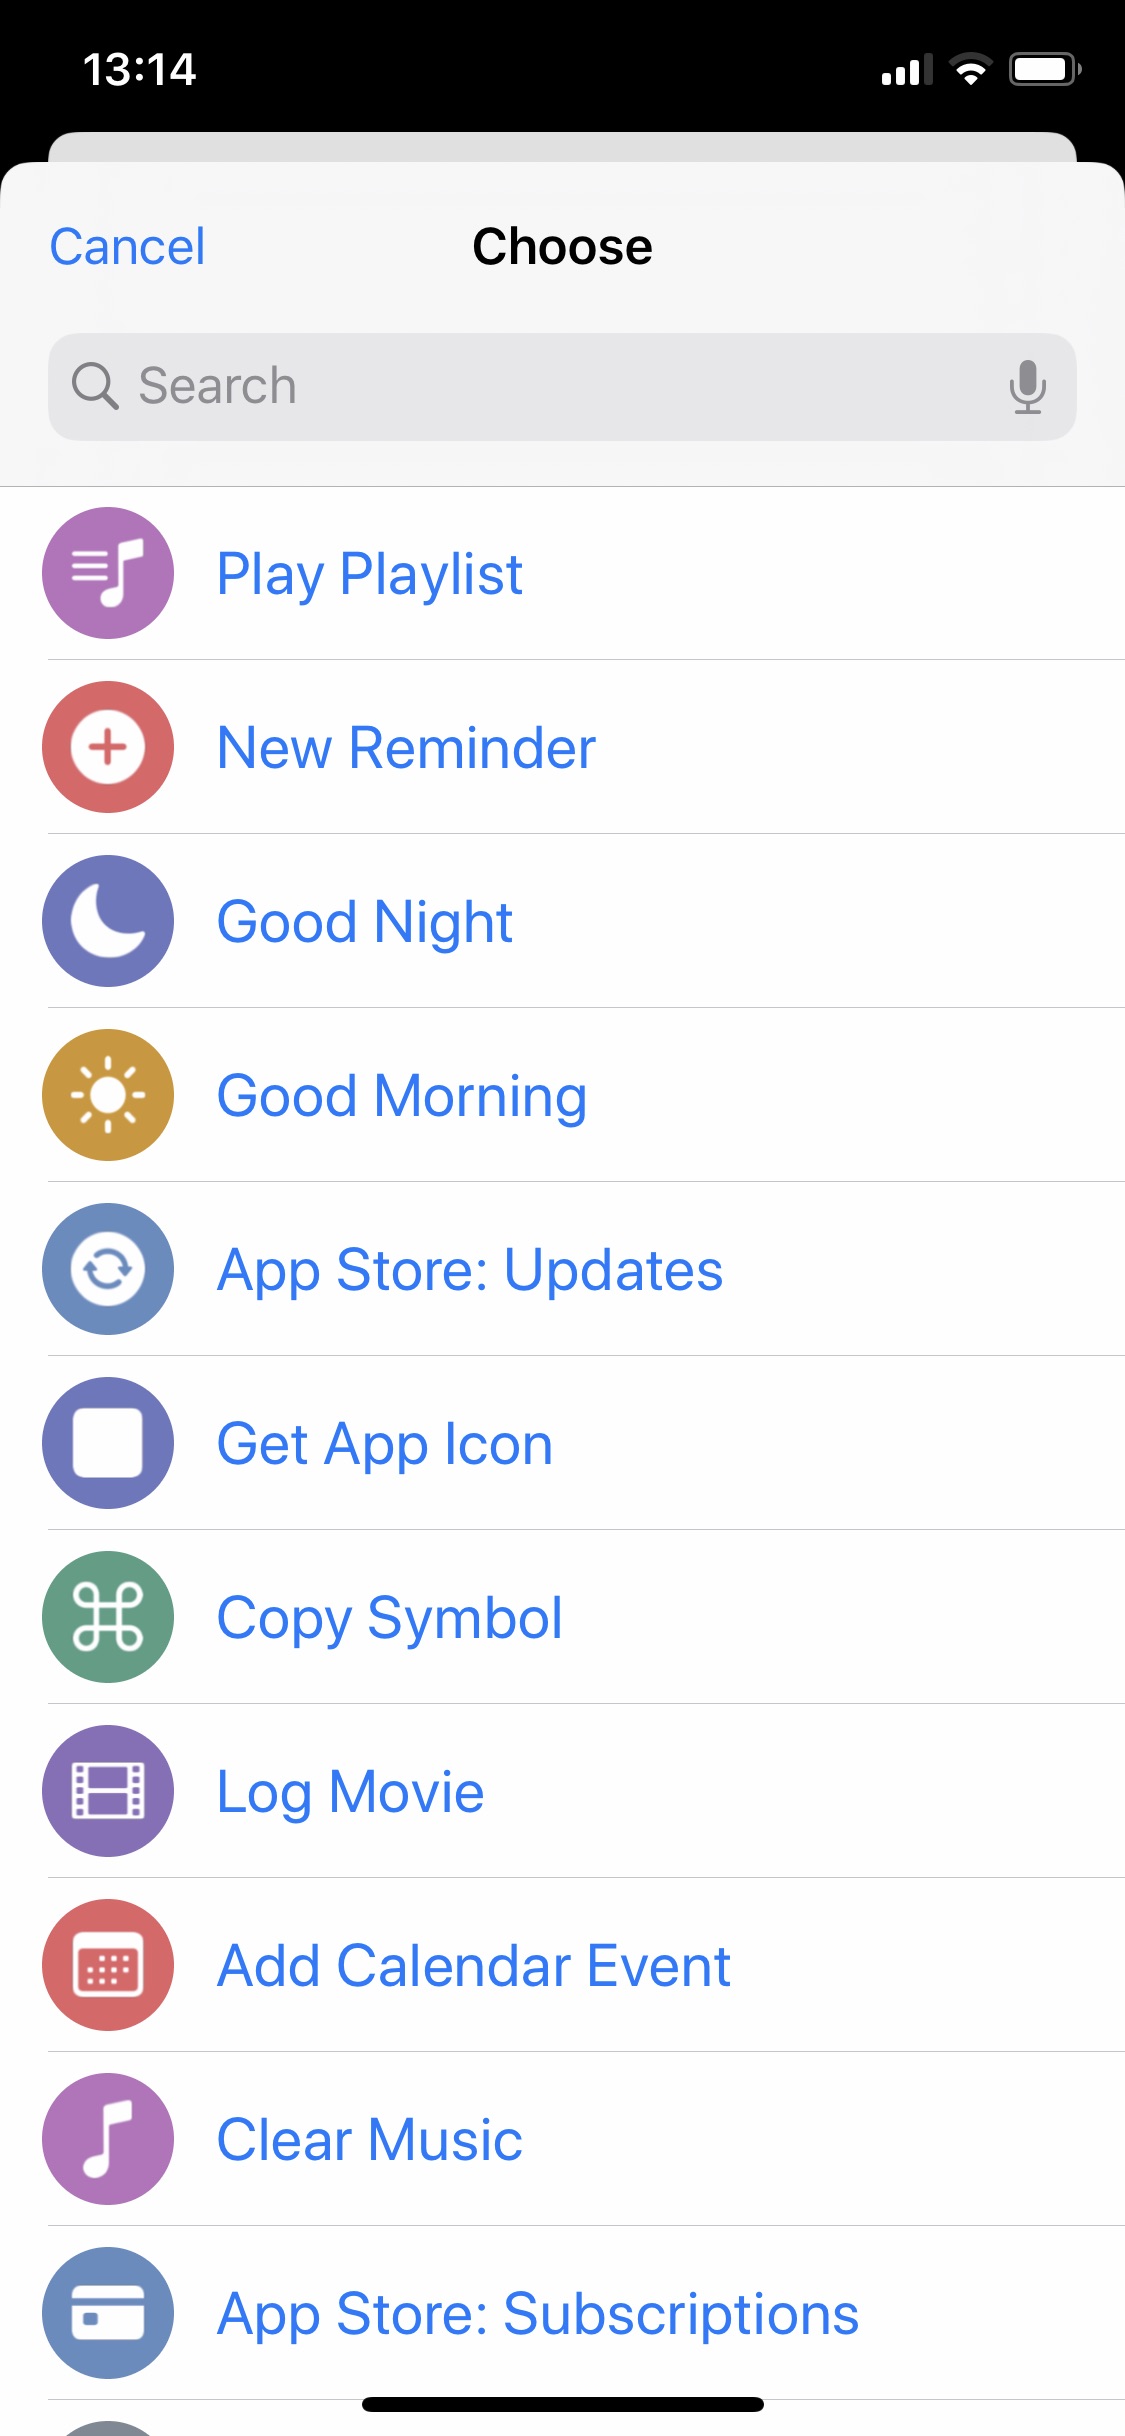
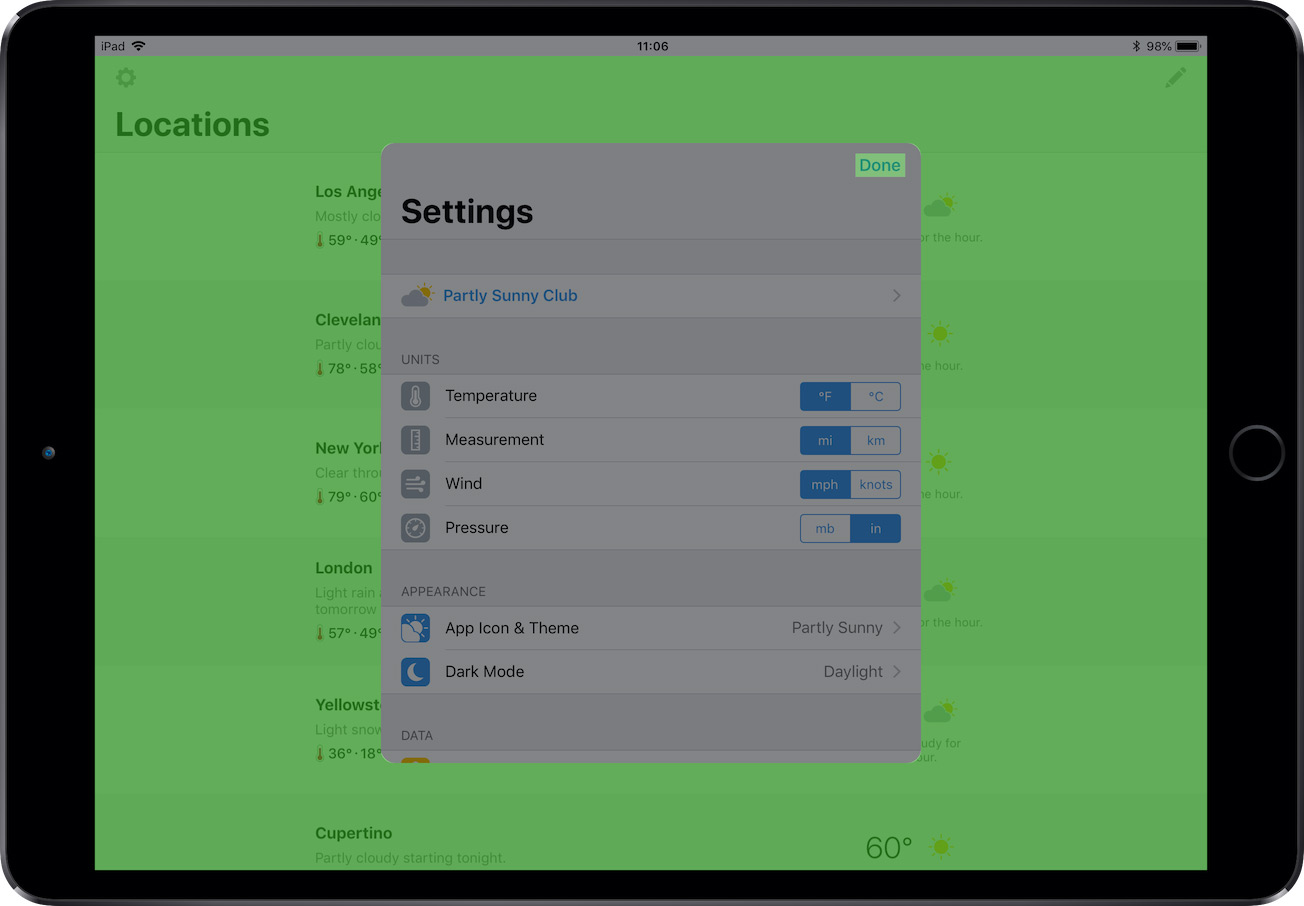
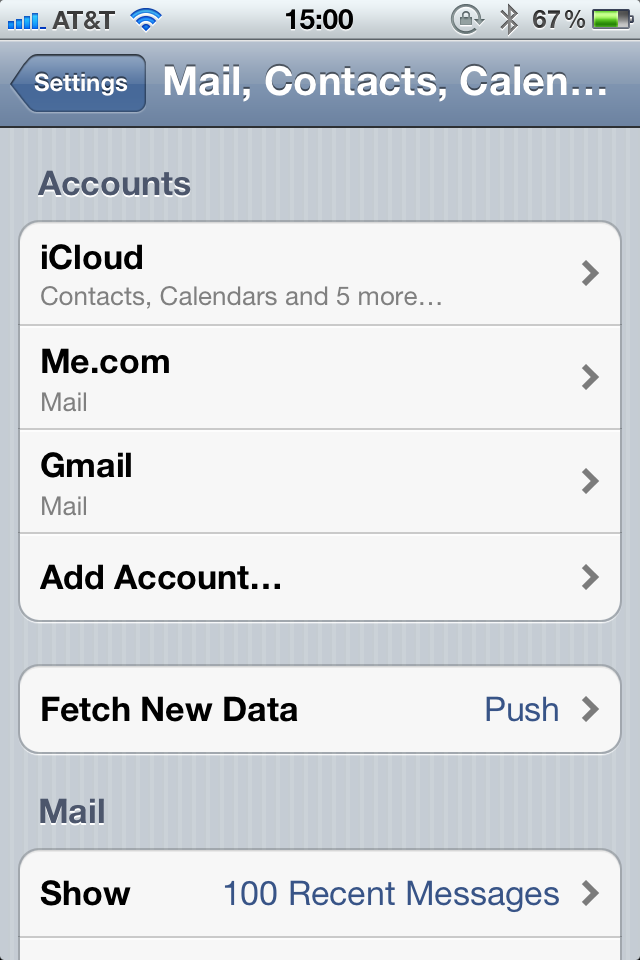
Let’s look at the Settings launcher as an example. Here’s the menu the shortcut presents:

settings launcher

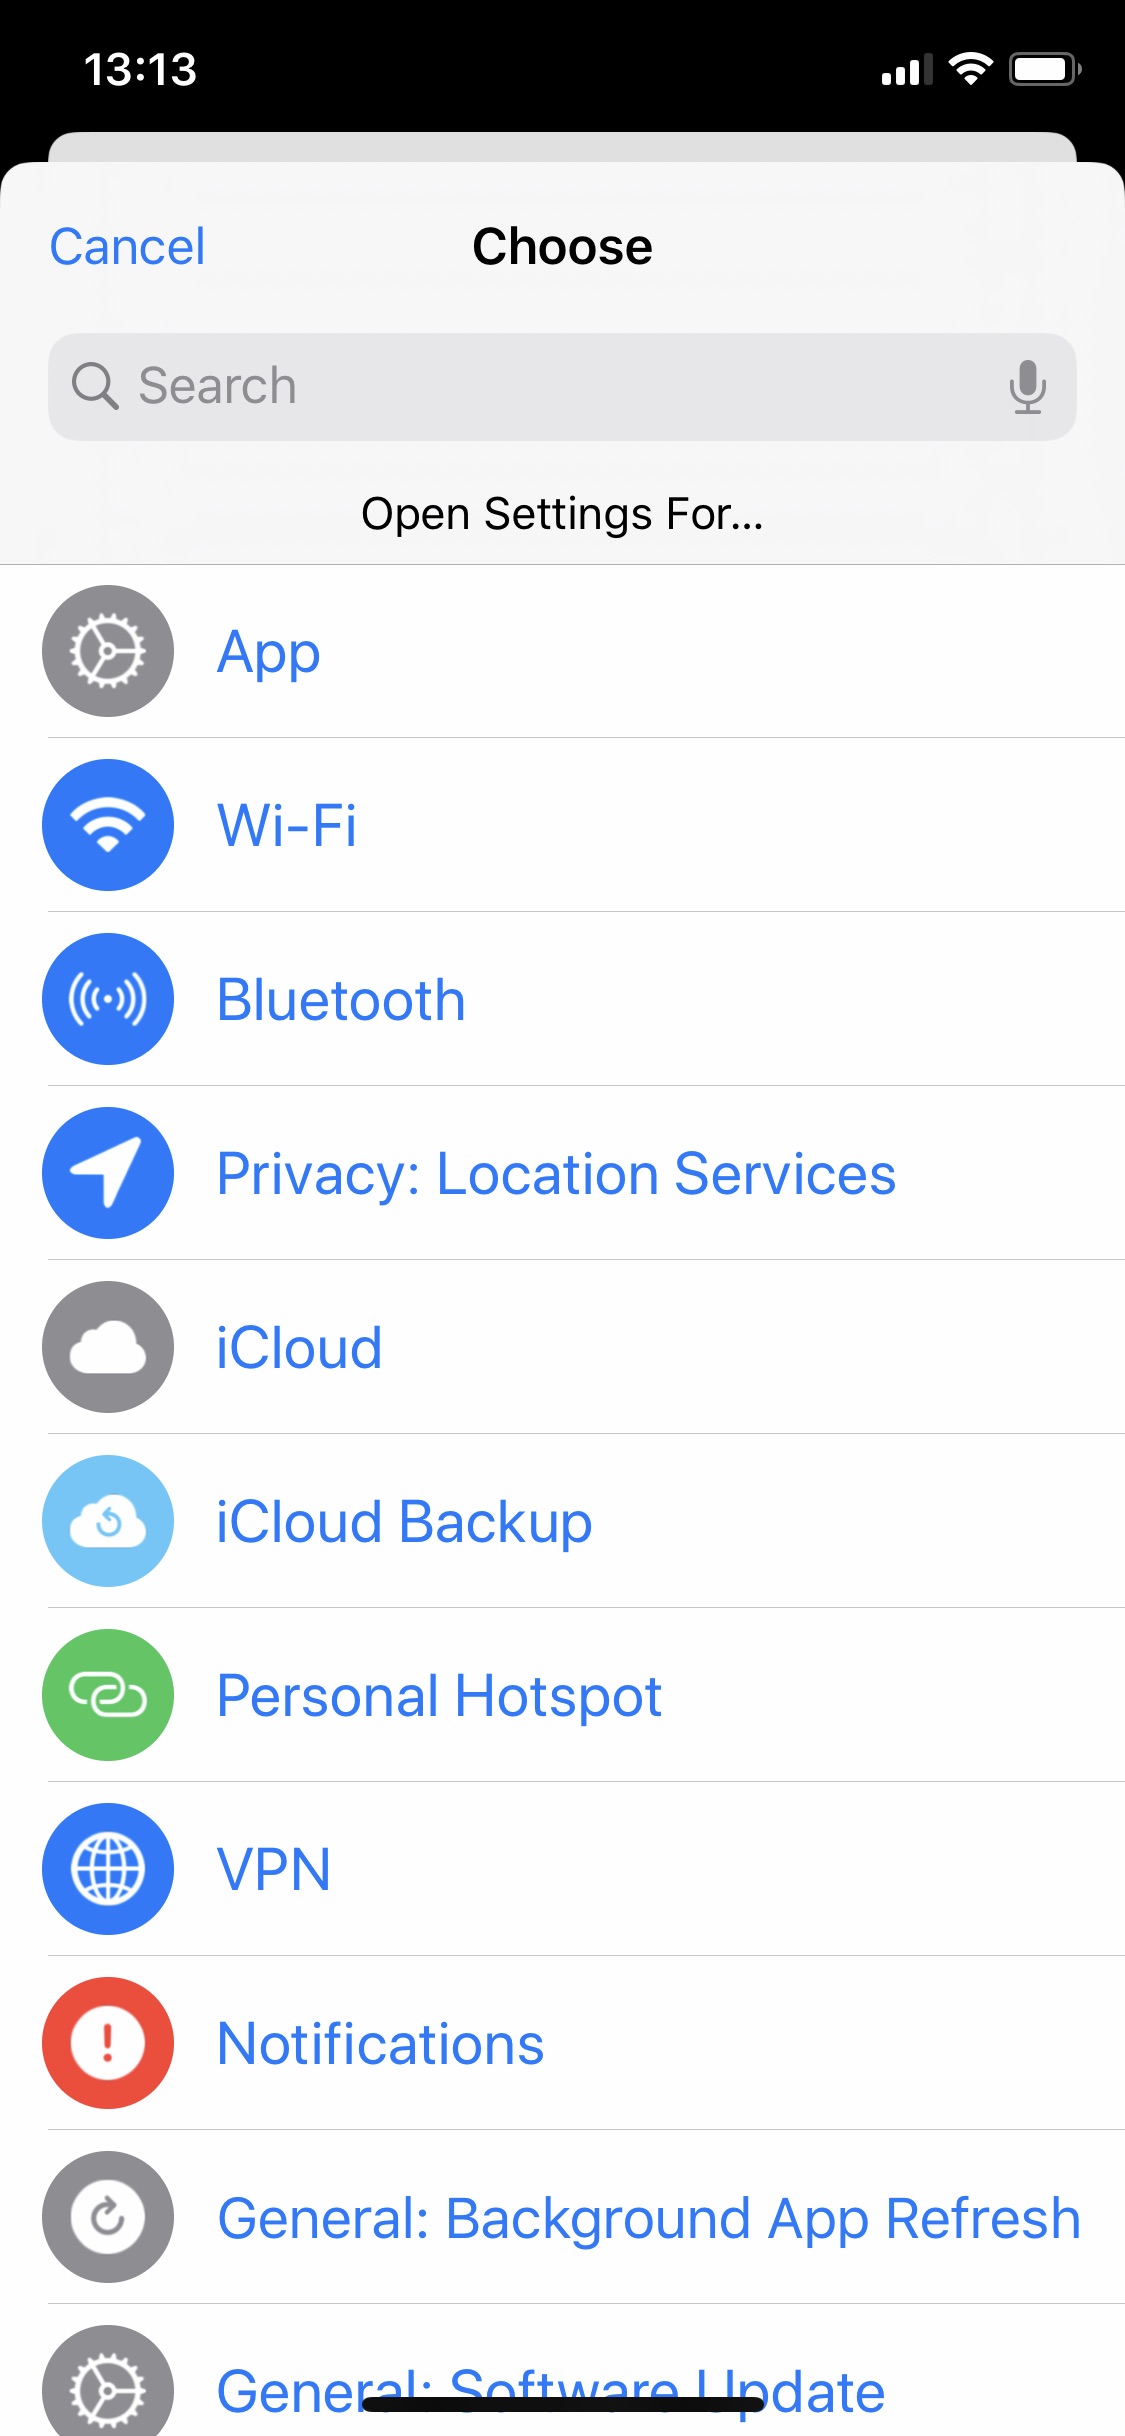
As mentioned above, this launcher is adapted from Federico Viticci’s Settings launcher that uses Settings URL schemes to deep dive into specific menus and submenus. It still works the same where when I run it, I get a menu of Settings options, I choose the thing I want to open settings for, and Shortcuts jumps over to Settings app into that thing saving me the steps of digging around to find the thing. My addition to Federico’s shortcut is having an SF Symbol and a color accompanying each option.

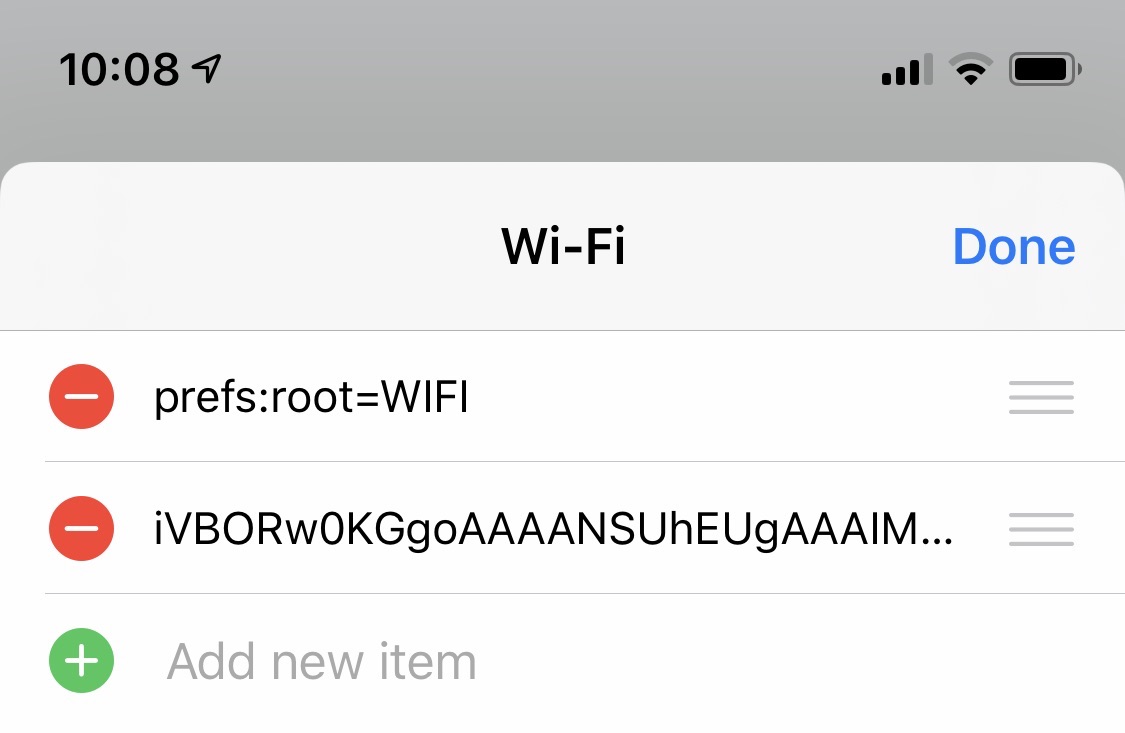
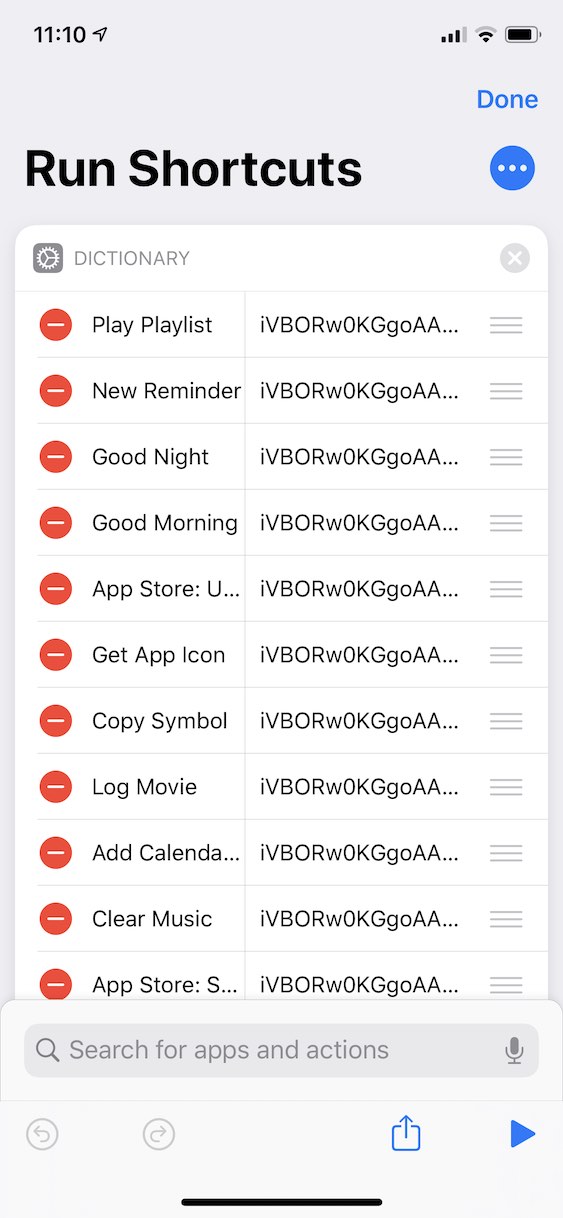
So how does it work? The shortcut starts with a dictionary of things to choose from. The keys are the text that appears in the list to choose from, and each value is an array of one or two strings.

settings launcher dictionary

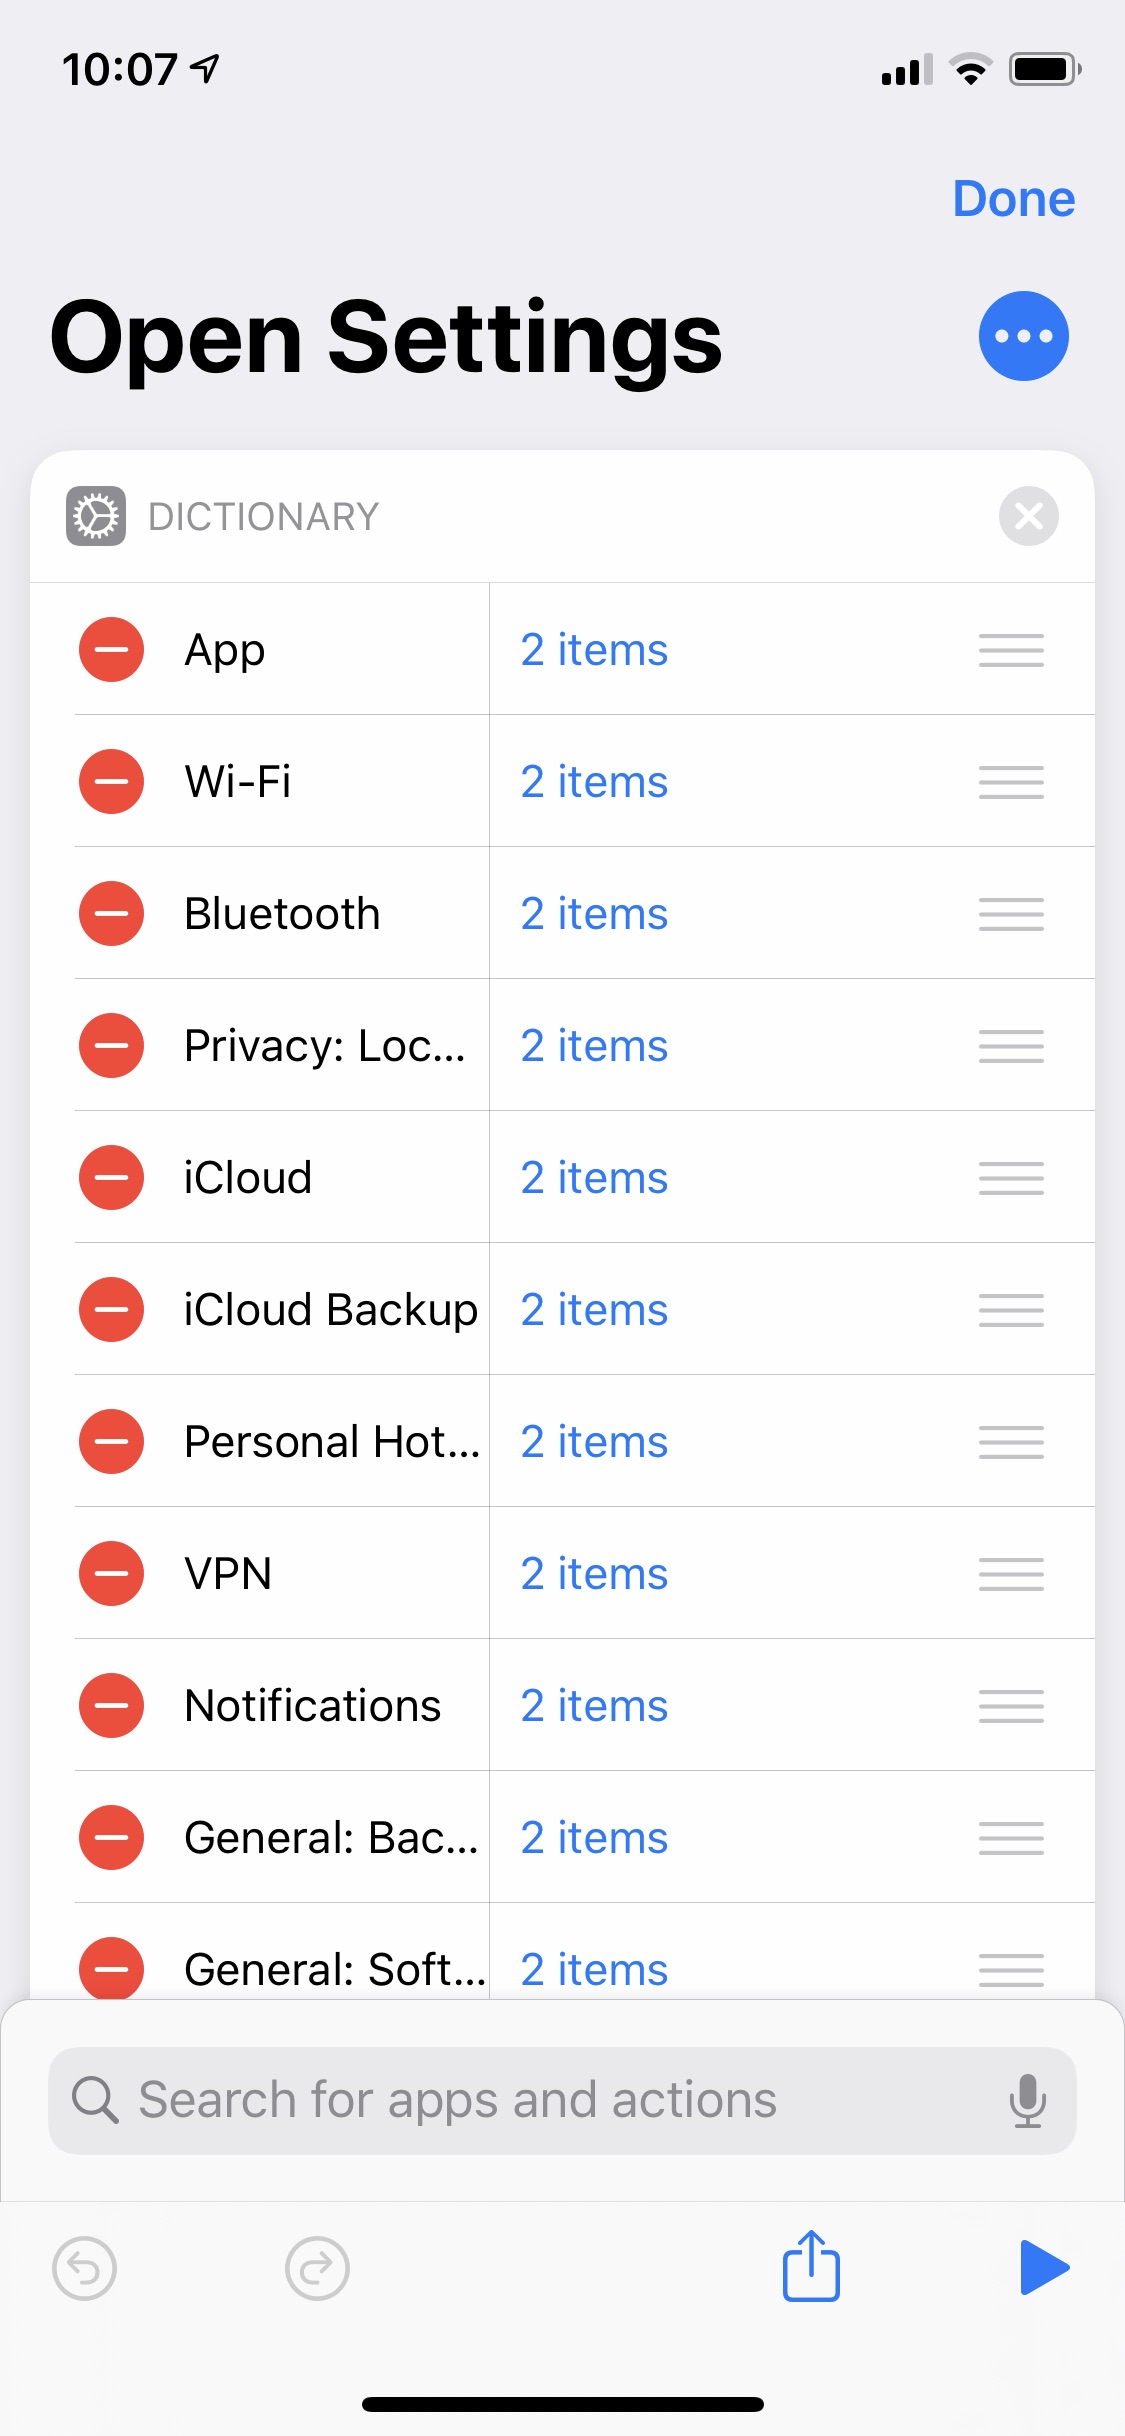
The first item in the array is the URL scheme for the setting. The second is a base64-encoded icon I generate with another shortcut (more on this below).

settings launcher dictionary value

This dictionary is sent to another shortcut which processes the dictionary, generates the actual menu, and returns it to the Settings launcher shortcut. The menu is presented, I choose the thing, and off I go to Settings.

settings launcher actions

Generating the Menu

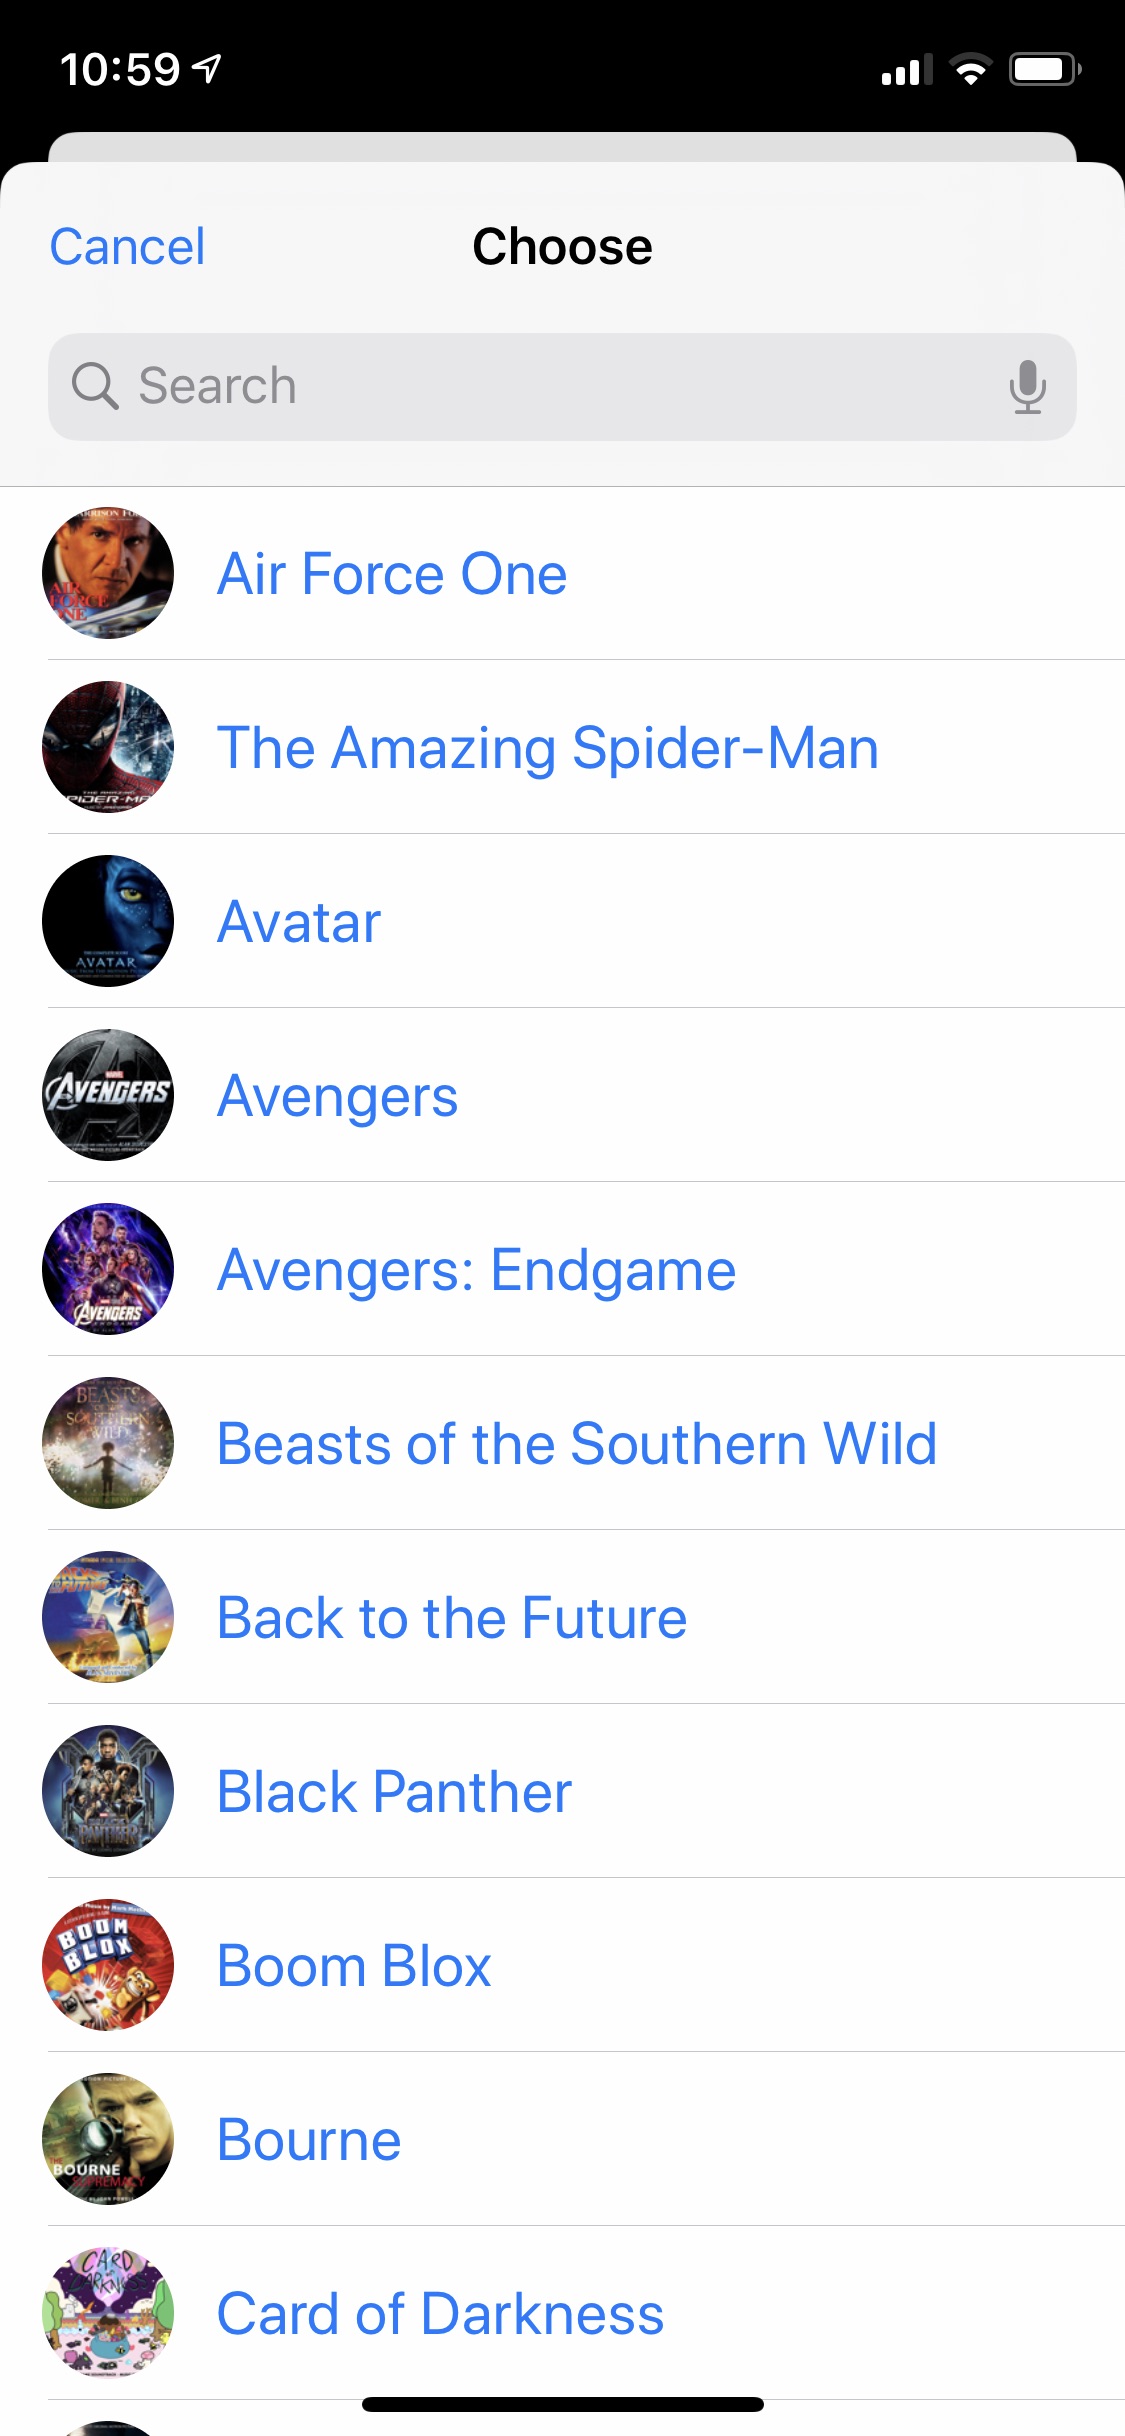
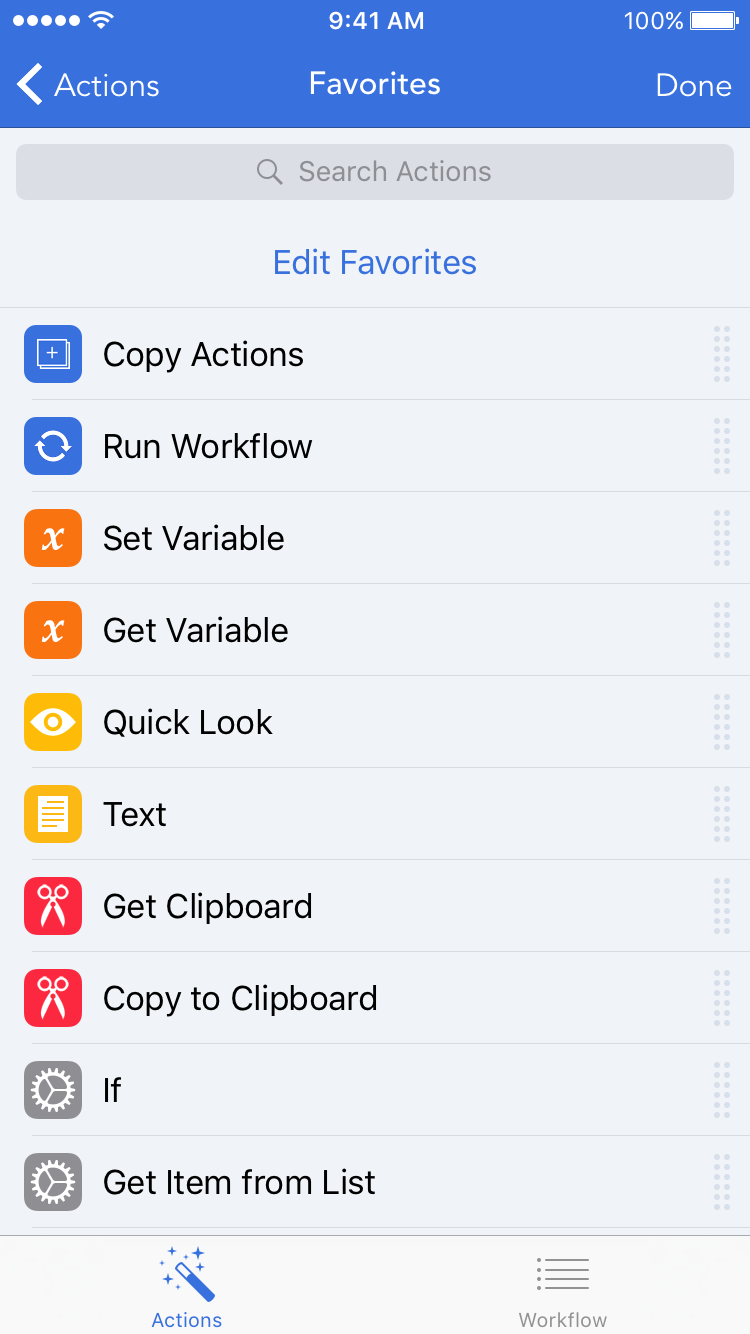
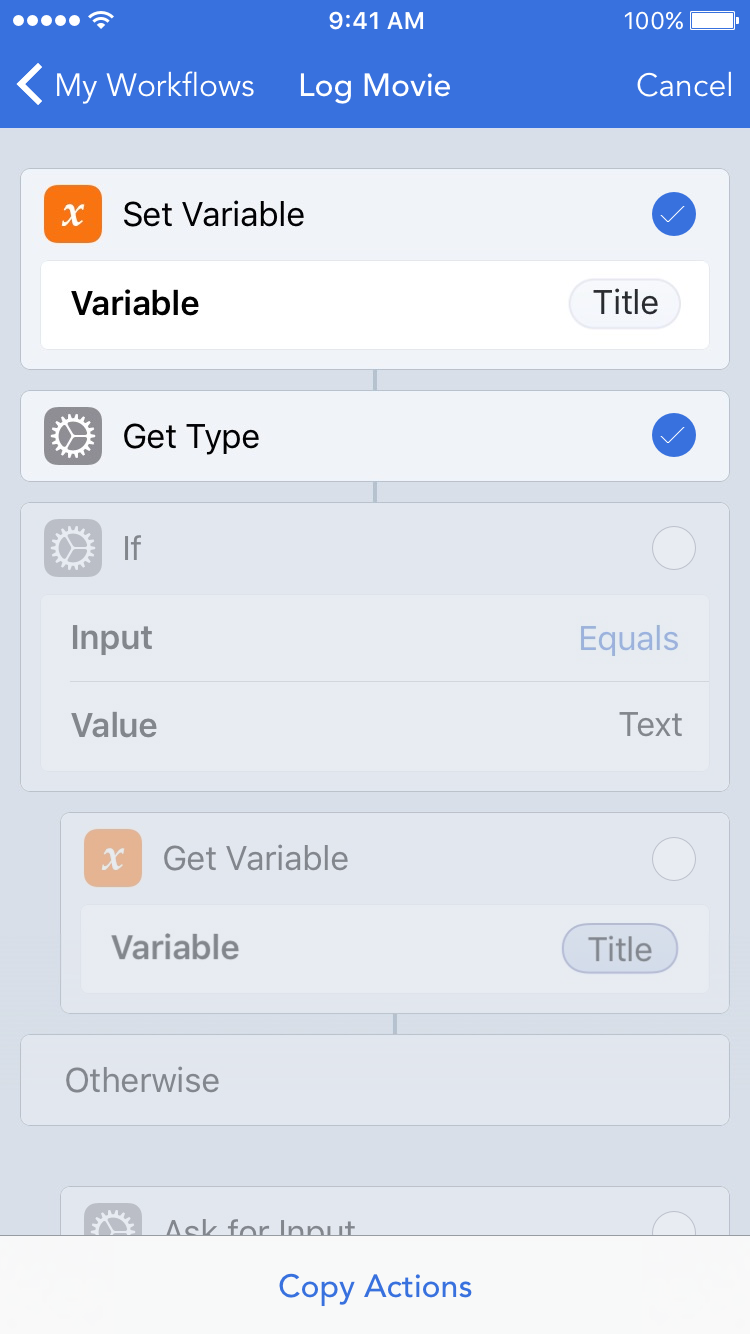
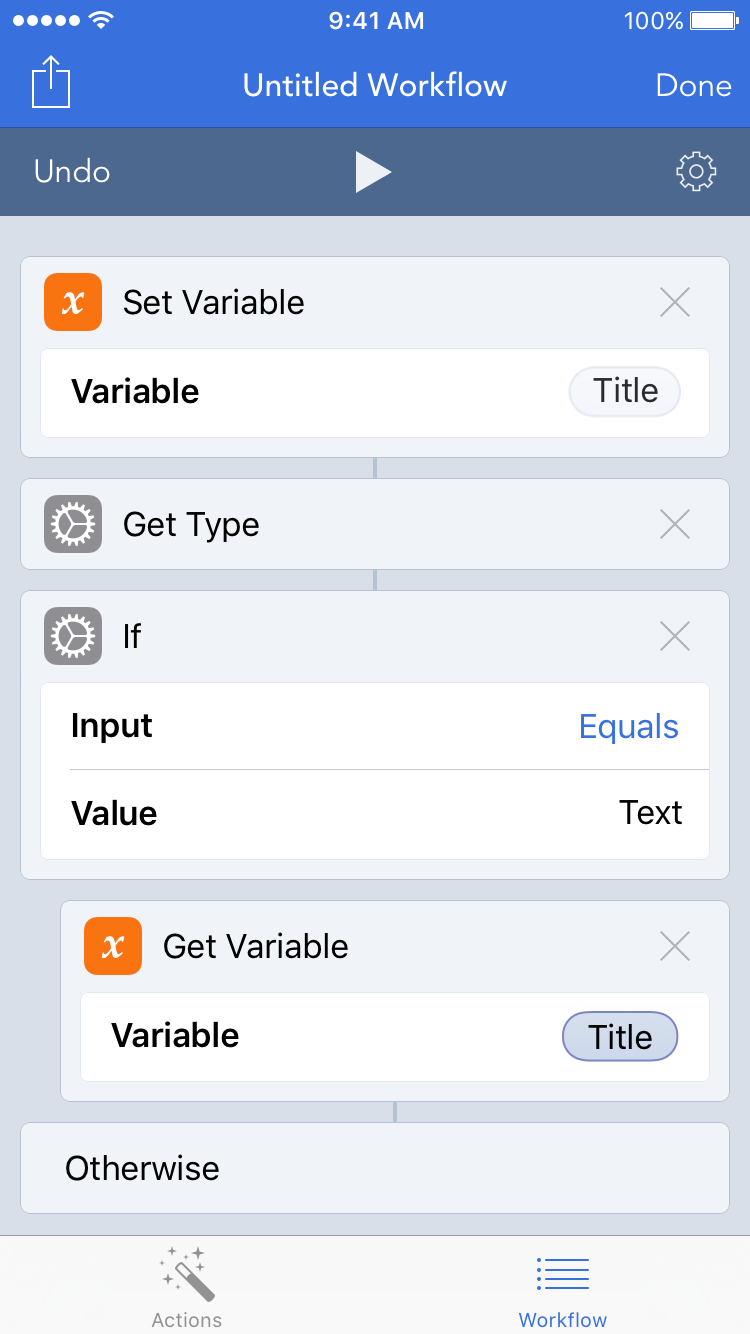
Shortcuts doesn’t have a native way of generating a rich menu, but if you give the Choose from List action a list of contacts, it uses the contact’s photo in the list item. So what the menu really is is a list of contacts.

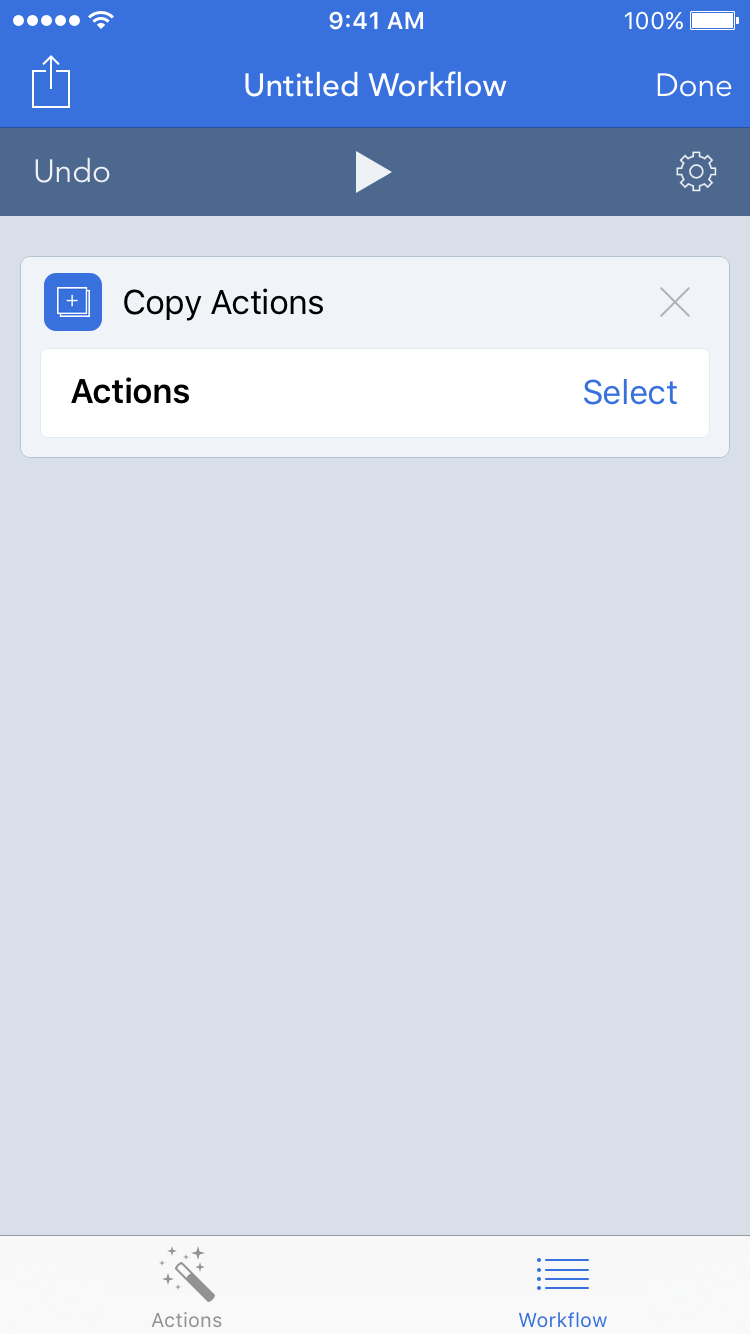
To generate the menu (the list of contacts), I use another shortcut dedicated to processing the dictionary and generating the menu. Thanks to the Run Shortcut action, I can break out this set of actions as a reusable shortcut for all of my launchers since these steps are the same for all of them.

menu generator

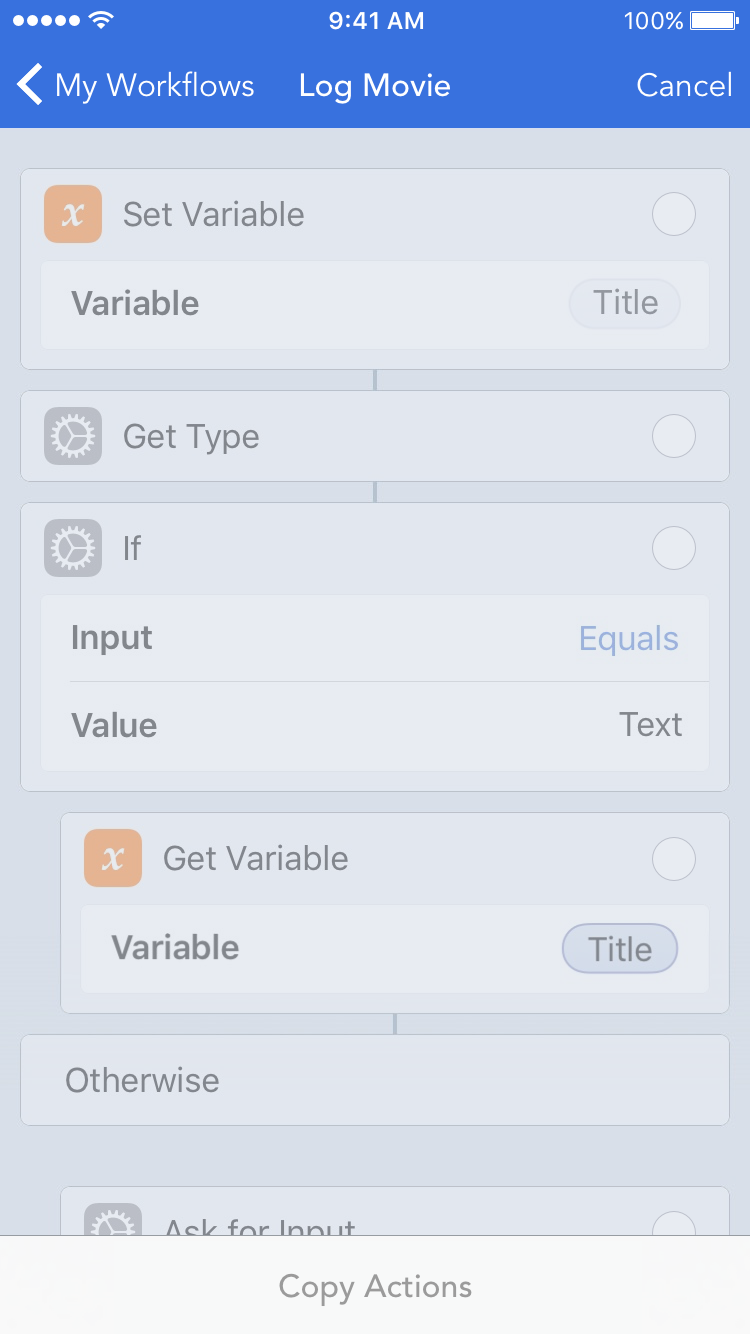
The shortcut takes each key/value pair from the dictionary above and creates a vCard with them. (A vCard is the file format for a contact card. It can contain a name, address, phone number, photo, etc.) The text is the “name” of the contact, and the icon is the photo. If the dictionary value has more than one item in it (in the case of the Settings launcher, it has two as described above), it uses the last item in the list; otherwise it uses the only item. The shortcut puts together the list of “contacts” and returns it to the Settings launcher shortcut to choose from.

One of the actions in Toolbox Pro is a Create Menu Item that puts a visual editor on top of vCard generation: you can specify the title and the SF Symbol & colors, and the action generates a menu item.

toolbox pro create menu item

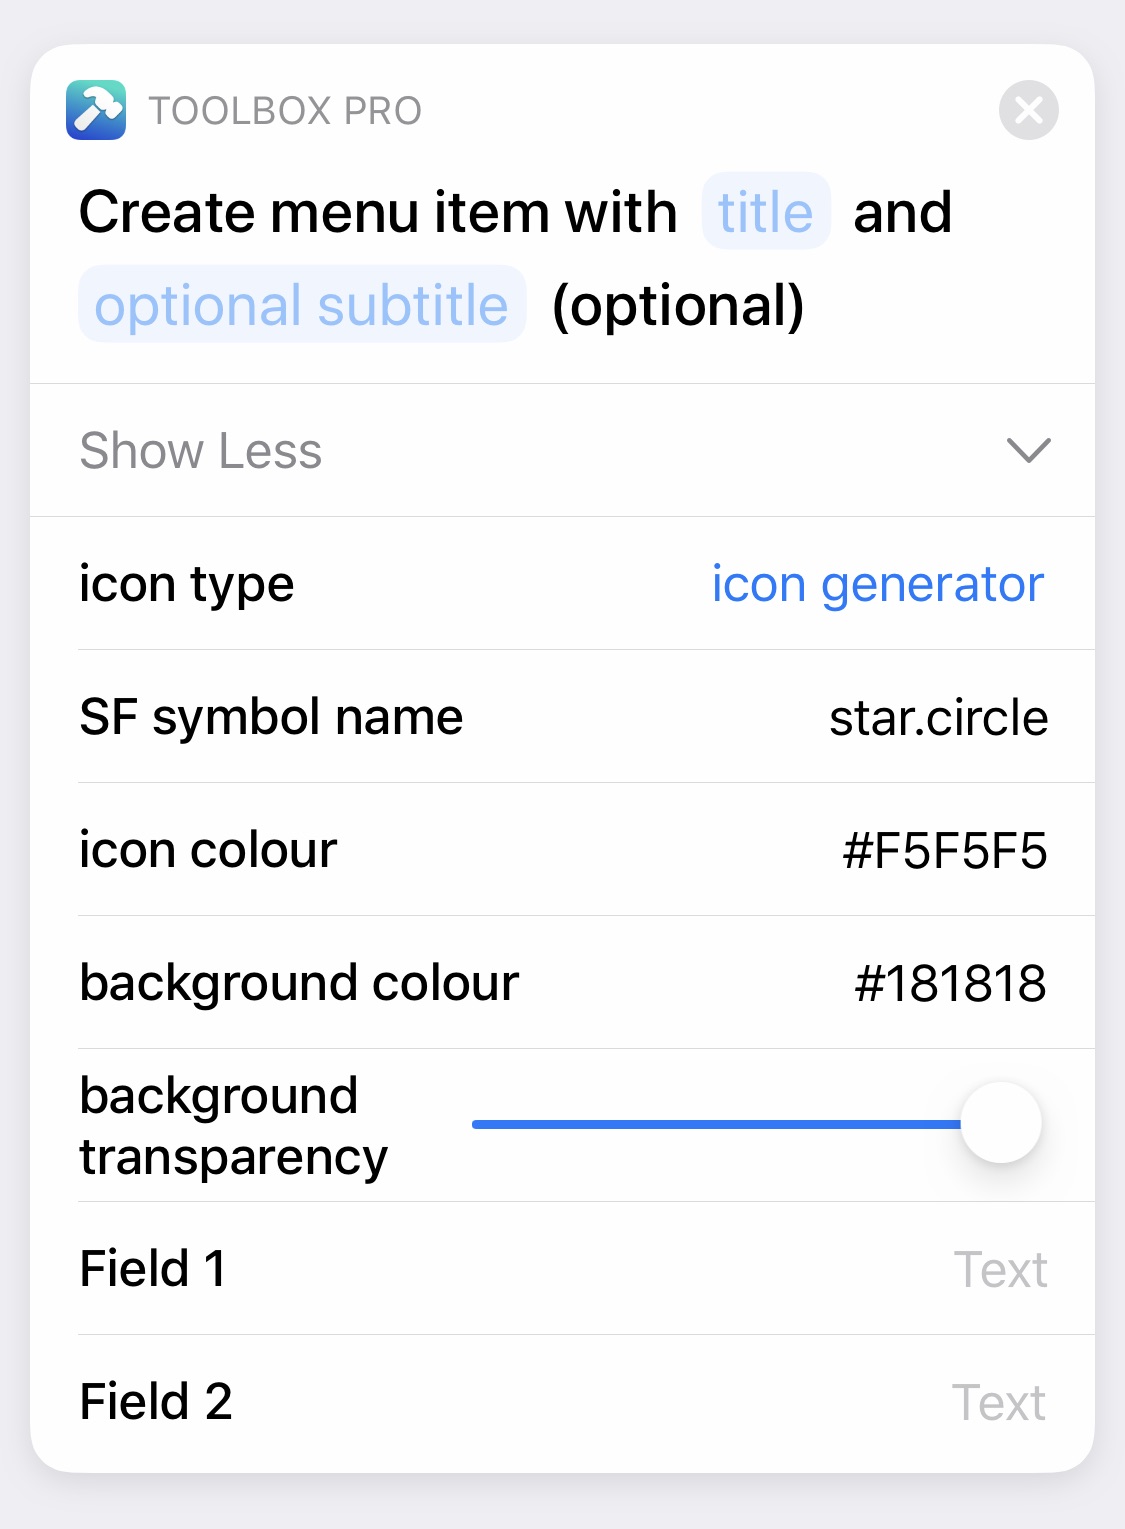
I originally was using this solution in my launcher setup instead of manually generating vCards, but there’s a slight delay while the menu is being generated each time I run the shortcut (I assume because Toolbox Pro has to create the image (symbol on a color) and then base64 encode it for the vCard for every item in the list). With many list items in my launchers, I wanted my launchers to be a little snappier, so I use a pre-generated and encoded image. (This isn’t me knocking the excellent work developer Alex Hay has done. Just explaining for anyone wondering why I don’t just use Toolbox Pro actions to make the menus!) So how do I generate the images? With a different action from Toolbox Pro!

Generating the Icons

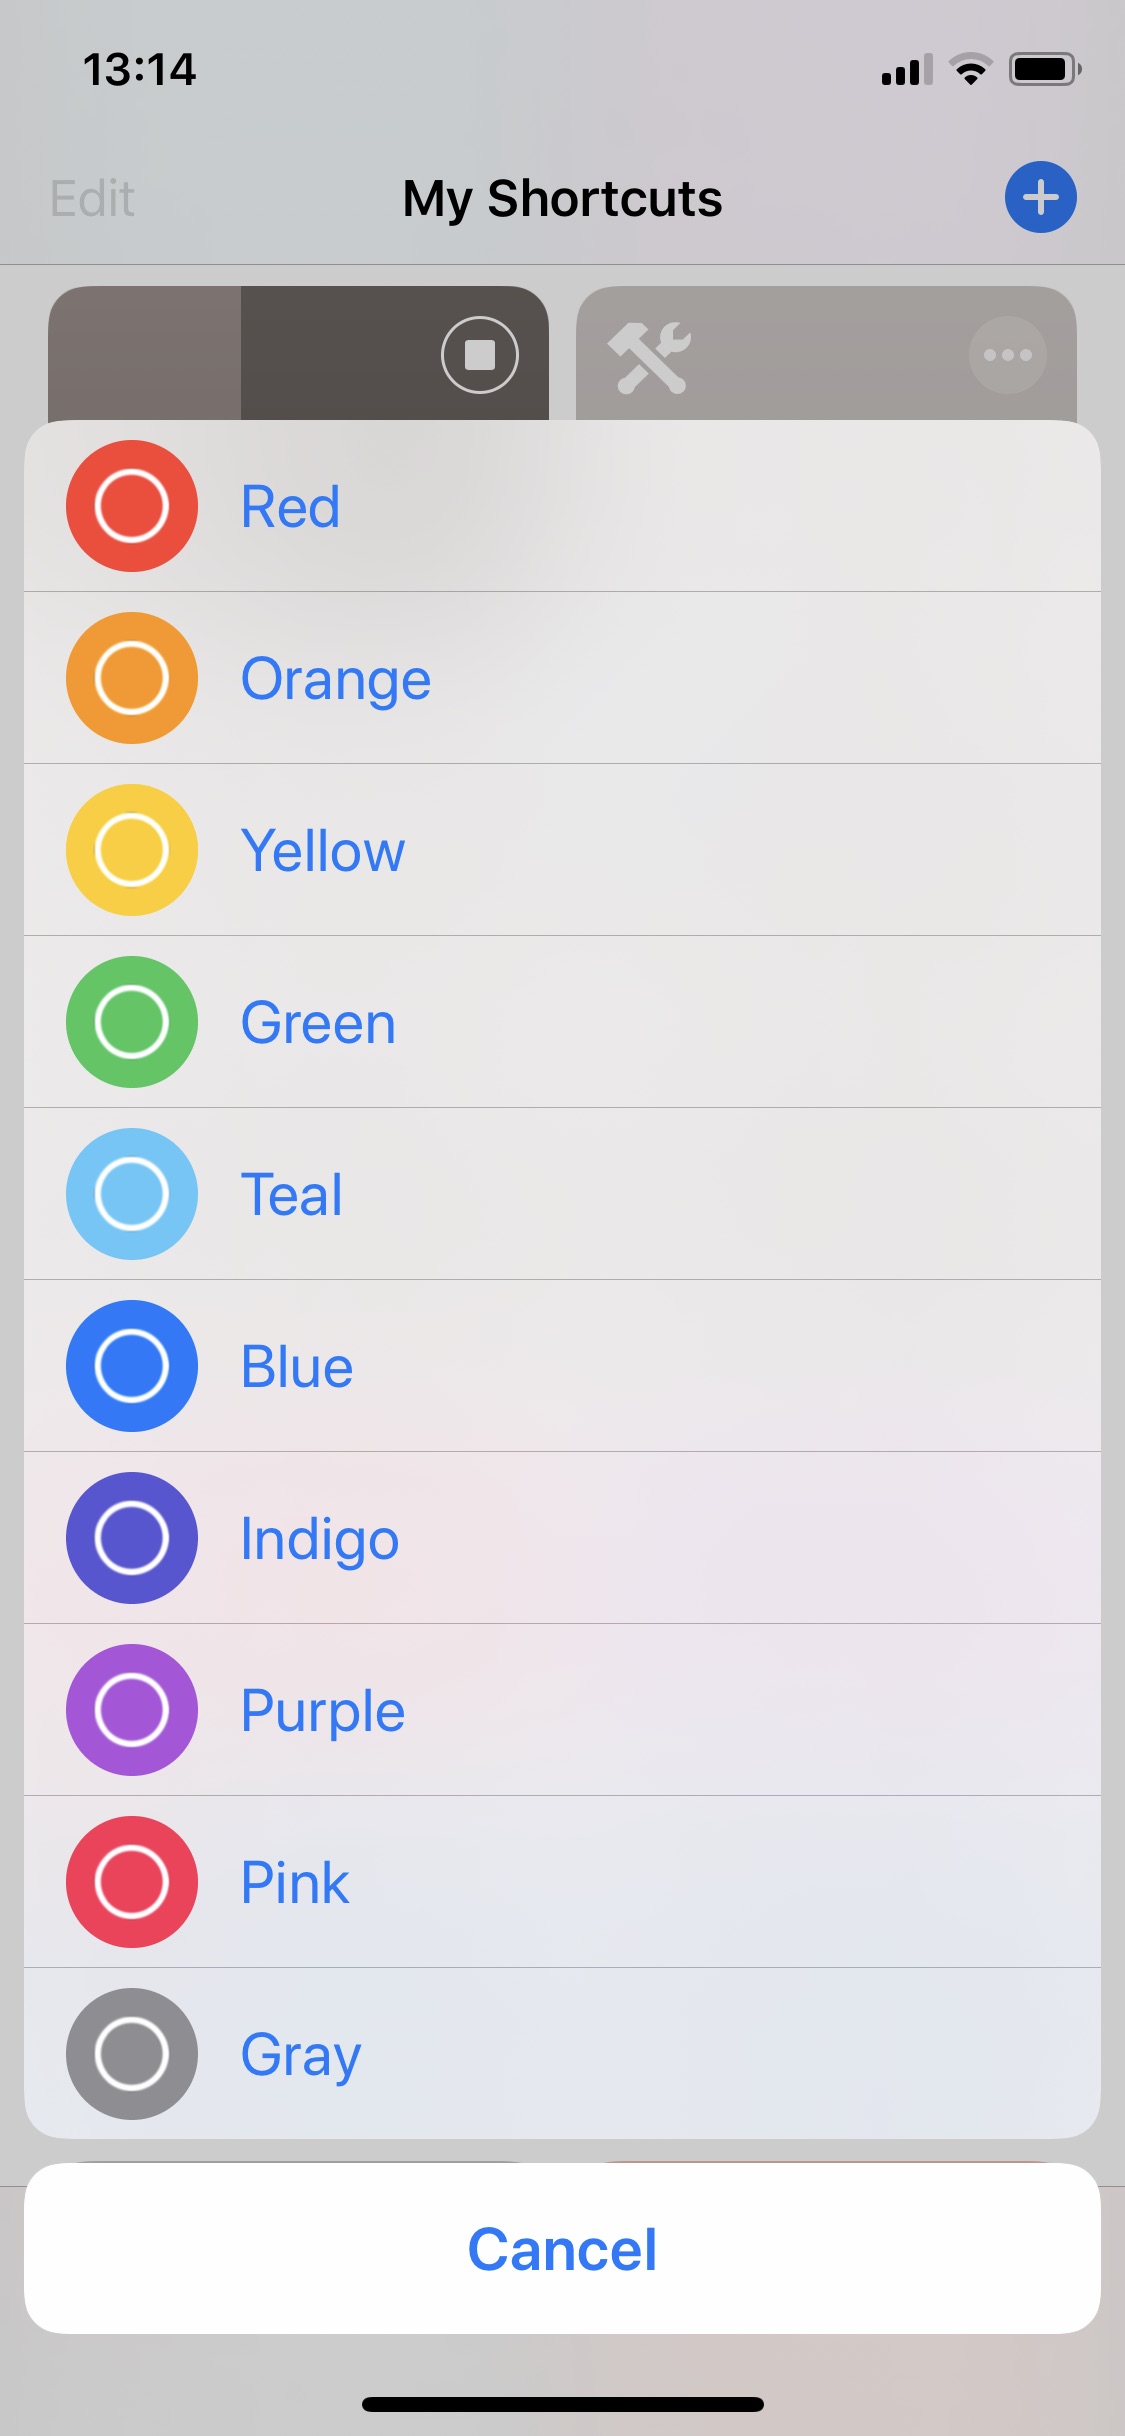
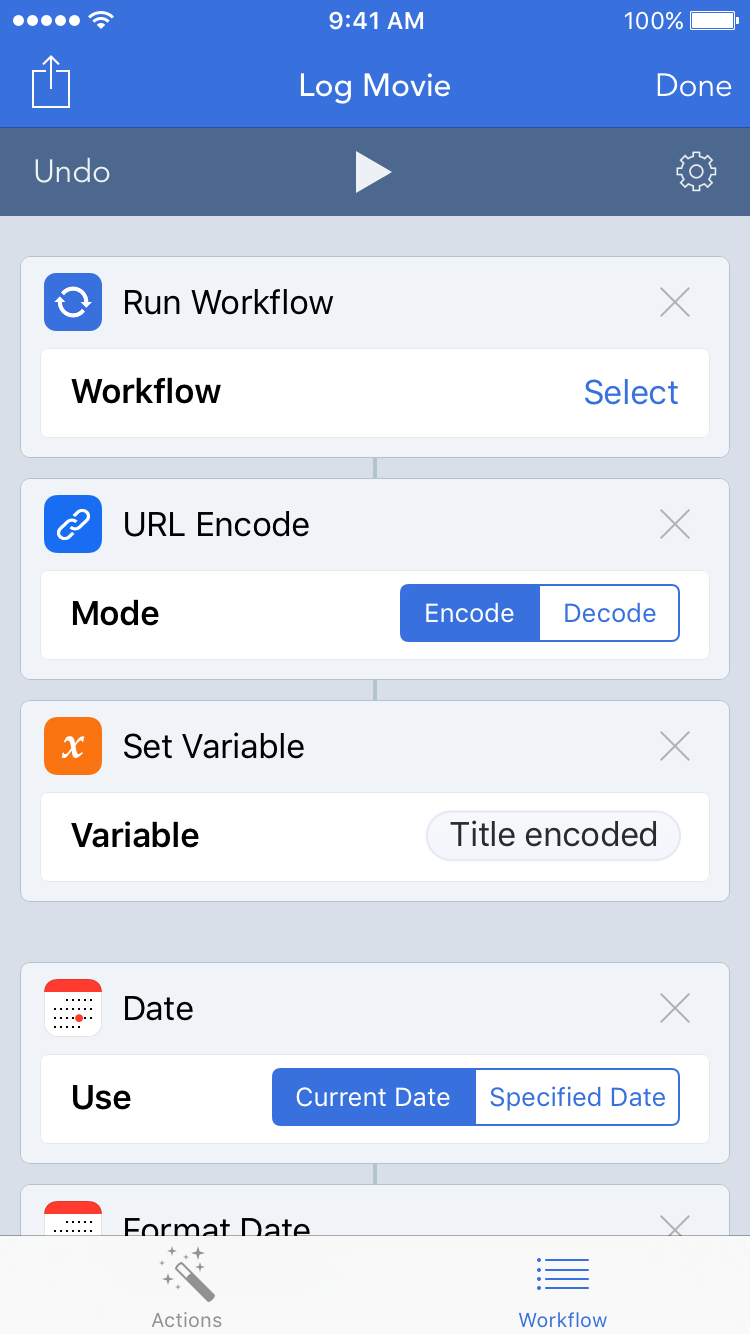
To generate and encode each setting’s icon, I manually run a separate shortcut that takes advantage of the Create Icon action of Toolbox Pro.

settings icon generator

The shortcut asks for the name of an SF Symbol, presents a list of system color options, and then uses the advanced mode of the Create Icon action to generate the image. I mask it to an icon shape (I like how the icon shapes look when the launcher shortcut is run in the widget), encode it, and copy it to the clipboard. Then I go back to my launcher shortcut and paste the output into the corresponding dictionary item.

Because the launcher icons don’t dynamically change, I can generate them once when I’m initially building or editing the launcher; they don’t need to be regenerated every time I run the shortcut.

To get the name of an SF Symbol, I use Geoff Hackworth’s excellent Adaptivity. I find the symbol I want, copy the name, and run the icon-generating shortcut.

adaptivity

The list of color options to choose from that this shortcut presents was generated with a similar method. All the icons and menus!

settings launcher colors

For the icon size, I settled on 130×130. This size allows the icons to not be too small and thus too fuzzy on a retina screen while not being too large and possibly slower to decode with long lists.

Other Launchers

Similar to my Settings launcher, I have a shortcuts launcher that launches other frequently used shortcuts of mine.

shortcuts launcher

It’s built similarly where it presents a list with icons generated like the Settings launcher above though it uses Shortcuts colors instead of system colors. Instead of a dictionary of arrays, the shortcut has a dictionary of text since there aren’t any URL schemes involved.

shortcuts launcher actions

I also have a music launcher that presents a list of playlists to choose from. The icons in this case are generated from album art instead of SF Symbols, but the presenting and launching mechanics are the same.

music launcher

The Shortcuts

If you want to try these out at home, here are links to each of the shortcuts mentioned above. If you have ideas on how to improve them, please let me know!

My Home Screen

So that’s my Home screen and how I’m experimenting using shortcuts launchers on it. I’m curious to see where I go with this and what other shortcuts I may add to my Home screen.

Thanks for coming along on this experiment with me thus far. I hope this has inspired you to try one of these apps if you haven’t already or to tinker with these shortcuts to develop launchers and menus of your own.

Please come find me on Twitter and let me know what your Home screen looks like!

My Home Screen Setup: December 2018 Edition

It’s been a while since my last home-screen-update post, and quite a bit has changed. Here’s what my home screen looked like in May and in January.

I was inspired by various posts in the iOS Setups subreddit with home screens organized by color. Here’s my current home screen (select to view a larger version):

home screen

These are the apps I use the most or I want easy access to. I’m currently using a wallpaper from AR72014. This is a slightly desaturated version of Colorful Sky V3. The subtle color and textures are pleasing and allow the icons to pop. Below are a few notes on some of the apps I have on my home screen.

timery

Timery
I use Toggl to track my time on various tasks and projects. I wrote previously how I used Workflow to start and stop time entries because the official Toggl app isn’t for me. Wanting more functionality like editing or deleting time entries, I decided to make my own Toggl app since their API is rather robust. I’ve been hard at work on Timery for the last several months, and it should be ready soon!

fantastical

Fantastical
I don’t usually have many calendar entries, but when I need to add one, I enjoy Fantastical’s, well, fantastic natural-language parsing. (If you’re on iPad, here’s the iPad version.)

momento

Momento
This is a journaling app that collects manual thoughts and media and also automatically imports tweets, Instagram and Facebook posts, and other social-media feeds. I’ve been using Momento for several years now, and looking back at memories and what I was doing, thinking, and even tweeting years ago is something special.

transit

Transit
I enjoy trying different apps to see how they solve the same problems, and transportation apps are no exception. In Los Angeles where many public-transportation lines run infrequently or have earlier-than-ideal-end-of-service times, Transit has some key features for me: its active-trip mode lets me know when to get off, whether or not I’ll make a connection, and what my ETA is.

castro

Castro
I switched to Castro after their big 3.0 update, and I’m really enjoying the app. Many design aspects and interactions are clever and just fun. The drag & drop support inside the app is particularly clever and fun.

twitterrific

Twitterrific
I’ve been an avid Tweetbot user since the first version came out. But I’m using Twitterrific now because certain things about Tweetbot 5 drove me away. There are certain things Tweetbot does better than Twitterrific, and there are certain things Twitterrific does better than Tweetbot. Perhaps more on this another time. But for now, I’m using Twitterrific and enjoying it. As I said, I enjoying trying different apps.

start

Start
This is a shortcut from Shortcuts saved to my home screen. It presents a menu of apps and tasks, and for the selected item, it starts an associated Toggl timer with Siri Shortcuts from my Timery app and then opens the app.

partly sunny

Partly Sunny
I’m the developer and designer behind this app that shows your weather in quick glances and detailed looks. If you just want a quick glance at what’s happening, Partly Sunny can show that. If you want a more detailed look at what’s happening in the next hour, day, or week, Partly Sunny can show that too. Whichever you prefer, everything is meant to feel at home on iOS. Some of the key features include: customizable hourly graphs; customizable conditions in current, hourly, and daily forecasts; interactive radar; a widget; and a dark mode.

trello

Trello
Trello helps me organize Partly Sunny and Timery to-do lists, feature requests, and bug reports as well as plan out future updates. I’ve been using it beyond project tracking too. For the 365-day photo project I’m doing this year, I have a Trello board to save sort-of photo drafts; if I see something interesting I want to revisit for a future photo, I add a photo of it to a Trello board so I don’t forget about it.

apollo

Apollo
With its many customization options, gestures, and the jump bar, Apollo is such a delight to use (it’s easy to tell much thought and love has been poured into the app). And it feels at home on iOS (always a bonus for me when apps do).

things

Things
Earlier this year, I started using Things to keep track of my to-dos. Its design is striking for two reasons: it’s beautiful and it’s calming—meaning it doesn’t stress me out to use it. Plus, it doesn’t shame me for not completing a task the previous day. The cost of the apps may be a dealbreaker for many (there’s a separate app for iPad), but Things is more than enjoyable and useful enough to justify the price.

launch center pro

Launch Center Pro
I used this app frequently before 3D Touch Shortcuts, widgets, and another launching app largely replaced it. But earlier this year I came back to it after I realized there’s still a place for it, and I’m excited what version 3.0 will bring. Launch Center Pro is still great for launching into deeper parts of apps and sending text input to process. Plus, many times throughout the day I’m launching other apps from Launch Center’s 3D Touch app-icon widget.

shortcuts

Shortcuts
This is an indispensable app for connecting and combining apps and actions to automate tasks—thus saving me time and effort. I have shortcuts for sharing photos, adding calendar entries and reminders, adding Trello cards and attachments, adding Apple device frames to screenshots, parsing email receipts, and more. Sure, I could do all those things without Shortcuts, but Shortcuts makes those things easier. Plus, I love making shortcuts. I wish I could find a job as a “Senior Shortcut Builder”.

1password

1Password
If you aren’t already using a password manager to create and store passwords, you really should. 1Password has been my password manager of choice for a long time now, and I’m excited to have it more integrated and easier to use in iOS 12. Having 1Password directly integrated into iOS password suggestions is so convenient.

halide

Halide
A polished, powerful manual camera app. One of my favorite features is when in manual-focus mode, I can turn on highlighting of what’s in focus in the frame—immensely helpful when I’m trying to compose a shot with a particular thing in focus. Something I like about Halide in particular over other manual camera apps is that it doesn’t overwhelm me. Some manual camera apps have so much going on they become intimidating or convoluted. But Halide keeps things simple while still being powerful.

darkroom

Darkroom
A polished, powerful photo editing app to complement Halide (the two apps have buttons in each that launch the other). I’ve been using this to make my daily photos pop just a bit more. Plus, the depth-editing features are helpful to make Portrait Mode photos really shine.

And in my Dock:

cesium

Cesium
Since iOS 9, the default iOS Music app hasn’t been for me. Thankfully, Cesium exists with its customizable tabbed navigation, powerful list sorting and grouping, track details, dark theme, and more. (I’m using an alternate icon to match the iOS 7 Music app color.)

drafts 5

Drafts
This app is great for when I need to jot down a quick note. From there, I can decide what to do with it later or immediately perform an action or set of actions on the text and send it somewhere else like a message, a tweet, or elsewhere with a URL scheme. Drafts 5 brought a powerful new scripting environment giving me further options for processing text—and giving me opportunities to brush up on my Javascript.

As a complement to my wallpaper, my lock screen uses Colorful Sky by AR72014.

home screen

So that’s my home screen setup. December 2018 edition. As I said last time, I like to tinker, so no doubt this will get tweaked soon. What does your home screen look like? Come find me on Twitter and let me know!

My Home Screen Setup, May 2018 Edition

I thought perhaps I would make sharing my home screen setup a regular thing. Back in January, I posted my then-current setup. Four months later, my home screen is a bit different, so here’s an update.

My current home screen (select to view a larger version):

home screen

These are the apps I use the most or I want easy access to. As for my wallpaper, this is a wallpaper I’ve been using for years (I have no idea where I originally found it) (and actually it’s too small for iPhone X, but I’m using it anyway). The subtle grays and textures are pleasing and allow the icons to pop. Below are a few notes on some of the apps I have on my home screen.

tweetbot

Tweetbot
For me, this is the gold standard of what a Twitter app should be. With thoughtful design and interactions, timeline sync, and more, Tweetbot is an all-around terrific Twitter app. I hope Twitter’s recent API news doesn’t make Tweetbot—and all third-party Twitter clients—unusable.

timr

Timr
I use Toggl to track my time on various tasks and projects. I wrote previously how I used Workflow to start and stop time entries because the official Toggl app isn’t for me. Wanting more functionality like editing or deleting time entries, I decided to make my own Toggl app since their API is rather robust. I don’t know ultimately what the roadmap for Timr is, but for now it offers me a better way to interface with Toggl—and, unlike the official app, works natively on iPad and with iPad multitasking too!

partly sunny

Partly Sunny
I’m the developer and designer behind this app that shows your weather in quick glances and detailed looks. If you just want a quick glance at what’s happening, Partly Sunny can show that. If you want a more detailed look at what’s happening in the next hour, day, or week, Partly Sunny can show that too. Whichever you prefer, everything is meant to feel at home on iOS. Some of the key features include: customizable hourly graphs; customizable conditions in current, hourly, and daily forecasts; interactive radar; a widget; and a dark mode.

workflow

Workflow
This is an indispensable app for connecting and combining apps and actions to automate tasks—thus saving me time and effort. I have workflows for sharing photos, adding calendar entries and reminders, adding Trello cards and attachments, adding Apple device frames to screenshots, parsing email receipts, and more. Sure, I could do all those things without Workflow, but Workflow makes those things easier. Plus, I love making workflows. I wish I could find a job as a “Senior Workflow Builder”.

things

Things
I recently started using Things to keep track of my to-dos. Its design is striking for two reasons: it’s beautiful and it’s calming—meaning it doesn’t stress me out to use it. Plus, there’s no concept of overdue in Things, so it’s never shaming me for not completing a task. The cost of the apps may be a dealbreaker for many (there’s a separate app for iPad), but Things is more than enjoyable and useful enough to justify the price.

momento

Momento
This is a journaling app that collects manual thoughts and media and also automatically imports tweets, Instagram and Facebook posts, and other social-media feeds. I’ve been using Momento for several years now, and looking back at memories and what I was doing, thinking, and even tweeting years ago is something special.

transit

Transit
I enjoy trying different apps to see how they solve the same problems (see: Things), and transportation apps are no exception. In Los Angeles where many public-transportation lines run infrequently or have earlier-than-ideal-end-of-service times, Transit has some key features for me: its active-trip mode lets me know when to get off, whether or not I’ll make a connection, and what my ETA is.

lire

lire
In the previous post, I had just started using this RSS reader, and here I am four months later still using it. Still one of the most notable things for me is it feels at home in iOS 11 with its design choices. Another notable thing is it can fetch the full text of articles that get truncated in feeds.

apollo

Apollo
Here’s a bar graph comparing my Reddit usage before Apollo was released vs after: ▁ ▇. With its many customization options, gestures, and the jump bar, it’s such a delight to use (it’s easy to tell much thought and love has been poured into the app). And like lire, it feels at home on iOS.

trello

Trello
Trello helps me organize Partly Sunny to-do lists, feature requests, and bug reports as well as plan out future updates. I started using it beyond project tracking too. This year, I embarked on a 365-day photo project where I take and share a photo each day. I have a Trello board to save sort-of photo drafts; if I want to revisit something for a future photo, I take a photo and add it to this board so I don’t forget about it.

halide

Halide
A polished, powerful manual camera app. One of my favorite features is when in manual-focus mode, I can turn on highlighting of what’s in focus in the frame—immensely helpful when I’m trying to compose a shot with a particular thing in focus.

And in my Dock:

cesium

Cesium
Since iOS 9, the default iOS Music app hasn’t been for me. Thankfully, Cesium exists with its customizable tabbed navigation, powerful list sorting and grouping, track details, queue editing, dark theme, and more. (I’m using an alternate icon to match the iOS 7 Music app color.)

drafts 5

Drafts
This app is great for when I need to jot down a quick note. From there, I can decide what to do with it later or immediately perform an action or set of actions on the text and send it somewhere else like a message, a tweet, or elsewhere with a URL scheme. The recent Drafts 5 (I’m using an alternate icon) brought a powerful new scripting environment giving me further options for processing text—and giving me opportunities to brush up on my Javascript.

So that’s my home screen setup. May 2018 edition. As I said last time, I like to tinker, so no doubt this will get tweaked soon. What does your home screen look like? Come find me on Twitter and let me know!

Gesturing for User-Friendliness

With my iPhone X in my hand, I’m checking the weather for my current location in Partly Sunny, and I want to see my full locations list. What do I do? I swipe from the left edge of the screen to go back. I’m done checking the weather, and I want to go to my home screen. What do I do? I swipe up from the bottom.

I open Photos, swipe through my Camera Roll, favorite some photos, and now I want to go to the Favorites album. What do I do? I swipe down on the current photo to get back to the Camera Roll, I swipe from the left edge to go back, and now I can tap on the Favorites album. With all that navigating, I didn’t press any buttons. I only used gestures.

Gestures are an increasingly important part of iOS. Whether they’re a simple tap to dismiss, a swipe to go back, or a pinch to close, gestures not only offer shortcuts, they offer increased usability.

There is one particular place in iOS that hasn’t been given some gesture love but dearly needs some: modal form sheets. No doubt you’ve seen and interacted with form sheets in iOS before. On iPhone, they slide up from the bottom of the screen and fully cover the other view you were interacting with. On iPad, they slide up from the bottom and occupy a portion of the width and height of the screen. The area of the other view not covered by the form sheet is dimmed underneath.

App Store Apple ID

By default, when modal form sheets are displayed, there is one way to dismiss them: the Done button in the top-left or top-right corner. This can make dismissing form sheets user-unfriendly. On iPads, this button occupies a tiny portion of the screen—meaning there’s just a tiny portion of the screen that can dismiss the modal. And on taller iPhones, reaching for the Done button can be challenging. How can dismissing form sheets be made easier? Gestures!

Before we get to that, let’s define a few things. First, what’s a modal? In its basic definition, a modal is a view that covers up another view and prevents interaction with that other view (the parent view) until an action occurs on the modal view. What are some examples of modal views?

In iOS, there are a variety of modal views. There are alerts (centered on the screen with usually a message and one more more buttons), action sheets (anchored to the bottom of the screen and usually show two or more choices to act on something), and activity sheets (commonly know as “share sheets” to copy, send, or share content).

Modals

These types of modal views are defined by iOS. One more type of modal view is defined by developers. When showing (called “presenting” in iOS parlance) a custom view—say a settings view with options and submenus—developers can choose to present the view modally. By default, the view will slide up from the bottom of the screen and cover the view the user was interacting with.

When presenting a view modally, developers can choose a few styles for the modal view. From the iOS Human Interface Guidelines, the styles are “full screen”, “page sheet”, and “form sheet”. On smaller screens, page sheets and form sheets cover the whole screen, but on larger screens, they cover a portion of the screen. The portion of the parent view not covered is dimmed underneath.

ModalPresentations

I’m going to focus specifically on form sheets though the improvements I discuss would also apply to page sheets and mostly to full screen modal views too.

What are some examples of form sheets? In App Store, viewing your Apple ID account presents a form sheet.

App Store Apple ID

In Settings > Apple ID, tapping “Set Up Family Sharing” presents a form sheet.

Family Sharing

And in Partly Sunny, viewing settings, editing the locations list, and viewing radar all present a form sheet.

Partly Sunny settings

Partly Sunny edit list

Partly Sunny radar

So how can dismissing form sheets be made easier with gestures? Here are two ways.

First, on iPad, tapping anywhere outside the form sheet where the parent view is dimmed underneath should dismiss it. Here’s the current active area of the screen where tapping will dismiss the form sheet: just the Done button.

Current tap area

And here’s what the active area to dismiss the form sheet should be: both the Done button AND the space outside the view (the status bar is still reserved for its interactions like scrolling a view to the top).

Proposed tap area

The space outside the form sheet currently is a touch dead zone; the dimmed area merely prevents taps to the view underneath. Why not use this space to dismiss the form sheet?

Tapping outside a view to dismiss it already exists elsewhere in iOS—even for dismissing modal views. When an action sheet or activity sheet is presented, tapping above or outside the buttons or view will dismiss the sheet.

Tap outside action sheet

In the iOS 11 App Store, tapping a Today story tile or list tile opens a sort-of page sheet where, on iPad, tapping to the left or right of the view in the blurred area will dismiss the view.

Tap outside App Store tile

This example isn’t a modal view per se, but it applies. On iPad when pulling down on a Messages notification banner to reply to the message, tapping to the left or right of the messages view in the blurred area will dismiss the view.

With the latter two examples, perhaps these relatively new interaction methods will inform an updated modal system in a future iOS version.

In the meantime, there’s a workaround to capture taps outside the form sheet and have them dismiss the modal. This Stack Overflow thread discusses the solution. Since I first discovered this workaround, there’s been an update for Swift 4. I’ve reproduced and tweaked it here:

import UIKit

class FormSheetViewController: UIViewController, UIGestureRecognizerDelegate {
    // gesture recognizer to test taps outside the form sheet
    var backgroundTapGestureRecognizer: UITapGestureRecognizer!
    
    // dismiss the modal and perform any other related actions (e.g. inform delegate)
    func done() {
        dismiss(animated: true, completion: nil)
    }
    
    // check if the tap was outside the form sheet
    @objc func handleTap(_ sender: UITapGestureRecognizer) {
        if sender.state == .ended {
            let location: CGPoint = sender.location(in: view)
            
            // if outside, dismiss the view
            if !view.point(inside: location, with: nil) {
                view.window?.removeGestureRecognizer(sender)
                done()
            }
        }
    }
    
    override func viewDidAppear(_ animated: Bool) {
        super.viewDidAppear(animated)
        
        // set up gesture recognizer
        if backgroundTapGestureRecognizer == nil {
            backgroundTapGestureRecognizer = UITapGestureRecognizer(target: self, action: #selector(handleTap(_:)))
            backgroundTapGestureRecognizer.delegate = self
            backgroundTapGestureRecognizer.numberOfTapsRequired = 1
            backgroundTapGestureRecognizer.cancelsTouchesInView = false
            view.window?.addGestureRecognizer(backgroundTapGestureRecognizer)
        }
    }
    
    override func viewWillDisappear(_ animated: Bool) {
        super.viewWillDisappear(animated)
        
        // remove gesture recognizer
        if backgroundTapGestureRecognizer != nil {
            view.window?.removeGestureRecognizer(backgroundTapGestureRecognizer)
            backgroundTapGestureRecognizer = nil
        }
    }
    
    // don't forget the delegate method!
    func gestureRecognizer(_ gestureRecognizer: UIGestureRecognizer, shouldRecognizeSimultaneouslyWith otherGestureRecognizer: UIGestureRecognizer) -> Bool {
        return true
    }
}

Partly Sunny uses this workaround, so in any of the previously mentioned form sheets, tapping outside the view will dismiss it.

Tap outside Partly Sunny settings

Tap outside Partly Sunny edit list

Tap outside Partly Sunny radar

This works for iPad, but what about iPhone where the form sheets cover the full screen and there isn’t any dimmed area? The second way to make dismissing form sheets easier is dragging. Once the view is dragged down a certain amount, the view should dismiss. This would work on iPads too.

Drag to dismiss

This idea of dragging down to dismiss something exists elsewhere in iOS. In Photos, when tapping on a photo in the Camera Roll or an album, the photo goes full screen. Tapping the back button goes back to the album, but also dragging down on the photo will shrink it and fade it to reveal the album—in other words, dragging down dismisses it.

Drag photo to dismiss

While Maps doesn’t use traditional modal views, the system it uses allows for dragging the cards down to get back to the content underneath.

Drag map card to dismiss

Third-party apps have started to employ dragging down modals to dismiss as well. I’m not sure where I first saw it, but I know of several apps that have this functionality. Partly Sunny is one of them. In any form sheet, dragging down on the view will dismiss it. Here it is in action:

Drag to dismiss

I added a sort-of guard to help prevent accidental dismissals. If you scroll the view and then scroll back to the top, if when you reach the top you’re still dragging down (so that the view is doing the iOS rubber-banding effect), the view won’t dismiss. But once you release, if you drag down again, the view will dismiss. I didn’t want anyone to be casually scrolling up and suddenly the view disappeared on them. Here’s what that code looks like added to the code above:

import UIKit

class FormSheetViewController: UIViewController, UIGestureRecognizerDelegate {
    // scroll view must be dragged down this distance to be dismissed
    var scrollDistanceToDismiss: CGFloat = 50
    
    // tracks whether or not the scroll view should be dismissed if dragged down from top boundary
    var dragScrollViewToDismiss = true
    
    // tracks whether or not dragScrollViewToDismiss is ready to be set
    var dragScrollViewToDismissIsReady = false
    
    // stores the initial offset of the scroll view
    var scrollViewInitialOffset: CGFloat = 0
    
    // stores if the scroll view was loaded; guards overwriting scrollViewInitialOffset
    var scrollViewLoaded = false


    // gesture recognizer to test taps outside the form sheet
    var backgroundTapGestureRecognizer: UITapGestureRecognizer!
    
    // dismiss the modal and perform any other related actions (e.g. inform delegate)
    func done() {
        dismiss(animated: true, completion: nil)
    }
    
    […]
}

extension FormSheetViewController: UIScrollViewDelegate {
    func scrollViewDidScroll(_ scrollView: UIScrollView) {
        // store initial content offset of scroll view
        if !scrollViewLoaded {
            scrollViewLoaded = true
            scrollViewInitialOffset = scrollView.contentOffset.y
        }
        
        if dragScrollViewToDismiss {
            // if scrolling up, cancel dismiss
            if scrollView.contentOffset.y - scrollViewInitialOffset > -scrollView.contentInset.top {
                dragScrollViewToDismiss = false
                dragScrollViewToDismissIsReady = false
            }
            // if scrolling down, dismiss view controller
            else if scrollView.contentOffset.y - scrollViewInitialOffset <= -scrollView.contentInset.top - scrollDistanceToDismiss {
                done()
            }
        }
        
    }
    
    // if scroll view released beyond top boundary, set dismiss ready
    func scrollViewDidEndDragging(_ scrollView: UIScrollView, willDecelerate decelerate: Bool) {
        if scrollView.contentOffset.y <= -scrollView.contentInset.top {
            dragScrollViewToDismissIsReady = true
        }
    }
    
    // if scroll view drifts beyond top boundary, set dismiss ready
    func scrollViewDidEndDecelerating(_ scrollView: UIScrollView) {
        if scrollView.contentOffset.y <= -scrollView.contentInset.top {
            dragScrollViewToDismissIsReady = true
        }
    }
    
    // if scroll-to-top activated, set dismiss ready
    func scrollViewDidScrollToTop(_ scrollView: UIScrollView) {
        dragScrollViewToDismissIsReady = true
    }
    
    // when tapping again on scroll view, set dismiss active
    func scrollViewWillBeginDragging(_ scrollView: UIScrollView) {
        if dragScrollViewToDismissIsReady {
            dragScrollViewToDismiss = true
        }
    }
}

Form sheets and modal views as a whole are important and useful tools for iOS app developers. Dismissing them could be a bit more user-friendly, and gestures—tapping outside the view and dragging down on the view—can accomplish that. I hope a future version of iOS gives developers out-of-the-box tools to do both and thus standardizes these interaction methods.

Until then, developers can use their own solutions like those above. If you have suggestions how I can improve tapping outside the view or dragging down on the view, please let me know. Now it’s time for me to swipe down on this and get back to work.

Tracking My Time with Workflow and Toggl

Thanks to Federico Viticci at MacStories, last year I started using Toggl to track the time spent on many of my tasks. I started initially for two reasons. First, the work I was doing at the time was hourly, and I punched in and out for the day and for lunch. Keeping an account of how long I had been working and how long I had been away at lunch ensured I didn’t end my day or my lunch too early or too late.

Second, there are sometimes long stretches of time when I’m doing something—from working on Partly Sunny to playing a game to just reading Twitter—where I have no idea how long I’ve been doing that something. Tracking my time has allowed me to, well, keep track of my time—it has allowed me to better understand what I’m spending my time on. And in the case of working on a project, it allows me to better understand how long something actually takes to complete.

When I started using Toggl, I made sure to not be militant with my time tracking. I’m not tracking everything I do to the point where I get so annoyed with it and want to print out the Toggl website and set fire to it. But things that are work related and tech related—the things I need to track or the things I’m most curious about tracking—I’ve been tracking.

To aid in this tracking, I’m using the indispensable (and hopefully long-lasting) Workflow. While the new Toggl app has improved over the previous version, it still is clunky to use and doesn’t offer ways to quickly start and stop time entries—like, for example, a widget or Apple Watch app or even 3D Touch shortcuts—and doesn’t have a native iPad app. This is where Workflow comes to the rescue. Federico discussed how he used workflows to start and stop Toggl timers when Workflow gained the ability to more powerfully work with web APIs. Later, in an edition of Club MacStories, he wrote about a new approach that used dedicated workflows for quickly starting and stopping timers.

Using his modified workflow idea, I created several workflows fashioned to how I use Toggl. For example, I have a Partly Sunny timer that when run asks what I’m working on (development, testing, replying to emails, etc.) and starts a time entry with that chosen thing as its description. I also have a Games timer that asks what game I’m playing. For this timer, I have several defaults (including Alto’s Odyssey, Really Bad Chess, Mini Metro, and Rodeo Stampede), but I also have an “Other” option. I built my workflows so that if I select “Other”, Workflow will prompt me to type in the other thing I’m doing that isn’t a preset in the list.

As I was creating my timer workflows, I kept pulling out portions of them that were the same in each and creating reusable workflows to embed with the Run Workflow action (I’m still happy this was added to Workflow. The Run Workflow action has allowed me to create many reusable workflows to run inside other workflows.). For example, the actions that create the encoded Toggl authentication became a separate workflow. The actions that processed the selected description choice and asked for input when “Other” was selected became a workflow. My goal was to pull out all the duplicate actions so that if I ever wanted to update these core actions I wouldn’t have to update them in ten or more places.

Eventually I reached the point where I thought creating a sort-of “super workflow” for starting time entries was the way to go. Rather than having several reusable workflows, could I have just one? Challenge accepted! For me, part of the joy of using Workflow is actually building the workflows and experimenting to see what I can do. It’s like visual programming—visual problem solving.

What I ended up creating is a workflow that takes as input a dictionary of project IDs and a list of descriptions. It does some parsing and starts a time entry accordingly. Here’s what the workflow looks like (select the image for a larger version):

super workflow

If I send the workflow more than one project ID or description, it asks which one I want to use for the time entry; if there is only one of either, it just uses that one project ID or description. And for the descriptions, if I select “Other”, the workflow prompts me to type in an other item. The workflow is also built to handle “None” for a description; choosing “None” starts a time entry with a blank description. Once this parsing and processing takes place, the workflow starts the time entry.

Because the super workflow does all the processing of IDs and descriptions and handles the Toggl API call that starts the time entry, I can more easily create other workflows that set up the timers or groups of timers. These timer-setup workflows then, with the Run Workflow action, run the super workflow. None of the timer-setup workflows contain any of the processing and handling actions, so if I need to adjust them in the future, I’m adjusting them in one place: the super workflow. Reusable code (sort of) for the win!

So what do the timer-setup workflows look like? They’re much simpler than the super workflow. Each timer-setup workflow contains a dictionary of project IDs and a list of possible time-entry descriptions associated with the project IDs. For example, my Partly Sunny timer workflow has one project ID—that for my Partly Sunny Toggl project—and a list of several possible descriptions: “Development”, “Testing”, “Replying to emails”, etc. The aforementioned games timer looks similar.

partly sunny timer

One of my other timers is a reading timer that has four project IDs in the projects dictionary (those for Twitter, Reddit, RSS, and Pocket) and one description in the list: “Reading”.

reading timer

You’ll notice there are a few more actions under the Nothing action. Each of these timer workflows do include a few more actions that package the projects dictionary and the descriptions list into a dictionary that gets sent to the super workflow, and then the super workflow is run. None of these actions are modified when duplicating a timer workflow or creating a new one.

So with this setup, how easy is it to create a new timer workflow for something new I want to track? Let’s do it. I’m working on a new app project (more on this later), so I’m going to create a timer workflow for it. First, since I don’t have a workflow for this, I create the project on the Toggl website (I suppose I could—should?—make a workflow to do this). Next, I get the Toggl project ID for it with another workflow (that I believe came from Federico at some point) that returns a list of all my projects and prompts me to choose the one I want the ID of. The workflow copies the project ID to the clipboard for easy pasting in the next step.

project ID workflow

Next, I duplicate an existing timer workflow and delete any project IDs and descriptions I don’t need for this new timer. In the projects dictionary, I type in the name of my project and paste in the ID. Then, in the descriptions list, I add any descriptions I want shortcuts for.

toggl timer

And that’s it. My new timer workflow is done. And it works in both the Workflow widget and the Apple Watch app.

Thanks to the indispensable Workflow, tracking my time with Toggl is easy and convenient. And thanks to the Run Workflow action, I can create reusable workflows to embed in other workflows instead of having duplicate actions in multiple places.

And a big thank you goes to Federico for inspiring me to not only better track my time but better track my time efficiently and conveniently with Workflow and Toggl.

Here are links to the various workflows:

If you have ideas or suggestions to improve these workflows, please let me know!

Happy time tracking!

My Home Screen Setup

I enjoy seeing what apps people use and how they’re arranged. In the past, I’ve shared my home screen on sites like homescreen.me, but recently I learned about the iOSsetups subreddit which is more active than the websites I previously used.

Here’s my current home screen (select to view a larger version):

home screen

These are the apps I use the most or I want easy access to. As for my wallpaper, I’ve been enjoying the built-in multi-colored dynamic wallpaper. Below are a few notes on some of the apps I have on my home screen.

tweetbot

Tweetbot
For me, this is the gold standard of what a Twitter app should be. With thoughtful design and interactions, timeline sync, and more, Tweetbot is an all-around terrific Twitter app.

workflow

Workflow
This is an indispensable app for connecting and combining apps and actions to automate tasks to save time and effort. This helps make things a little more efficient.

partly sunny

Partly Sunny
I’m the developer and designer behind this app that shows your weather in quick glances and detailed looks. If you just want a quick glance at what’s happening, Partly Sunny can show that. If you want a more detailed look at what’s happening in the next hour, day, or week, Partly Sunny can show that too. Whichever you prefer, everything is meant to feel at home on iOS. Some of the key features include: customizable hourly graphs; customizable conditions in current, hourly, and daily forecasts; interactive radar; a widget; and a dark mode.

momento

Momento
A journaling app that collects manual thoughts and media and also automatically imports tweets, Instagram and Facebook posts, and other social-media feeds. I’ve been using Momento for several years now, and looking back at memories and what I was doing, thinking, and even tweeting years ago is something special.

transit

Transit
I’ve tried several apps for navigating cities’ public-transportation systems, and Transit has stuck. Thanks to its ability to show nearby stops with realtime train and bus times and its active-trip mode that lets me know when to get off, whether or not I’ll make a connection, and what my ETA is, Transit helps me get to where I need to go on public transportation. Also, they often have fun release notes—a welcomed thing in the age of “bug fixes and performance improvements”.

apollo

Apollo
I enjoyed using Alien Blue back in the day, but after it became the official Reddit app, it lost its charm and what made it a great app. Not being able to find a great replacement, I only occasionally browsed Reddit. But then Apollo came along. With its many customization options, the gestures, and the jump bar, it’s such a joy to use that I found myself browsing Reddit much more.

lire

lire
I recently started using this RSS reader, and one of the most notable things for me is it feels at home in iOS 11 with its design choices. Add to that it can fetch the full text of articles that get truncated in feeds, and this feels like an app with staying power.

clash royale

Clash Royale
I’m rather addicted to this game right now (send help?). Does anyone play? I’m looking for a more active clan.

halide

Halide
A polished, powerful manual camera app. One of my favorite features is when in manual-focus mode, you can turn on highlighting of what’s in focus in the frame—immensely helpful when trying to compose a shot where I need a particular thing in focus.

launch center pro

Launch Center Pro
A sort-of speed dial for apps and actions that uses apps’ URL schemes to launch or deep-dive into the apps more quickly and efficiently.

And in my Dock:

cesium

Cesium
Since iOS 9, the stock Music app has not been for me. Thankfully, Cesium exists with its customizable tabbed navigation, powerful list sorting and grouping, track details, queue editing, dark theme, and more. (I’m using an alternate icon to match the iOS 7 Music app color.)

drafts

Drafts
This app is great for when I need to jot down a quick note. From there, I can decide what to do with it later or immediately perform an action or set of actions on the text and send it somewhere else like a message, a tweet, or elsewhere with a URL scheme.

One other note about my Dock: since iOS 7 introduced Control Center with its shortcut to Camera, I had the app buried in a folder on another screen. When my phone was unlocked, I used this shortcut to launch Camera. But with Control Center’s less-than-convenient placement on iPhone X, I brought back Camera to my home screen—changing my Dock arrangement for the first time in years—to have easy, quick access to Camera. Here’s hoping iOS 11.x finds a better way to access Control Center on iPhone X.

So that’s my home screen setup. January 2018 edition. As I like to tinker, no doubt this will get tweaked soon.

Don’t Be the Product

Nicole Nguyen at BuzzFeed writes about the Uber/Unroll.me news and more generally on free apps and services.

The Unroll.me/Uber fury is a good reminder of the ol’ Internet adage, “if you’re not paying for it, you’re not the customer, you’re the product.”

But some sites are much more egregious than others. So here are some ways you can assess an app’s trustworthiness and find out if your free faves are problematic.

I don’t use either, but the Uber/Unroll.me news has me thinking about the “free” apps & services I do use.

If there’s only one thing you take away from this article, let it be this: there’s no such thing as a free lunch.

Partly Sunny: Design Notes

When I set out to make Partly Sunny, my weather app for iPhone and iPad, there were a few design and technical solutions I knew I wanted to include: things like making custom icons and using specific APIs. These solutions would go toward building the weather app I wanted to use and would help differentiate Partly Sunny from other weather apps on the App Store.

What follows is a sort-of behind-the-scenes look at Partly Sunny. I’ll start with discussing some of the design solutions and show some draft designs, and in a subsequent post, I’ll discuss some of the technical solutions. Select any image below for a larger version.

From the start, one thing I wanted to include in Partly Sunny was a view that gave summary information for both my current location and for any saved location. I wanted a way to quickly glance at the weather for these places. But I didn’t just want some basic information like the current temperature and an icon representing the current condition (e.g. “clear” or “light rain”). I wanted this view to be more useful, so in Partly Sunny, the list view includes the current temperature and condition for each location but also offers more: a sentence stating what’s happening over the next many hours at that location as well as the high and low temperatures and the chance of precipitation for the day.

locationsList

Whereas some weather apps might declare this to be too much information, I wanted this view to be useful for understanding what’s happening. A simple icon stating it’s clear right now doesn’t help in understanding a couple hours later it’s going to be pouring.

From this simpler-but-still-useful view, I wanted to be able to select any location to view more detailed information—what’s happening over the next hour, the next day, and the next week at that location.

locationView

And the key to help visualize this information was graphing it. While this isn’t a new solution to weather apps, some do it and some don’t, and I wanted Partly Sunny to do it. So looking ahead in the hour-by-hour forecast, there’s a visual representation of how temperature, chance of precipitation, humidity, wind speed, and more are changing.

features_hourlygraph

And looking ahead in the day-by-day forecast, there’s a visual representation of the high and low temperatures over the week. Reading, for example, that the high temperature will be 55° on Monday, 68° Tuesday, 75° Wednesday, 52° Thursday, and 48° Friday is one thing. Seeing it rising and falling on a graph is another.

dayByDay

This experience was something I wanted to have on both iPhone and iPad. Some of the weather apps I had been using previously were iPhone only, and some of the iPad-friendly apps weren’t the best. So for when my iPad is in-hand and I want to check the weather, having Partly Sunny run natively on both iPhone and iPad giving me the same experience on both devices was a must-have.

iphone_ipad

Also a must-have was making custom icons. I know of several apps that use Climacons by Adam Whitcroft. They’re great icons, and I could have used them as well. But I wanted Partly Sunny to use its own icons. So I learned how to use Sketch and made my own. Here they are:

Icons

For the navigation bar, I made a system of icons using a dots-and-dashes theme.

Dots and Dashes

Sure, my icons aren’t going to win any design awards, but they’re unique to Partly Sunny, and that’s what I wanted.

Icon design wasn’t all I used Sketch for. I also, uh, sketched drafts of the various views in Partly Sunny. For example, here’s my first pass at the location view, a subsequent pass, and what it looks like in the app:

locationViewDrafts

The list view went through a few explorations and largely ended up with version 4:

listViewDrafts

Sketch was also helpful in working out another design solution I wanted to include: a dark theme. I’m a proponent of having dark themes for apps so that in lower-light environments, the UI isn’t blinding me (I still wish iOS had some kind of system-wide dark theme).

darktheme

Not all the design solutions in Partly Sunny were planned out from the start, of course, but these were many that were. My goal was to build the weather app that I wanted to use, and that goal included a few specific design and technical solutions. I hope those solutions are useful to you as well and help make Partly Sunny the weather app you want to use too!

Partly Sunny is available on the App Store for $2.99.

Next time, I’ll discuss some of the technical solutions built into Partly Sunny. Stay tuned!

Partly Sunny

For the past several months, I’ve been learning Apple’s Swift language and how to build iOS apps. Learning this has been something I’ve wanted to do for a while, so it’s been both a fun and rewarding challenge.

To bring together everything I’ve learned, I built a weather app—not because the App Store doesn’t already have enough of them but because the apps I like don’t do exactly what I want them to do. So I made my own because now I can.

Meet Partly Sunny:

intro

Partly Sunny shows your weather in quick glances and detailed looks.

Some of the features of Partly Sunny:

Locations List

Quick glances of what’s happening in the sky at your current location and your favorite locations.

locationsList_black

Location View

Detailed looks at what’s happening throughout the hour, the day, and the week at your locations.

locationView_black

Day-By-Day

Swipe up in location view to show a day-by-day graph with the week’s high and low temperatures plotted.

dayByDay_black

Day View

On the day-by-day graph, tap any day to see a detailed forecast for that day.

dayView_black

iPhone and iPad

Partly Sunny runs natively on both devices.

ipad_right

Dark Theme

Toggle between Partly Sunny’s light theme and dark theme in the app’s settings or with a handy gesture.

darktheme

Hour-by-Hour Graphs

Tap on any hour-by-hour graph and choose to plot temperature, chance of precipitation, cloud cover, humidity, wind speed, or more.

features_hourlygraph

Rain Graph

For U.S. & U.K. locations, a rain-intensity graph for the next hour will appear when it’s raining.

features_raingraph

Pollen & NOAA Links

For U.S. locations, links will appear for pollen forecasts and the local NOAA weather office for winter-weather predictions, tropical forecasts, marine forecasts, and more.

features_pollen

Widget

Partly Sunny includes a widget to show both a quick glance and a detailed look at your current location’s forecast.

features_widget

3D Touch

3D Touch the app icon for the widget and shortcuts. Peek and Pop in the locations list; the location view’s severe-weather alerts, pollen-forecast, and NOAA buttons; and the day-by-day graph.

features_3dtouch

Dark Sky

Partly Sunny forecasts are powered by Dark Sky to give you super-accurate data.

While you may not always enjoy the weather, hopefully you enjoy checking the weather with Partly Sunny.

Of course there are things I want to tweak and more features I want to add, but I’m proud of what I’ve accomplished so far. I set out to do a thing, and I did it.

You can visit Partly Sunny on the web at partlysunnyapp.com and follow @partlysunnyapp on Twitter.

Partly Sunny will be available on the App Store tomorrow is available on the App Store for $2.99.

Copying Efficiency in Workflow

Workflow by DeskConnect has become one of my most used and most indispensable iOS apps. With its powerful and efficiency-gaining functionality, Workflow is an app I use repeatedly throughout the day and take delight experimenting with.

If you haven’t used Workflow before, the app connects and combines apps and actions to automate tasks on iPhone, iPad, and Apple Watch. With the ability to create workflows ranging from choosing pre-written messages to send someone to changing the case of a text string to combining burst photos into GIFs to adding entries into Health.app, Workflow has hundreds of actions to create countless combinations however you see fit.

If you have used Workflow before, perhaps you’ve run into the same situation I have: you have a string of actions in one workflow you’d like to have in another workflow, and getting those actions in the other workflow requires you to recreate them one by one. Depending on how many there are, this can be rather vexing. What Workflow could use is the ability to copy actions from one workflow to another. How might that work? Like this.

Start with a new workflow:

New Workflow

Like usual, you swipe right to reveal the actions view:

Favorite Actions

From there, you drag a new “Copy Actions” action to the workflow:

New Workflow With Copy

At first, this action doesn’t do anything as it awaits further, uh, action in case you want to set something else up first. When you’re ready to copy actions from another workflow, tap the “Select” button and you’re presented with a new view containing all your workflows:

My Workflows

Choose the workflow that has the actions you want to copy, and the workflow slides in from the right with its actions grayed out and selectable:

Copy Actions Unselected

From there, select the actions to copy:

Copy Actions Selected

Once you select all the actions you want to copy, press the “Copy Actions” button at the bottom, and the view disappears to reveal underneath the new workflow with the selected actions in place of the “Copy Actions” action:

New Workflow With Copied

And there we have an easy way to copy actions from one workflow to another that both maintains and builds upon the existing foundation and interactions in Workflow.

But why stop there? Perhaps you noticed another new action in the favorites list: “Run Workflow”. The block of actions copied above really could be a reusable workflow that is called from multiple other workflows. You could use the above method to copy the actions into those other workflows, but what happens when you want to update that reusable workflow? You’d have to update it in multiple places. Nah.

Instead, what Workflow could also use is a “Run Workflow” action that pauses the workflow it’s in, allows the designated workflow to run and optionally return something, and then continues the original workflow. How might that work? Like this.

Using the actions above, create a new workflow that checks for input text or otherwise asks for input. Below that block of actions, drag a new “Return” action:

New Workflow With Return

In this case, the action would return text, but in other workflows, it could return an image, a URL, a date, and more.

Back in the original workflow, you can now delete that block of actions and replace it with a “Run Workflow” action:

Run Workflow Unselected

Like with the “Copy Actions” action, tap the “Select” button, and you’re presented with a new view containing all your workflows:

My Workflows

From there, select the workflow to embed, and the view disappears and updates the action:

Run Workflow Selected

When you run the workflow, it executes the embedded workflow to get or ask for text, returns the text, and proceeds with the rest of the workflow.

Now in the future if you want to build on this reusable workflow (for example by adding a string of actions to replace dumb quotes with smart quotes), you can make edits in one place and have all the other workflows that embed the reusable workflow enjoy those edits. That’s far more efficient.

And efficiency is what this is all about. Each new version of Workflow gets better and better with more actions to build more workflows to be more efficient. And I hope one day soon building workflows becomes a bit more efficient with the ability to copy actions from one workflow to another and the ability to embed one workflow in another. If I may quote Workflow, that’s powerful automation made simpler.

Copying Efficiency in Workflow

Launch Center Pro

I started using Launch Center Pro by App Cubby several months ago, and since then, the app has become indispensable for me. Rarely does an app disrupt my dock arrangement, but Launch Center Pro did. Perhaps the app isn’t for everyone, but below I’ll share how I use it and what for.

What is Launch Center Pro? Through custom URL schemes, developers can allow users and other apps to deep-dive into features or sections of an app. For example, with the tap of a single button, you could search in the Yelp app what restaurants are nearby instead of finding the app, launching it, bypassing the occasional splash screen, tapping the Search tab, typing in “restaurants”, and finally hitting the search button.

The same idea applies to Messages. Rather than launching Messages, possibly having to back out of a message thread from someone else, searching through the list of message threads to find the person you want to send a message to, selecting the thread, and then typing and sending your message, Launch Center Pro can use a URL scheme to send a message to a particular person much faster.

Here’s Launch Center Pro in action:

The speed at which I can accomplish normally-several-step actions is what makes Launch Center Pro so useful for me. And that the app is completely customizable (including what icons are used) makes it useful for many, many workflows. Here’s mine.

When I launch the app, this is what I see:

The app supports “Groups” and “Actions”. Groups are folders of actions. Actions are the specific task to perform (whether it’s launching an app or calling someone).

Tapping the Edit button (the pencil in the upper-right corner) places the app in edit mode (love the blueprint theme) where you can add, delete, or rearrange groups and actions. Tapping on a group enters that group for editing.

My main screen has five actions and eight groups. Here’s what the actions do.

Tweet
This launches the OS-level tweet sheet to compose and send a tweet. Most of my tweeting that isn’t a reply to someone else’s tweet happens here. I don’t have to launch an app, wait for it to load, and then post a tweet. (Why am I not using the tweet button in Notification Center? Because my workflow for getting places in apps is tied to Launch Center Pro, and I decided to include tweeting in that. I consolidated.)

New Birdhouse Draft
birdhouse://draft?text=[prompt-twitter]

This shows a window inside Launch Center Pro where I can compose—with the Twitter keyboard—a tweet draft and save it to Birdhouse app. Launch Center Pro supports Apple’s custom keyboards; when composing an action, you can select the default keyboard ([prompt]) and add the additional directive.

New Instagram Post
instagram://camera

This deep-dives into Instagram’s camera. Rather than launching the app and tapping the camera button, this is a shortcut to bypass loading my feed.

Yelp Search
yelp4:///search?category=[prompt]

Like the new-draft action, this launches the keyboard prompt where I can enter a search term and jump right to searching that term in the Yelp app. If you always wanted to search for a specific thing—like “restaurants”—in the example URL you could replace “[prompt]” with “restaurants”.

PhotoForge2
Launches the app so I can edit a photo.

Those are the five main-level actions. Here are what I have in each of my groups. To open a group, you tap and hold on the group to reveal its contents and drag your finger to the action to launch it. As a result, I keep my more-frequently-used actions closer to the group’s center (if you were wondering about my arrangement inside each group).

New
This group contains actions to create a new event in Agenda (my calendar app of choice); create a new email in Mail; create a new note in Simplenote (my note-taking app of choice); create a new timer in Timer; and add an app, movie, album/song, or “other” to Recall app (useful for when someone says, “Hey, you should see ‘Reservoir Dogs’”, and I don’t want to forget).

The URLs:
agenda://event?title=[prompt]&location=[prompt]
mailto:?subject=[prompt]&body=[prompt]
simplenote://new?content=[prompt]&tag=Home
launchtimer://[prompt-num]
recallapp://apps?search
recallapp://movies?search
recallapp://music?search
recallapp://other?add

Apps
This group contains shortcuts to launching apps. These actions give me easy access to apps I use but don’t use often enough to warrant them not being buried inside a folder. No special URLs here; just URLs to launch these apps.

Bookmarks
This group contains Safari bookmarks for sites I might want to quickly jump to.

Search
This group contains actions to search or translate text I enter in the keyboard prompt.

Tweetbot
This group contains actions to jump to specific sections in Tweetbot (my Twitter app of choice).

FaceTime
This group contains shortcuts to FaceTime specific contacts.

Call
This group contains shortcuts to call specific contacts as well as a keypad button and a contact-search button.

Message
This group contains shortcuts to send a message to a specific contact as well as a generic new-message button (I use this when composing a message to multiple recipients; Apple doesn’t have a URL scheme for a multi-recipient message).

So, that’s my Launch Center Pro workflow. If you only use a few apps or call/message a few people, perhaps this app isn’t for you. If, though, you enjoy having quicker, easier, and more efficient ways to perform frequent actions, give Launch Center Pro a try. After using it since July, I can’t be without this app.

Get Launch Center Pro on the App Store for $4.99.

Microsoft Acquires Perceptive Pixel

Microsoft today announced the acquisition of the multi-touch-pioneering company Perceptive Pixel. This is a big get for Microsoft. Couple this with Microsoft now producing its own hardware, and these are exciting times for the company.

This news was striking to me because of my connection with Perceptive Pixel. While at ESPN, I worked with Perceptive Pixel multi-touch technology for three-and-a-half years creating broadcast touchscreen graphics for SportsCenter. On the SportsCenter set is a 103-inch multi-touch touchscreen for anchors and analysts to use during live broadcasts.

So why is this a big get for Microsoft? Two reasons: technology and customers.

First, the technology. When company founder Jeff Han gave his Perceptive Pixel demo at TED back in 2006, multi-touch technology was groundbreaking. The iPhone and its multi-touch technology wouldn’t be unleashed until the following year. And remember CNN’s Magic Wall during the 2008 presidential election? That was Perceptive Pixel technology.

Jump to 2012, and Microsoft is lagging behind Apple in the consumer space. Acquiring Perceptive Pixel marks a more concerted effort by Microsoft to keep up—not necessarily catch up—with Apple. No doubt the Surface will make use of Perceptive Pixel technology—if it already doesn’t. Why should Microsoft sink money and time into developing their own—perhaps not as good—multi-touch technology when they can use tried, tested, and successful technology from a company dedicated to producing said technology.

Second, the customers. Take a look at Perceptive Pixel’s customer list. The big industries on that list? Government, broadcast, and education. Microsoft just gained huge inroads with all those industries.

Microsoft hasn’t yet announced what their plans are for Perceptive Pixel, but the acquisition alongside their new hardware ventures make for interesting speculation. If nothing else, Steve Ballmer can take notes from Jeff Han on giving presentations.

How To Set Up Gmail As an Exchange Account on iOS to Enable Push Access

Today, I learned Gmail can be set up as a Microsoft Exchange account in the iOS Mail app to enable push email-access. With push, you’re instantly notified when a new email arrives—no more having to wait for Mail to poll the Gmail server every 15 minutes.

Megha Bassi at Simon Blog posted a tutorial back in March 2011, and that’s where I learned how to set up Gmail Exchange. Below, I’ve updated the screenshots for iOS 5 and included a couple extra steps (like a fix for Mail to delete emails instead of archiving them). (Note: I only sync my mail from Gmail, not contacts or calendars, so this tutorial only covers mail.)

Setup Instructions

On your iOS device, launch the Settings app and go to Mail, Contacts, Calendars:

If you’ve previously set up your Gmail account with the Gmail option, go ahead and delete the account:

Next, on the “Mail, Contacts, Calendars” screen, tap “Add Account…” and select Microsoft Exchange:

You’ll be brought to the Exchange screen:

Enter the following credentials:

Email: your Gmail address
Domain: leave this blank
Username: your Gmail address
Password: your password
Description: the label for this account

Tap Next. After your account is verified, an additional “Server” field will appear:

In the Server field, enter: m.google.com. Tap Next, and you should see a bunch of checkmarks:

Next, select which services you want to sync:

Tap Save, and your Gmail Exchange account will be added.

In the settings for the account, there’s one more option you may wish to change: “Mail Days to Sync”.

By default, the Exchange account only syncs the last three days of mail, but there are other options. Tap “Mail Days to Sync” to select a new sync range:

If your Gmail account is your default mail account, back in the “Mail, Contacts, Calendars” screen, scroll down to “Default Account” and reselect your Gmail account:

Also, make sure you have push activated (it should be by default). In the “Mail, Contacts, Calendars” screen, under the list of accounts is “Fetch New Data”. Tap this option and make sure push is on:

To verify your Gmail Exchange is using push, scroll down, and tap on “Advanced” to see what each account is using:

So now Mail is set up to use Gmail through an Exchange account. In this setup, the delete button in the Mail app by default archives your mail to your “All Mail” folder instead of moving the mail to the trash. If you’re okay with that, then you’re done. Enjoy your push Gmail. If, though, you want to fix that and be able to actually delete emails, there’s one more step.

Launch Safari and browse to m.google.com/sync. If you aren’t logged in, you’ll be prompted to. Next, you’ll a list of your iOS devices that use Google services:

Select the device you’re on. On that device’s settings page, check the box to “Enable ‘Delete Email As Trash’ for this device”:

And that’s it. Now your Gmail uses push, and the Mail app delete button deletes. Enjoy!

Backboard Dribbble App Is Good But Could Use an Assist

(Note: I think this is the first time I’ve really reviewed an iPhone app. I don’t plan on making this a habit, but I had a few things to say that didn’t fit in a tweet or two.)

If you aren’t familiar with Dribbble, it’s a website/network for designers to showcase small screenshots (called “shots”) to get feedback (and depending on your popularity large amounts of praise, too) from others. In addition, the site is a great source for inspiration and for seeing what cool things others are working on.

Dribbble doesn’t have its own native iPhone app, so numerous third-party developers have stepped in to fill the void. The Dribbble app I’ve been using is Balllin’; the app looks great and is easy to use.

This week, I tried out Backboard. Like Balllin’, the app looks great. Backboard also makes some improvements on user interaction with its reliance on gestures over buttons (I’m a sucker for gesture UI).

What I like about Backboard:

THE DESIGN. (I’m a sucker for minimal design, too.) The design of the app is simple and flat and as a result allows the artwork it features to shine with no distracting or unnecessary chrome.

THE GESTURES. When in a list, swipe right to reveal the menu of lists. When on a shot page, swipe right to return to the list. No buttons taking up precious screen real-estate and browsing time (like in Balllin’).

THE LARGE SHOT. Tap a shot in a list to see a larger version on the shot page (much larger than is available on the shot page in Balllin’). (In both apps, rotating iPhone displays the shot fullscreen.)

What I don’t like about Backboard:

ALL THE TAPS. With simplicity exuding from so many other aspects of the app, liking or commenting on a shot is anything but simple. When in a list, if I want to like a shot, I have to tap FIVE times to like it. 1: tap the shot in the list to go to the shot page. 2: tap the shot image on the shot page to reveal the iOS arrow-actions button. 3: tap the action button. 4: tap “View on Dribbble” from the slide-up menu to launch the in-app browser. 5: tap like on the mobile page. If Dribbble ever opens their API to allow third-party apps to access liking and commenting, this process could be simpler. But it could be simpler before that as Balllin’ demonstrates: liking a shot in Balllin’ only takes THREE taps.

PAGINATION (aka more taps). There is no continuous-scrolling in a list. Instead, at the bottom of a list are buttons for the previous and next pages. Again, if the app is otherwise touting simplicity, this seems out of place. Or if the pagination must stay, why not continue with the gesture theme and allow swiping left or right on the page bar to switch pages?

ICON INCONSISTENCY. When in a list, views, likes, and responses are written out:

When on a shot page, views and likes are icons:

Why not have the icons on the list view, too (again for simplicity)?

In the end, the app’s minimal design and gesture-based UI allow me to overlook the annoyances for now, and I hope future updates make this a slam-dunk Dribbble app. If you’re looking to draft a new iPhone Dribbble app and you appreciate clean design and gestures, take a shot at Backboard.

Bluebird Blues

I don’t have much to add to what’s already been said about the Twitter.com and Twitter for iPhone redesign/restructure; I don’t often use either (I do most of my tweeting from Tweetbot).

But while I was looking around the new Twitter.com last night, something jumped out at me. Looking at the Twitter logo, the verified logo, the compose-a-tweet button, the following button, the home button, and the follow-this-person button, I noticed almost all of those elements use a different blue a blue other than the official Twitter blue. Here they are for comparison (click for larger version):

twitter blues

Was this on purpose? Or was someone just being lazy? If this wasn’t a mistake, it sure looks like one.  I’m assuming Twitter has an internal identity guide that their designers are supposed to follow. And if the designers didn’t have that guide, they could have easily gone to Twitter’s public logo page, downloaded the bird, grabbed the RGB color, and designed the buttons using the official Twitter blue.

Details matter. The consensus is that Twitter struck out with the redesign/restructure. They even seem to have struck out with their own color. Twitter has the blues. And they’re using too many of them.

Browsing Refresh

Henrik Eneroth reimagines the web browser in the era of widescreen monitors and fullscreen apps:

Of course, screen sizes do still mat­ter when browsing the web. Since many web sites will be longer than your screen is tall, the less user inter­face we put vertically, the bet­ter. But most screens today are widescreens, so why are we not put­ting the left- and right-hand sides of the screen to better use, instead of for­cing everything into a bar on the top of the window?

His solution:

eneroth_browser

(Via Cameron Moll)

“Give My Regards to King Tut”

President Obama this week gave a speech in Schenectady NY. And apparently he also opened the Stargate?

(Photo: http://www.timesunion.com/).

GOOOOOLden Graphics

I’ve talked about the music of ESPN’s World Cup coverage, but what about some of the graphics?   Motionographer recently posted a montage of Prologue’s graphics package for ESPN.   Great stuff.   Check it out!

prologue espn

NBA Free Agents

On SportsCenter yesterday, my NBA free agents touchscreen graphic debuted with NBA analyst Chris Broussard:

I still have a few tweaks and updates to work on, so the graphic isn’t finished, but after spending two months working on it, finally seeing it on TV is a great feeling.

What’s special about this graphic is the on-the-fly calculations of NBA team salaries based on several factors: signed player salaries, free agent cap holds if they have Bird rights, and team roster charges if the team has less than 12 players.   Each time a player is moved to or from a roster or a team renounces all or individual free agents, the graphic runs through a series of calculations to determine the team’s new salary total and their available cap room.

Because of this graphic, I now know more about the NBA free agency process than 1.) I care to know and 2.) I ever thought I would all thanks to this year’s big story: LeBron James.

Here was my view in the studio yesterday:

free agents graphic

free agents graphic

Earth! Wind! Water!

When these powers combine… they’re gonna take pollution down to zero!

Well that’s the idea, at least, behind a recent study. From Wired:

A 1,550-mile-long network of offshore wind stations could provide power from Massachusetts to North Carolina with minimal threat of outages, according to a new study.

Scientists had considered offshore wind as a potentially limitless source of power. Compared to land, the ocean has stronger and more constant winds, though still not constant enough to be a primary energy supply. This study indicates that offshore wind deserves more serious consideration as an energy alternative.

“The technology’s there, the materials are there, we have the willpower to reduce carbon emissions, we have a reliable power supply that doesn’t lead to fuel shortage,” said Mark Jacobson, a civil and environmental engineer at Stanford University. “The next step is really to start implementing this on a large scale.”

There are currently no commercial offshore wind stations, though companies have started developing six wind farms along the east coast. Together, the developments could produce as much energy as a large coal or nuclear power plant.

These seems very promising.   Couple this with developing super-efficient solar panels, and, well, we might just make that green-haired captain proud.

The Difference 40 Years Make

Via The Daily Dish, here’s the “Internet” in 1969:

1969 technology, meet 2010 technology:

http://www.youtube.com/watch?v=nZ-yNISb54k

How do you like them Apples?

The last 50-ish years have been remarkable period of human achievement.   Look at the entire timeline of human existence and then look at the last 50 years or so.   At no time in human existence has technology not just electronic/computer technology advanced so rapidly and so robustly.   Truly remarkable.

Silent Running

News from the helicopter world via Wired: Eurocopter is developing technology to reduce the noise generated by helicopters.   The first technology is a different blade design.   Instead of a straight-edge blade, angles are built-in to the blades:

eurocopter

In addition to the Blue Edge rotor blade, the company also introduced something called Blue Pulse technology. Also designed to reduce helicopter noise, the Blue Pulse system uses three flap modules in the trailing edge of each rotor blade. Piezoelectric motors move actuate the flaps 15 to 40 times per second in reduce the “slap noise” often heard when a helicopter is descending.

Both of these technologies are able to reduce noise by minimizing the blade-vortex interaction of the main rotor on a helicopter. Blade-vortex interaction is the source of the pulsating sound most of us are familiar with when helicopters fly overhead. The noise is created when a rotor blade hits the wake vortex left behind from the blade in front of it.

Here’s a demo:

Pretty amazing.   I’d say look for this technology in those unmarked black helicopters, but you won’t hear them coming.

A Facelift for The Facebook on iPhone

facebook on iphone

Now THIS is good news!   The much-anticipated and much-needed Facebook 3.0 iPhone app has been submitted to Apple by developer Joe Hewitt.   TechCrunch notes:

Facebook has submitted v. 3.0 of their iPhone application to Apple, Joe Hewitt says via Twitter: “Just uploaded Facebook for iPhone 3.0 to the App Store for review. :)”

Hewitt also says he’ll post screen shots and more detais on this Facebook page for the iPhone app next week, and that he’s looking forward to getting started on v. 3.1 tomorrow.

Previously, TechCrunch reported Hewitt posted this list of new features:

1. The “new” News Feed
2. Like
3. Events (including the ability to RSVP)
4. Notes
5. Pages
6. Create new photo albums
7. Upload photos to any album
8. Zoom into photos
9. Easier photo tagging
10. Profile Pictures albums
11. A new home screen for easy access to all your stuff, search, and notifications
12. Add your favorite profiles and pages to the home screen
13. Better Notifications (they link to the comments so you can reply)
14. Quickly call or text people right from the Friends page
15. Messages you are typing will be restored if you quit or are interrupted by a phone call

For avid users of Facebook (Joe = guilty), having features currently available on the web-version of the site soon-to-be-available on the iPhone-version of the site is a huge victory for usability and consistency.   Woo!

(Nod: Just Another iPhone Blog)

Double Click through the City

Google Maps recently made a huge usability improvement to their Street View technology.   To “drive” along the street, you had to continuously click an arrow that moved them incrementally along the street.   Now, you can double click an area on the street and fly to that location (or even double click on something along the street to zoom in).   A huge usability improvement.

(Nod: Fumin)

NBA Mock Draft With ESPN’s Magic Box

I was on-hand yesterday to observe Doug Gottlieb making his NBA Draft predictions on SportsCenter using the Perceptive Pixel box.   This graphic is a modified version of the graphic I developed for the NFL Draft.

doug gottlieb with the perceptive pixel box

Here’s the video of his top seven picks (don’t mind the small technical difficulty I fixed it in time for the next segment):

http://www.youtube.com/watch?v=alYFDma97YY

Speaking of the NFL Draft, I snapped some photos during the NFL Draft with Michael Smith using the Perceptive Pixel box, but I never posted them.   Well, here they are:

michael smith with the perceptive pixel box

michael smith with the perceptive pixel box

michael smith with the perceptive pixel box

And here’s one of me with my project:

me with the perceptive pixel box